4.30.2011

MMM Swap Loot

As a bit of background, I signed up for a couple of sewing swaps at the beginning of the year (read more about this particluar one here and here and here).  I had finished my items and shipped them off so long ago (which apparently I was not supposed to do.  oops) that I almost forgot all about it, so it was an extra pleasant surprise when I recieved this package from my swap partner Leigh early last week:

My Swap Loot

Look at all the amazing things that she sent my way:  a cat bed, a pin cushion, Castle Peeps fabric by Lizzy House, Jill Bliss journals, Peeps, a magnetic pin wand, and a lint roller.

My Swap Loot

I was a little worried about the size of the bed at first given Pete's girth, but I should have known that Pete would have no regard for that.

My Swap Loot - Cat Bed in Action

So, a super big thank you to Leigh!

Signature
-----

4.26.2011

Shower Details - Baby Quilts

Of course, I had to make Sarah a quilt for baby Brooks!

Because I am so enamored by Eleanor Grosch's Zoo Menagerie (which was actually the inspiration for Sarah's whole shower), I made two quilts at once--one for Sarah and one for my friend Sabrina, who is due in July (Side Note: Both babies are boys, but I'm noticing now that I made both quilts from the "girl palette"...oopsie!).  I purchased all of the fabric and began cutting into it without any real plan, which is arguably pretty stupid.  Thankfully, it worked out well. 

I began with a stack of hundreds of triangles and ended up with two very different quilts, both of which I love, love, LOVE.
Sarah's Quilt

Sabrina's Quilt

Signature
-----

4.24.2011

Kitchen Lights: DIYing for Idiots

Since I'm sure at least two or three of you are awaiting after shots of my kitchen lighting project with bated breath, I wanted to share a few sort of not-quite-yet-after shots.  I still need to sand my patches and repaint the whole ceiling, but I am super pleased with how the fixtures turned out...definitely the right choice!

A reminder of what we started with:

My Kitchen

I really don't want to rehash all the idiotic details, but just as I had suspected, this project turned out to be a little harder than I hoped it would be and not because it actually was but mostly because Michael and I are idiots.  Seriously.  I cut two completely unnecessary holes in the ceiling and took two completely unnecessary trips to Home Depot to buy a bunch of completely unnecessary crap--screws of every kind, junction boxes of several configurations, a drywall saw, drill bits...blah, blah.  The heart of the problem was the need to move one of the junction boxes a few inches (because the old fixtures were not on the same plane) and unexpected metal studs, but the moral of the story is that slow, steady, and strong win the metal-drilling race.  It took us a good day, a Google search, and a DIY chat room post to learn that.  See, idiots.  Anyway, here's more not-quite-yet-after shots than you could ever hope for...


Signature
-----

4.21.2011

Kitchen Lights: Overcoming Indecision

Sometimes, I feel like my kitchen lights are the bane of my decor-conscious existence.  Our small kitchen (think: ~5' x ~14') is well-endowed with two fluorescent light fixtures.  While they provide more than adequate lighting, they cast a very harsh, unappetizing glow.  And do we even need to talk about their aesthetic value?
Check out that glow...
Kitchen - Before

And all the "character" added by that monstrosity clinging to the ceiling...
My Kitchen

For two years, I have been on the hunt for the right replacement fixtures.  The job was admittedly made more challenging by some of the parameters that I set beyond the obvious space limitations.  For one, I want this to be a DIY project, which cuts out adding any new electrical for more than 2 fixtures.  Second, I want something that adds some character.  For me, neither track lighting nor recessed lighting fit that bill. Third, no boob lights (yeah, that's what the internet world calls them, and well, they've got a point, no?). Fourth, the new set-up has to provide adequate lighting...obviously. And finally, I have a budget.  I really wanted to keep each fixture under $175.

In recent weeks (thanks in large part to Pinterest), I was able to finally compile all the contenders.  You can find them all plus some inspirational photos here.


A couple of weeks ago, I decided that the time had come to put on my big girl pants and make a decision about this already!  When this time came, however, I felt paralyzed with indecision.


My heart was really set on a schoolhouse fixture.  I just love the pictures below, the first of which I am convinced is a kitchen somewhere in our condo complex.  The problem is that all schoolhouse fixtures only accommodate one bulb, and I am just not convinced that that would provide enough light for the space (even with the under-cabinet lighting that I've already started installing).

Decorpad
Pinterest via Decorpad

With very little assistance from Michael (who so helpfully concluded, "I'd be okay with all of them."), I pulled the trigger.

Each of these fixture houses two bulbs, which I'm hoping will be adequate.  Although much more geometric and deco, something about them satiates that part of me that really, really wanted the schoolhouse fixtures.  I'm just hoping they don't look totally out of place.  

The fixtures arrived earlier this week, and last night, Michael and I went to Home Depot (very much against Michael's will) to get all the supplies to patch and paint the ceiling, which I'll need once the old fixtures are removed.  So, I'm all ready to tackle this! I've changed a total of 4 light fixtures in my life, but I feel fairly confident that this will not go as smoothly as I would like it so I set out on this adventure cautiously optimistic.  Wish me luck.

Signature
-----

4.17.2011

Shower Details - Fabric Covered Letters

Another project that I made for Sarah and baby Brooks was a set of fabric-covered letters for their nursery.  I worked with Sarah to identify the best fabric choices, and then I set out to do the project.

I ordered the paper mache letters from JoAnn, and followed this tutorial from the Prudent Baby.

I made a few modifications. First, instead of leaving the edge of the strip of fabric covering the letter's edge raw, I pressed one side down for a clean edge.  Second, I wrapped the edge of the edging fabric around to the back and left it exposed since these letters will be on the wall and no one will see the back.  Finally, I hot glued a picture hanger on the back.  Hopefully, this will hold the letters up as they are hollow and super light.

They were a little time-consuming, but in the end, I really liked the final product!


With the scrap fabric that I had leftover, I made a matching garland and a pillow cover -- both of which I failed to photograph, but you'll just have to trust me when I say that they were super adorable ;). 

Signature
-----

4.16.2011

Shower Details - Food Picks

Because I had to transport all of the decorations that I made for my friend Sarah's shower back to Tennessee from DC via plane, I had to keep things small, so I concentrated on the little details.  I made a couple of kinds of food picks--some simple flag picks and some baby pic picks. 

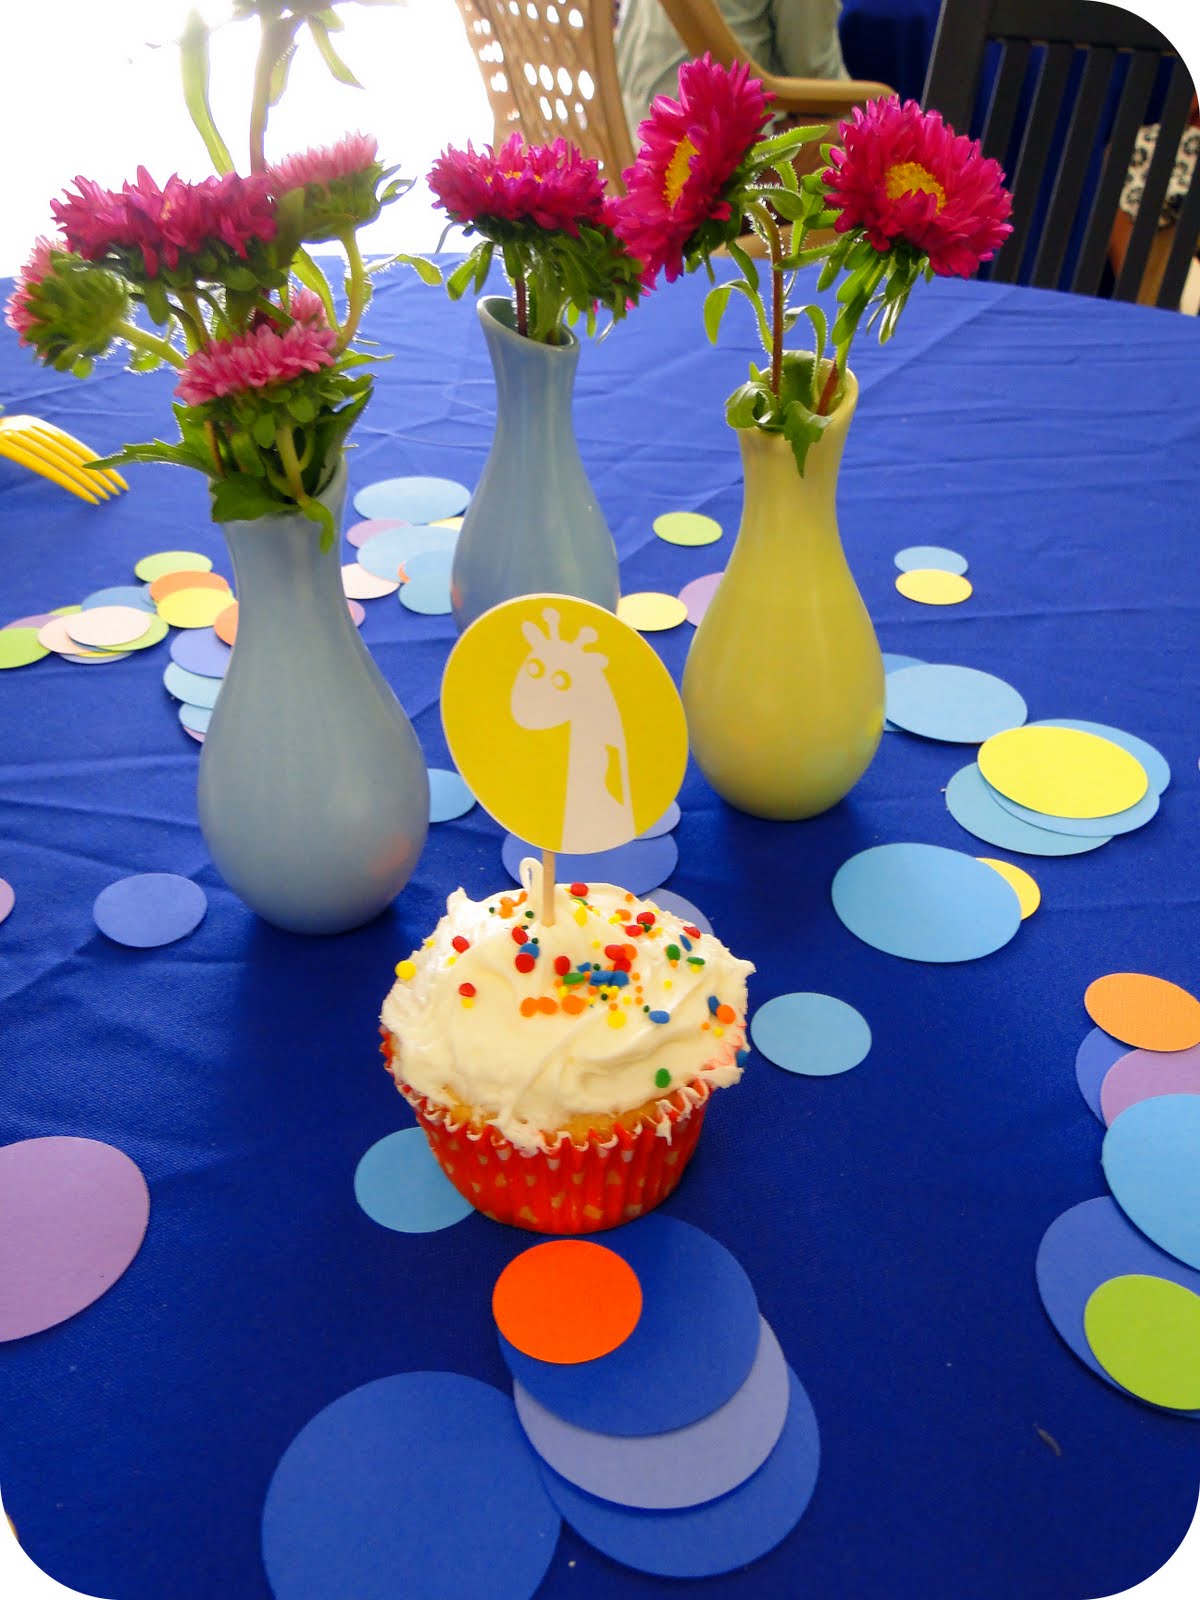
I thought it would be fun if some of the picks featured pictures of Sarah and her husband Adam as babies. Highly personal (...the grandmas-to-be eat it up!) and super easy. I just printed off a couple of sheets of pictures and fun graphics, which I made in Microsoft Word. Newer versions of Word let you crop pictures to shapes (like circles), which makes the task all the easier!


Then, I punched the pics and graphics out with my handy-dandy circle punch (but you could just as easily cut them out if you are sans-punch).


After that, it's as simple as a sandwiching a dollop of hot glue and a toothpick between a graphic and a baby pic.  See, super easy!

Same basic technique for the flag pics, except easier!  I just cut little double flag shapes out of colored cardstock, folded them in half, and assembled with hot glue.  Done and done.


If you like the animal graphics I used for the baby pic picks, you can download them here!

Click the Picture to Download and Print

Signature
-----

Pin It button on image hover