10.31.2011

Halloween Endeavors

I don't really have any great photos of this year's Halloween endeavors, but at least I was able to capture my creations with my camera phone and my friend's far superior iPhone camera.

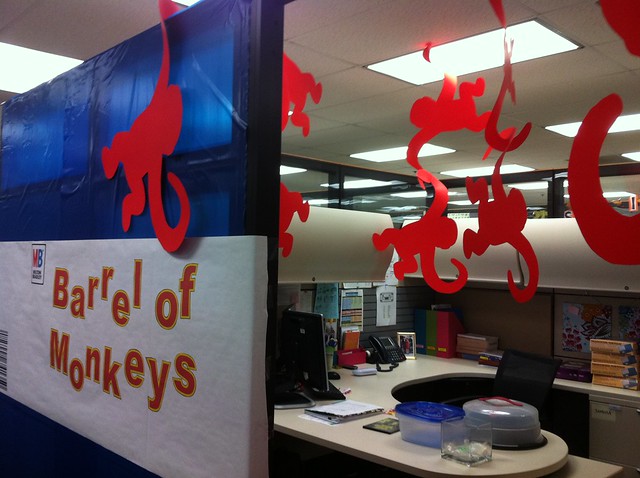
First up is my cubicle costume.  In my office, we dress our workspaces up for Halloween.  While my much cleverer colleagues dressed their cubicles up as timely, topical puns and plays on political goings-on, my cubicle was neither topical nor nuanced but I would argue well-executed.  Remind you of anything?

Cubicle Costume

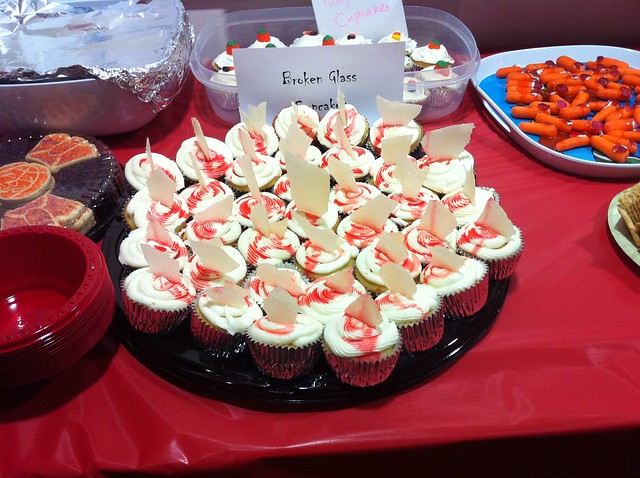
For the office-wide party, my friend Jillian and I tried our hands at Martha Stewart's Broken Glass Cupcakes.  We almost got it right, but if you try to make the glass too far ahead of time, it apparently clouds. Oh, well.

Broken Glass Cupcakes

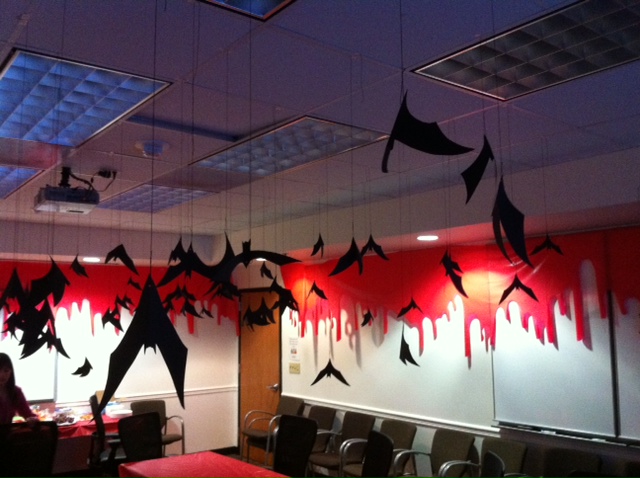
And finally, my pièce de résistance was the decor for the office-wide lunch party.  I've volunteered to decorate this conference room on more than one occasion, and I've got to say that no matter how much effort I put in, the conference room is so big and blah and fluorescent that it seems to overwhelm even my best efforts.  But this time, I think I got it right.  A gaggle of bats?  Check.  Bleeding walls?  Check.   I even had Night of the Living Dead silently playing on the two 60" teleconferencing monitors on the opposite wall. 

Fwd: Best

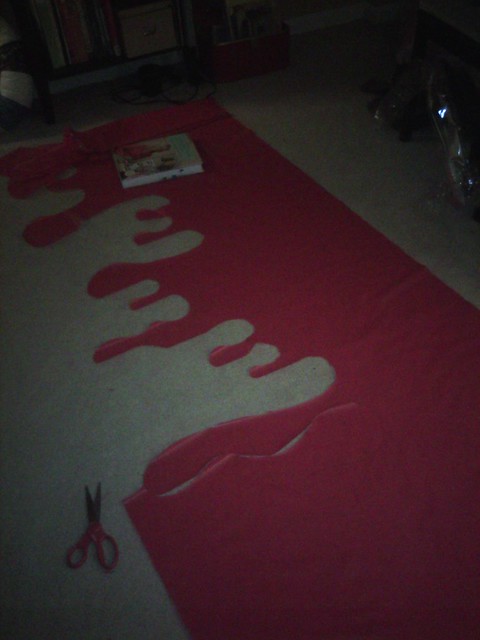
And the best part of these decorations was how ridiculously cheap they were.  I picked up a 100 foot roll of red vinyl tablecloth from Michael's for less than $8 with a coupon.  Then, I simply cut into a nice drippy pattern.  It was enough to get about halfway around the room and cover all the tables.  Not bad.

Office party decor

And there you have it...my badly-photographed Halloween endeavors.  Did you do anything fun?  Any good costumes or decor?

---

10.03.2011

Camera Strap Makeover

Michael and I leave for a trip to London and Paris this Friday.  The last time Michael and I did Europe, which was 5 and a half years ago now, we went for a month with nothing but backpacks, which means my wardrobe was limited to ribbed tank tops, Bermuda shorts, and flip flops.  Not this time, my friends!  I intend to be cute, and I’ve been doing my fair share of Fall shopping to this end. 
Then I realized that one accessory that will be on me at all times wasn’t quite fabulous enough --- my camera.  A camera strap makeover was in order.  Now that I’ve revealed my unhealthy love of all things gold to the world, you won’t be surprised to hear that I started this project off with a little gold fabric.  My vision here was something a little hippy chic with a bit of a (gold) edge. 
So, I cut my fabric into three strips about 3” wide.
I folded the raw edges in and then folded the strips in half, pinning along the way, to form three strips about 3/4” wide.
Then, I sewed the ends of the three strips together, slightly overlapping.
Braided them to a length about equal to my existing strap, removing the pins as I went along.
Finished the braid off with a stitch and a trim.
Once I’d made another braid of black fabric with a little stretch, I connected them by binding and tying the ends with a length of black ribbon.  Since I really didn’t want to have to grapple with recreating the hardware on the existing strap, I left a loop of the black ribbon free at each end to loop over the existing strap.
Then, I covered the bound ends with two little tubes I made from the black stretchy fabric.
I fed the existing strap through both the fabric tubes and the ribbon loops and reassembled onto the camera.  Then, I made a few quick stitches in various spots to tack things into place – including adjoining the two braids and the existing strap at the midpoint.
I like what I ended up with.  I don’t think Kate Spade will be selling these anytime soon, but it’s definitely more fabulous than the stock Sony strap. 

---

10.02.2011

New Kitchen Chalkboard

For a long time, I’ve been contemplating solutions for covering the unsightly utility boxes on my kitchen wall, which include both a breaker box and a mysterious box labeled “telephone.”  I tried painting over them to have them blend in, but I was left unsatisfied. 


For a while, I knew that a chalkboard would be the perfect solution, but I had to both finish other projects in there (i.e. lighting, painting) and track down the perfect chalkboard “canvas.”  I’d been stalking my local Goodwills for a bit hoping to find a frame in the right size with something in it that I could paint with chalkboard paint and at the right price (art and frames at my local Goodwills are surprisingly pricey…think $20+).

Last weekend, I found this guy…


Nothing too spectacular.  Not quite as big as I had wanted, but it was only $6, had a paintable frame, and this as its backer board…perfect for painting with chalkboard paint.


The rest is easy.  Paint the frame a glossy white to match the cabinets and contrast with both the chalkboard and the walls.  Paint the backer board with chalkboard paint, reassemble, and hang. 


Not exactly life-changing, but I like it.  Combine it with a strategically placed calendar, and those utility boxes disappear (but remain easily accessible).


And that’s right, we are headed to London in just 5 days!  So excited.
---

More Bedroom Art

Vignette styling isn’t really my strong suit.  I get attractive arrangements when I see them, but I always have a hard time creating them.  I think it’s mostly because I buy cute accessories and frames in the right colors and finishes as I see them and then try to make them work in my home.  As opposed to buying accessories not only in the right colors and finishes, but also of the right scale and with a context in mind. 
Lately, I’ve felt inspired to get my vignettes in order (wow, talk about first world problems…), and I’ve felt particularly inspired by the stylings of Emily Henderson.  I mean, seriously, that lady knows how to style a vignette.  Every episode of HGTV’s Secrets from a Stylist is packed full of vignettes with such depth and character.  Some of my favorites…


Anyway, I’ve been doing lots on the bed-side of the bedroom lately including a nightstand revamp and the addition of some new bedside art.  I figured it was time to give a little attention to the opposite side, which doesn’t get much exposure here on the blog both because I am ashamed of our 1999 TV (more first world problems) and the state of the accessories.  As you can see, I’m no Emily Henderson.


In my view, the main problem over here was that everything is basically one of two heights, so it just sort of looks like a jumble of stuff.  What I felt was really missing was a variation in scale, so I thought I’d bring in some tall art to lean against the wall.  (Another wall in the room is now the home for the mirror.)

I picked up a big canvas from the craft store (less than $8 on sale)…

I decided to stick to teal and white, since there’s so much teal going on on the other side of the room.  I tried a few things out unsuccessfully on some extra canvases and paper that I had around. Fail after fail.
And then I decided to just jump in and see what happened.  I started by covering the canvas in teal acrylic paint using a very quick and dirty crosshatch technique. 
On top of that, I worked in some white acrylic starting at one end and fading it into the other until I was satisfied that what I had could pass for art.  I leaned it up against the wall, edited my other accessories a bit, added and a plant, and voila!  I think I’m getting better at this. 

This is a pretty quick, easy, and super cheap project that anyone can do (Michael even declared that he thought he could have painted it).  What do you think? Do you ever have problems with vignettes?
---
Pin It button on image hover