3.30.2012

A Fabric & A Font

No miscellaneous missive this week.  Recognizing that many of you have no idea what I do for an actual living, I've taken on a new portfolio at work, and the extra hours that has involved combined with what are likely related tension headaches and my battle with allergies has meant that I've posted zero photos to Instagram this week and had no time whatsoever to identify my favorite things around the web this week.

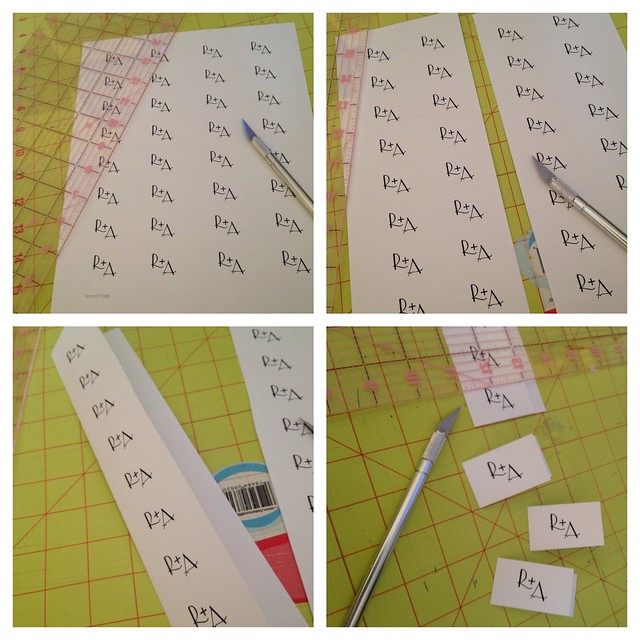
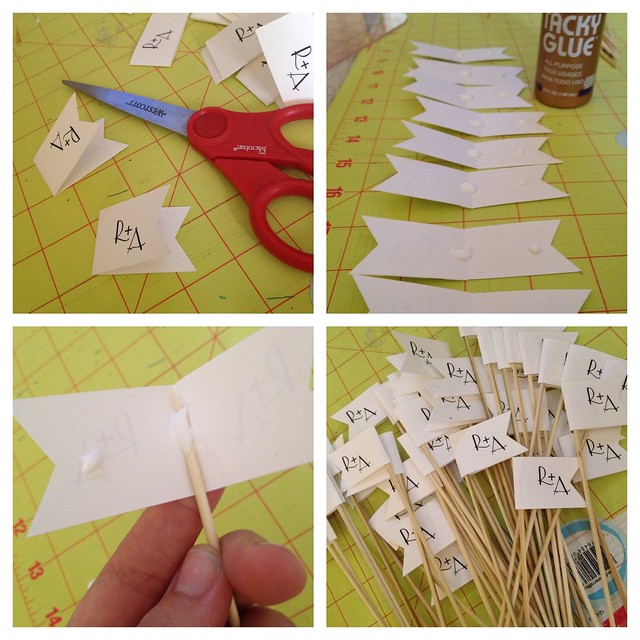
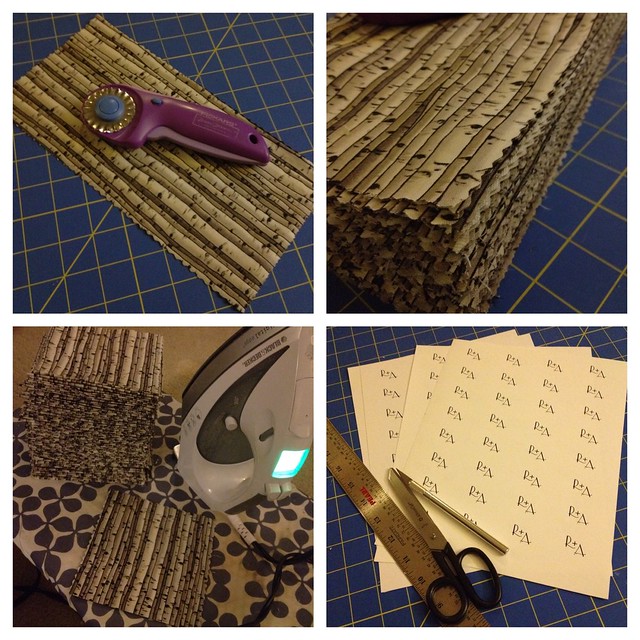
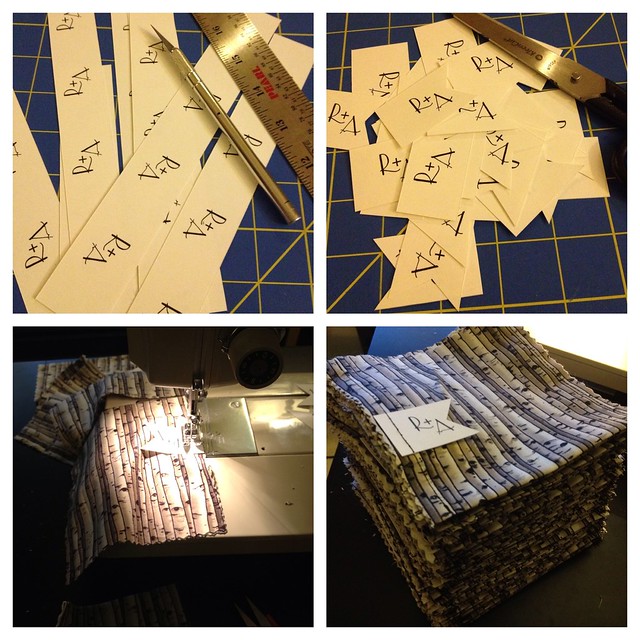
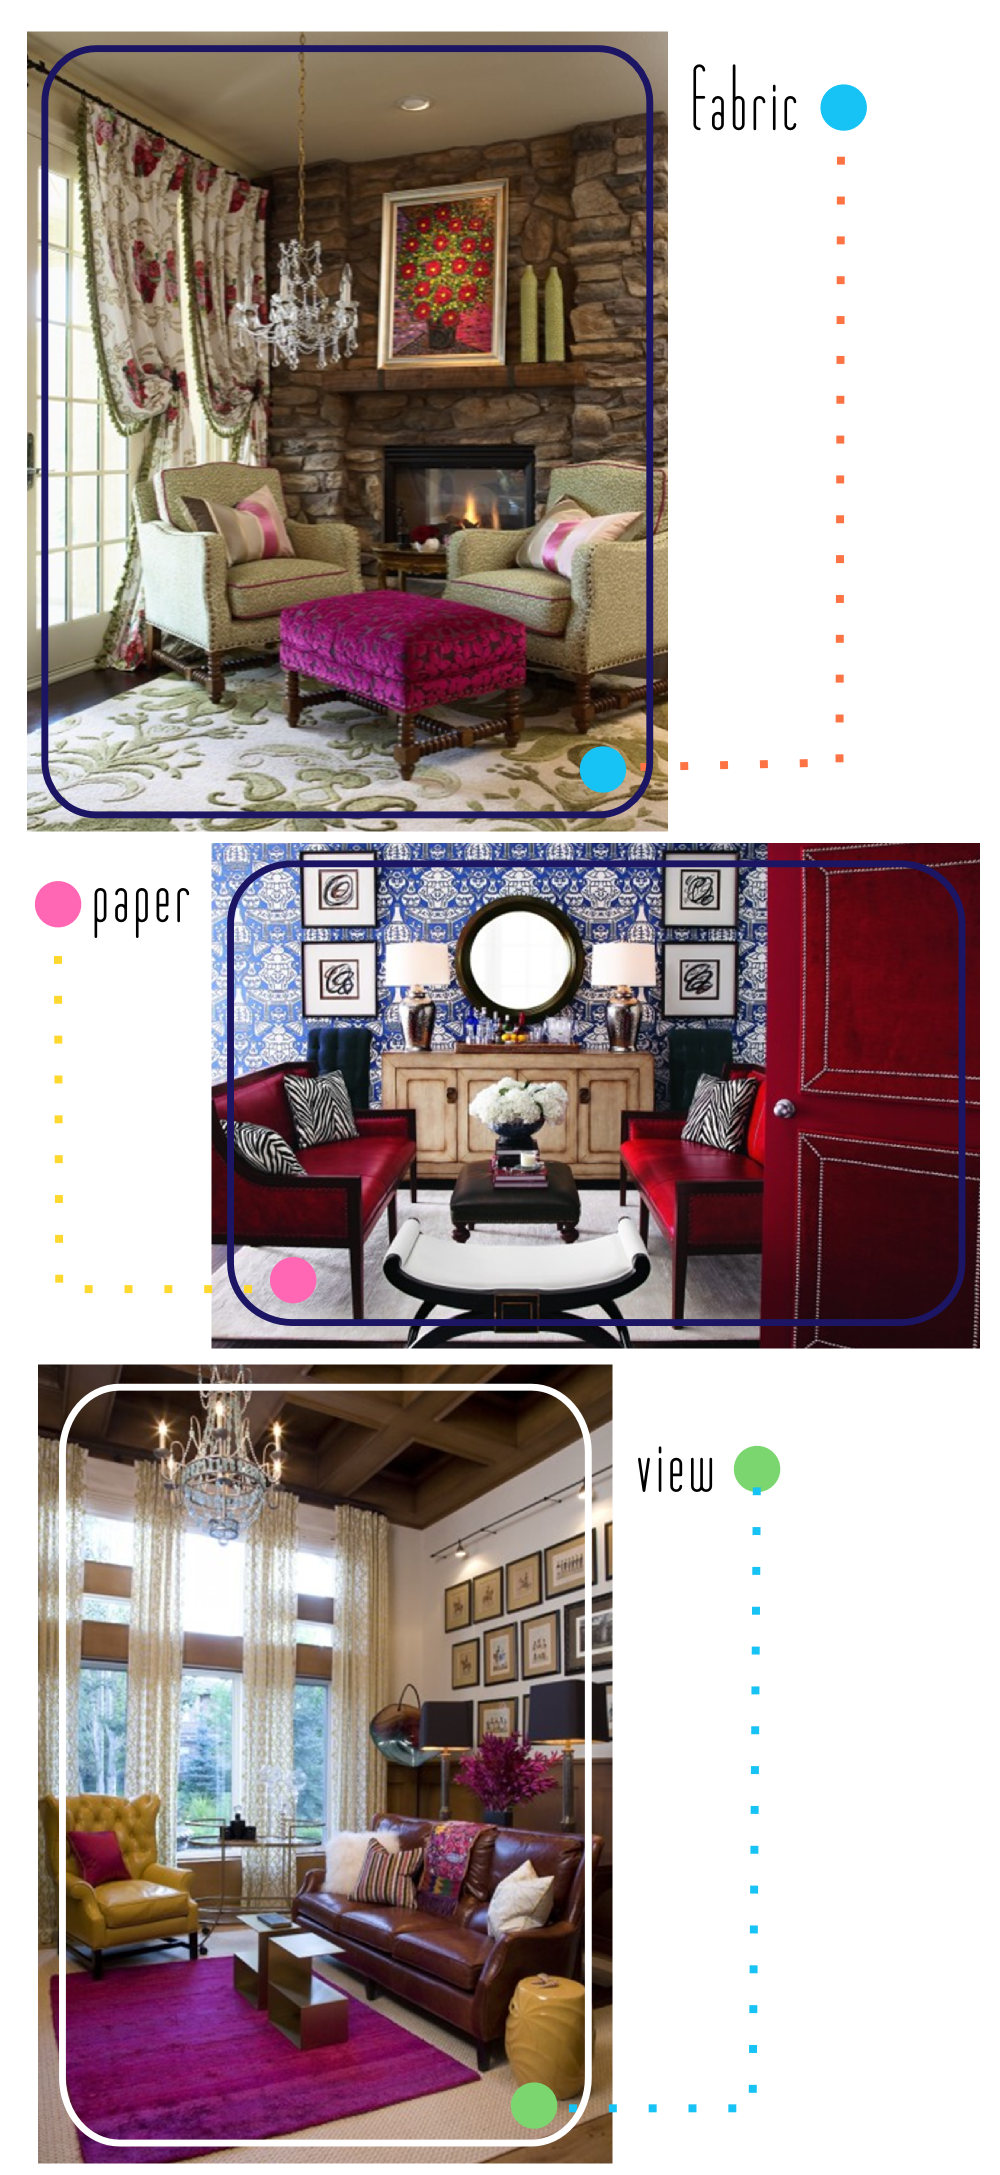
However...yesterday, I mentioned my insistence that cohesive party decor begins with a fabric and a font.  This off-hand thought set off a light bulb, thus a bit of party inspiration for you...
1
a fabric: Washi Tape - Triangulo Charcoal by Rashida Coleman-Hale available from Pink Chalk Fabrics
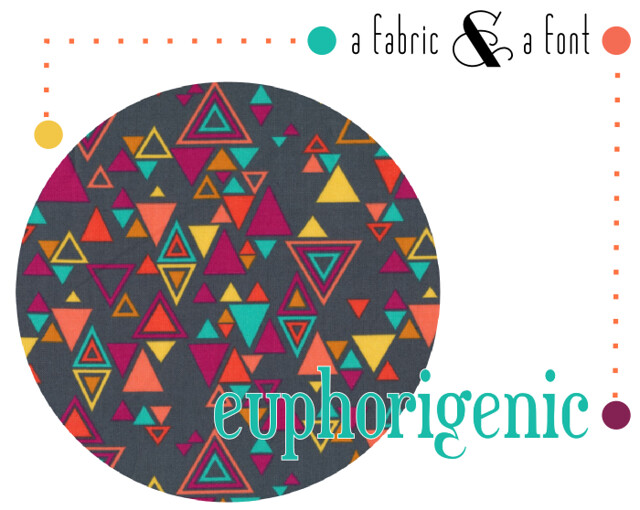
a font: Euphorigenic available from Dafont
signature
find me elsewhere
Fabric Paper Glue on Twitter Fabric Paper Glue on Pinterest Fabric Paper Glue on Facebook Fabric Paper Glue on Etsy Fabric Paper Glue on Instagram Fabric Paper Glue on Flickr Fabric Paper Glue via Email

3.29.2012

Rebecca's Wedding Projects - Process

Last week, I shared with you my friend Rebecca's wedding and mentioned that I helped her with several of the decorative details.  Because I did a pretty decent job of taking pics of the process for a couple of these, I thought I'd share them. 

These two projects together do a good job of embodying my approach to party decor, which is that it all starts with a fabric + a font.  Once you have those, you can create all sorts of little details that hang together.  On this one, we started with this birch tree fabric and the font from her invitations, which - believe it or not - we were able to track down for free online (available here).

Both of these projects are pretty simple and lend themselves to bulk creation.  First up are super simple accent flags featuring the couple's initals.  I mean, seriously, these are embarrasingly simple but I think add a little touch of customization.  You can stick these bad boys in all sorts of places, but we just put them in a jar here and there with the flowers.
Now to the process...

I created a sheet of initials using the free font and the drawing feature in a word processing program.  Print off a few sheets on heavy carstock.  Cut them out.  Fold them down the middle.  Cut some more.


I added a little detail to the edge.  Line 'em up, add glue, and wrap them around a skewer.  Done and done!  I churned about 50 of these out in less than an hour.

Next up are the fabric program pockets.  These area bit more involved, but with a little wrist grease (seriously, the cutting on this one will wear out your wrist), it's not that big of a deal.   150 pockets took around 7 yards of fabric and a few couple hour sessions.  Totally worth it because they made the programs feel so warm (can programs feel warm?) and personal...especially with the customized flags.  The programs themselves were also a DIY. 
Programs
Photos by Justin Wright Photography
More process...

For each pocket, I used a rotary cutter with a pinking blade (this is key because it prevents you from having to finish the edges) to cut out a piece of fabric about the same height and about 3/4" wider than the finished program.  I did this about 150 times.  Then ironed them in half lengthwise.  Next up were the personalized flags, which I created in much the same way as those up above.


I cut each of the flags out (no need for a folded flag this time) and added the edge detail.  Then I sewed along each side of the folded fabric pieces -- sewing the flag right onto each one.  You can just feed the pockets in one right after the other and clip them apart later.   Repetitive, but relatively easy!
signature
find me elsewhere
Fabric Paper Glue on Twitter Fabric Paper Glue on Pinterest Fabric Paper Glue on Facebook Fabric Paper Glue on Etsy Fabric Paper Glue on Instagram Fabric Paper Glue on Flickr Fabric Paper Glue via Email

3.28.2012

Fabric Paper Glue: v. 2012.9

12.9 Living Rooms

Fabric Paper Glue v.2012.9

Fabric: There are so many beautiful textiles going on in this small space, and I love them all!  And how amazing is the combination of super masculine materials like the raw stone with the super feminine ones like that crystal chandelier?!
Houzz via Riehl Designs

Paper:  This wallpaper is so bold and so fantastic.  It's already a bright color, but pops even more when paired with those bold red couches.
Houzz via Horchow

View:  Oh, man.  Look at those windows! This is another one that combines masculine and feminine in a way that looks so relaxing and cozy.  Those sooden beams and yellow couch with an impactful chandelier and a fuchsia rug.  I would have never thought of it myself, but I love it.
Houzz via O Interior Design

signature
find me elsewhere
Fabric Paper Glue on Twitter Fabric Paper Glue on Pinterest Fabric Paper Glue on Facebook Fabric Paper Glue on Etsy Fabric Paper Glue on Instagram Fabric Paper Glue on Flickr Fabric Paper Glue via Email

3.27.2012

1 Supply 3 Projects: Neon Twine - Part 3

Graphic

This week, I'm using my super cheap neon pink masonry line from the hardware store for a fun, layered necklace.
Be sure to check out part 1 and part 2.
12

Tutorial Mosaic

1
Materials:  Neon Pink Twine, Jump Rings in Various Sizes, Clasp, Lighter

2
Directions: Cut about 15 pieces of twine to the just a bit longer than you want your necklace.  I used a necklace I already own as a guide.

3
Make a couple of braids with some of the twine, braiding in a jump ring here or there as a little extra adornment.

4
At the begenning and end of each braid and the leftover unbraided pieces melt the ends together with a lighter.  It just takes a couple of seconds of contact with the fire.

5
Now, you should have 2 braids and all the other pieces.  I slipped a couple of jump rings around the loose pieces, too.

6
To sort of keep it all hanging together, I ran a strand or two of the loose pieces through the one or two of the jump rings in the braided pieces. 


7
Now combine all three pieces -- the 2 braids and the loose strands -- together by wrapping a small piece of twine around the ends and melting it a bit with the lighter.  Repeat on the other end.

8
To add the clasp, I just ran jump ring through the piece twisted on the end and added the clasp. 

9
Add the other end, I added a series of jump rings to create a little chain.  And that's it!  Not too bad for a hardware store find. 

10
11
12
signature
find me elsewhere
Fabric Paper Glue on Twitter Fabric Paper Glue on Pinterest Fabric Paper Glue on Facebook Fabric Paper Glue on Etsy Fabric Paper Glue on Instagram Fabric Paper Glue on Flickr Fabric Paper Glue via Email
Pin It button on image hover