

Try This: Botanic Sketches Tote Bag
I was recently perusing Spoonflower looking for nothing in particular. I started thinking how cool some freestyle sketches of botanic prints would be on some white fabric and made into a tote. I found one great candidate fabric here, but decided I'd try my hand at hand-painting some fabric myself. And thus this tutorial! Be warned that, although I sew quite a bit, I make no promises about my ability to do a sewing tutorial, so here goes...

Materials: botanic prints, pencil, black fabric paint (or acrylic paint + fabric medium), fine-tipped paint brush,
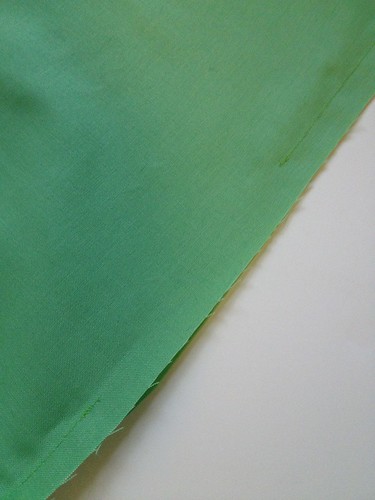
one 12" x 30" cut (for the body) and two 2.5" x 15" cuts (for the handles) of white cotton canvas or other heavy duty fabric for the outside of the bag,
one 12" x 30" cut (for the body) and two 2.5" x 15" cuts (for the handles) of colored cotton for the lining
For great botanic prints, I highly recommend the New York Public Library's Digital Gallery. If you don't feel like searching around for your own, here's a few: link, link, link, link, link.

Directions: You'll want to begin by tracing the outline of the botanic prints onto your white canvas. Obviously, you can buy tracing paper, but I just make do without by shading the back of my prints.
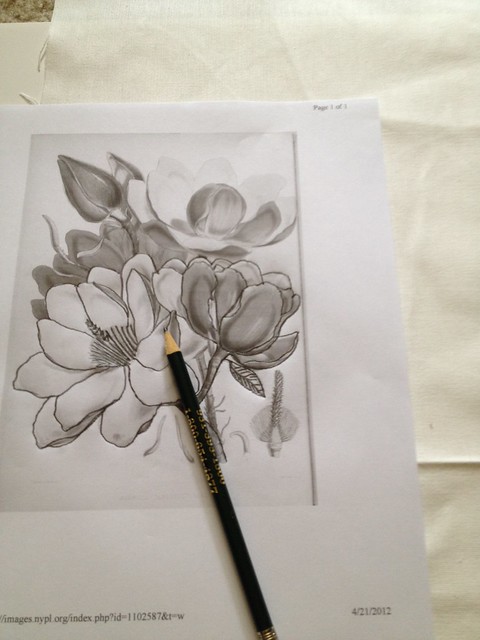
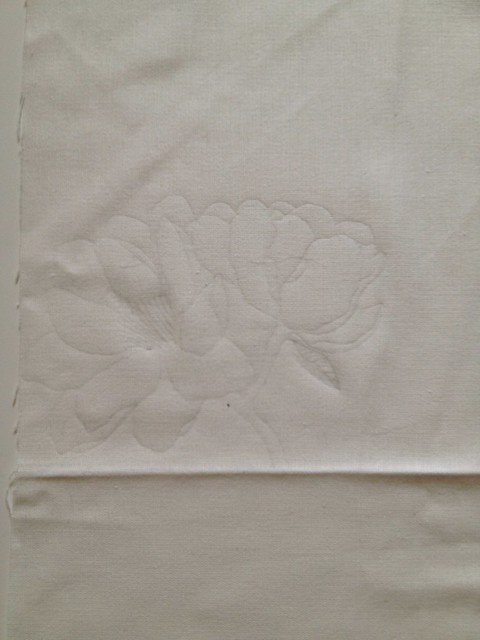
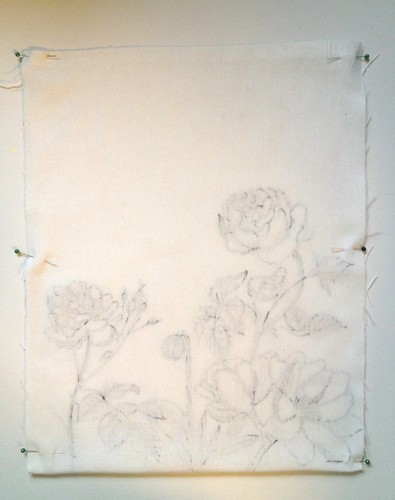
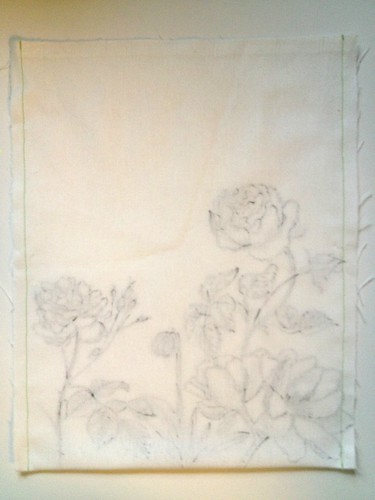
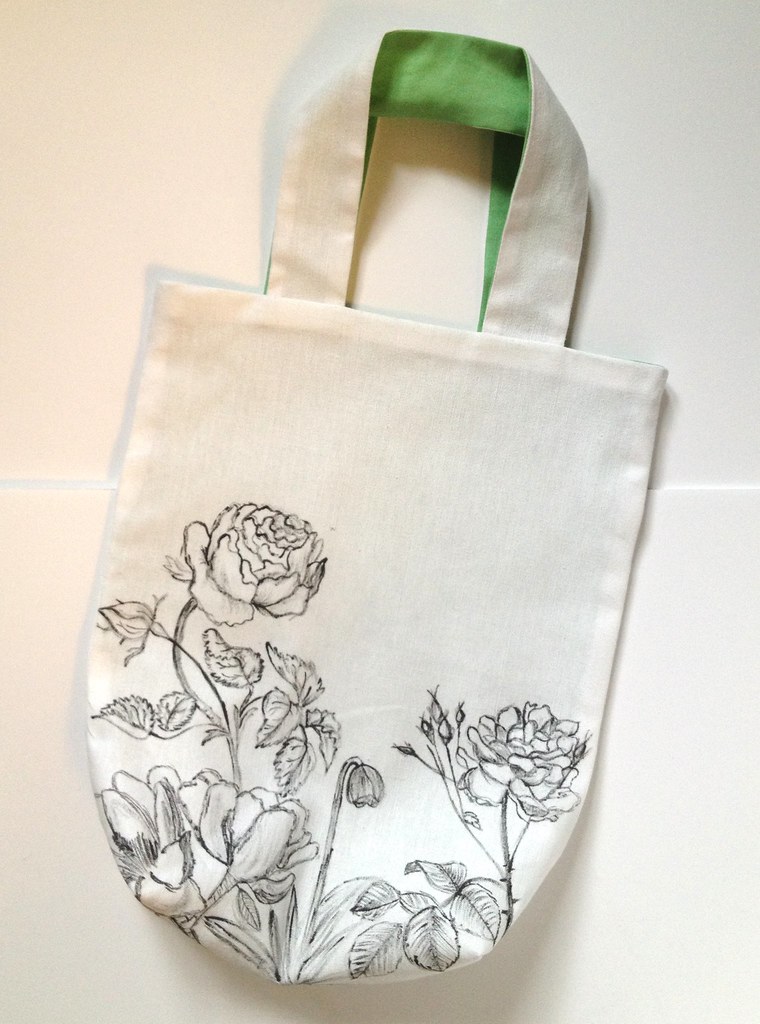
Place the print, shaded side down onto your white canvas. The canvas will be folded in half lengthwise where the fold will be the bottom of the bag, so you'll want to trace these towards the fold/bottom of the bag. Now, trace the outline of the botanic print, pressing hard so that the graphite on the back will transfer to the canvas. Do this with all the different botanic prints that you want on your bag. I just sort of randomly placed different ones around the bottom.

Once you have an outline, go back over the outline with your fabric paint and a fine-tipped paint brush. The nice thing about the sketched effect is that the less precise you are, the better it looks. I found that short, quick strokes created the best effect. You can also go back in and fill in some shading details, just looking at your prints as a guide. To get the lighter greys, just apply less pressure with less paint than you would for the outline of the flowers.

Now, do this for all the botanic prints that you traced onto the canvas.
Now, the sewing part! Fold the canvas where the right sides of the bag are facing each other. Pin and sew along each of the long edges.


Let's see if I can explain this. To get boxed corners to give the bag some volume, you fold the corners so that the side seam is touching the bottom fold, creating a tip where the corner is. Pin this together, and mark and sew a line perpendicular to the seam about an inch and a half from the point. I hope these pictures make this explanation more obvious. If it's not clear enough, I found this tutorial in a quick internet search with some pretty decent pictures of how to do this.

Trim the excess.

Repeat these steps with the lining, but leave a gap in one of the side seams about 3" long.

For the straps, sew each canvas strip to each colored strip on the long sides.

Turn the handles right side out and press.
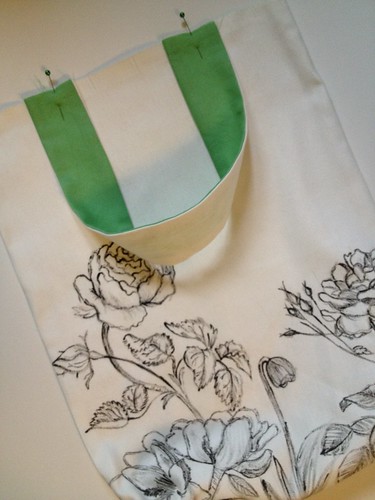

Turn the outside of the bag right-side out. Pin and sew the handles into place facing downward with the canvas of the handles facing the canvas of the bag body as shown in the pictures. Do this for both sets of handles.

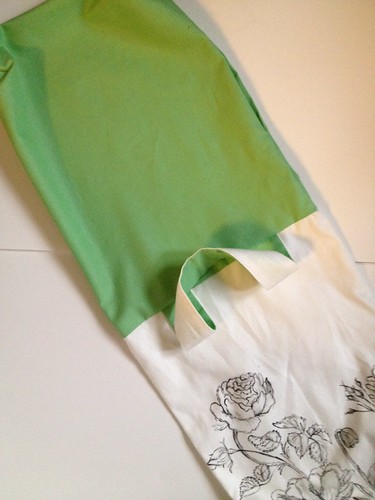
Now, place this outer part of the bag into the lining, with the wrong side of the lining facing out. You want the right sides of both the lining and the outer part of the bag facing each other.

Pin and sew the top edges of the two bag components together.

Now, pull the bag through the hole in the lining.
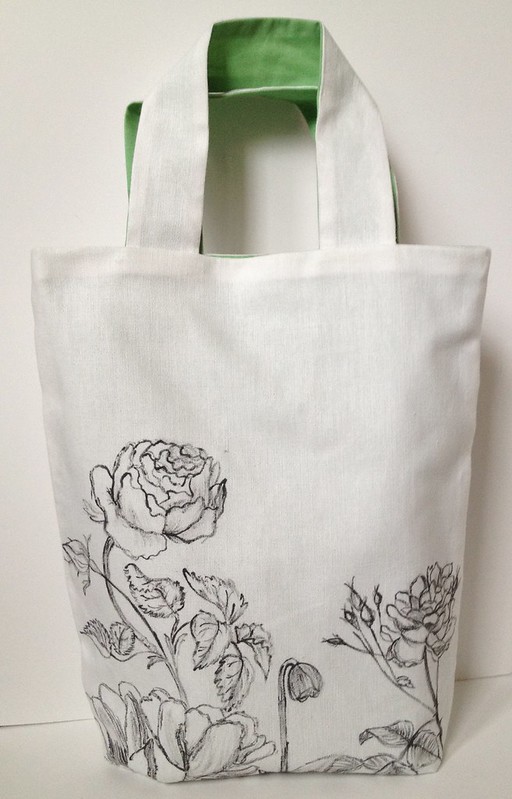
Once you pull everything completely through, the bag will look like this. Both the right side of the outer part and lining are on display!


Now, pin and stitch up the hole in the lining. Tuck the lining into the bag and press. Now you're done. The finished bag is about 11" wide by 14" tall (excluding handles).
The perfect little summertime tote for a bottle of wine and a baguette. Or maybe some magazines and a kindle. Or, if you're me, a tote for my work essentials -- a bottle of homemade, unsweetened tea and a pair of impractical shoes. Glamorous, I know.


find me elsewhere


So cool, Mandy! I love this idea.
ReplyDeleteThank you for sharing the tracing tutorial. I'm sure I will find some use for it, and your sewing tutorial is very understandable as well.
ReplyDeleteThat's fab. Definitely going to use this as inspiration! Thanks!
ReplyDeleteBeautiful....
ReplyDelete