
Over the past 6 months, I've been making some small changes and accumulating all the necessary pieces for the more involved ones. I finally got down to it last weekend while Michael was out of town for a bachelor party. He does not deal well with unfinished projects -- even if they take just a few days, so I thought for the peace of our home, it would be best to tackle this while he was gone.
Let's travel back in time first, though. Unfortunately, about a month back, our external hard drive got sick and I literally lost every picture that I had ever taken related to our home or any craft/sewing project. This was an enormous bummer to say the least. The only pictures I could recover were ones posted on my blog, so that's pretty much all I have to show you in the way of before shots.
When we got the place about 5 years ago, it looked like this. Very renter's grade. Very bleh. You can't see it but the light fixture was one of those gold, exposed bulb ones. Ew.
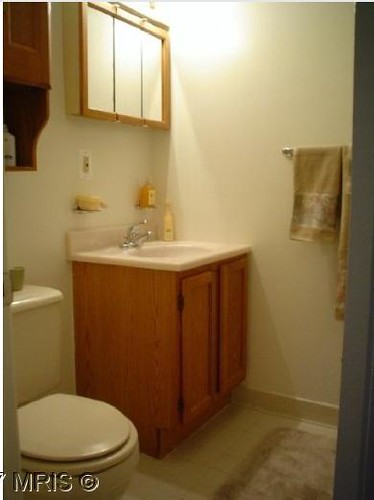
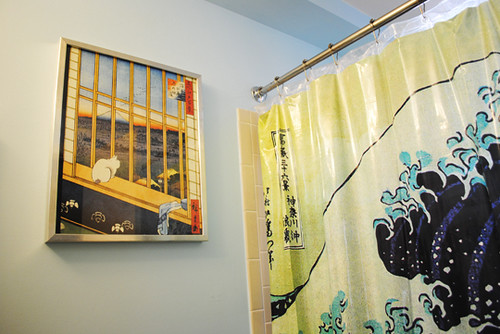
Before we actually moved in, I took all the wall fixtures down, did an embarrassingly atrocious job of patching the wall, painted the walls a deep deep blue (huge mistake!), installed two mirrored medicine cabinets from Craig's List (which I thought would be super practical...and they were, to some degree, if unattractive), put up some Japanese art, and called it a day. Unfortunately, I have no pictures of this, but it pretty much remained that way until I repainted it light blue a couple of years ago. This is what it looked like going into this year.

So the plan was:
- Find a new color scheme that utilizes the existing blue.
- Replace the art and shower curtain.
- Re-grout the tile in the shower.
- Smooth out my terrible patch job.
- Replace the mirrored cabinets with a mirrored-framed mirror (I was very specific about this, for some reason) and a nice cabinet or shelves.
And that's just what I did!
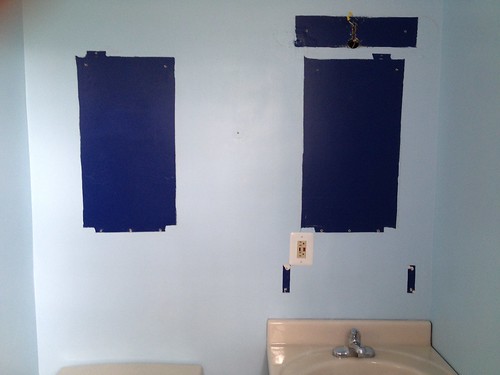
This is after I took everything down. You can see the way too deep blue I had painted it previously, and if you squint you can see the terrible patch job up where the light fixture was.
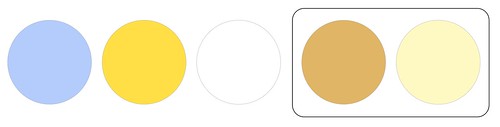
Now, the color scheme. The colors on the left represents my chosen colors. The colors on the right represent the ones I just have to deal with because we're not in a position to do a full-on bathroom demo. These are the colors of the cabinet, sink, toilet, and tile.
I really love where we ended up. I'll admit it's not 100% my style, but I'm still for it. It works with what we can't change. It feels fresh and clean. And it's practical with about twice as much storage potential as what we had before.
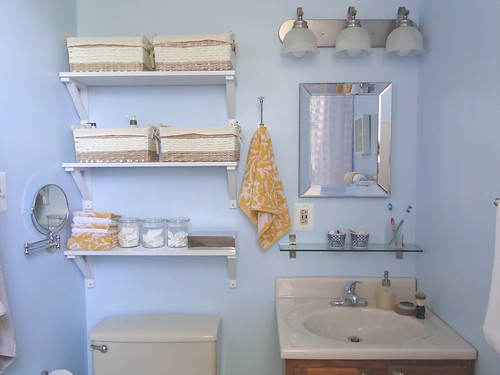
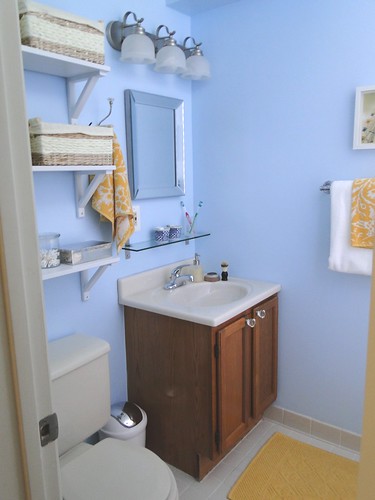
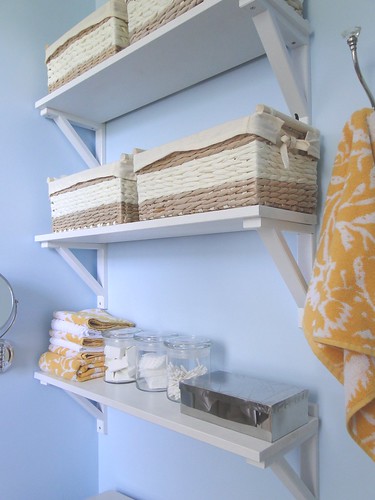
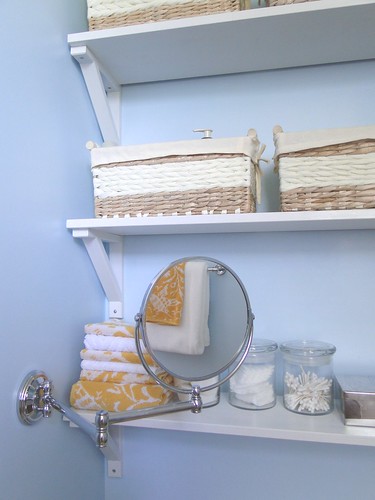
Even though they're a little beachy/country, these baskets (found at Michael's) are sorta perfect for the space. They do a great job of tying in the cream of the tile/sink/toilet and the oak of the cabinet. The shelving is the super-cheap Ekby bracket/shelf combo from Ikea cut to size and painted white (same as what's in our kitchen).
Same light fixture as before, but I turned it upside down. I tried out some new seed glass globes, but I wasn't feeling it. Too naked and didn't diffuse the light enough. This was also where I had done the terrible patch job. Smoothing this out and repainting this wall was really where all the work went, but obviously that is not registering in these before and afters. Trust me, though, it's legit now.
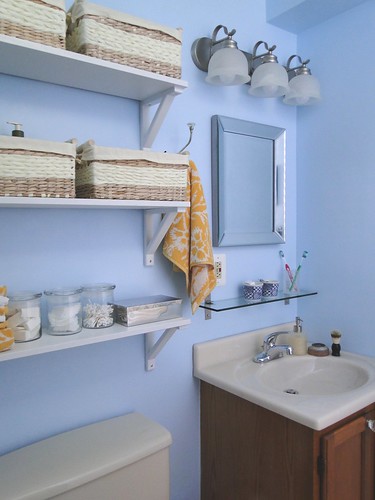
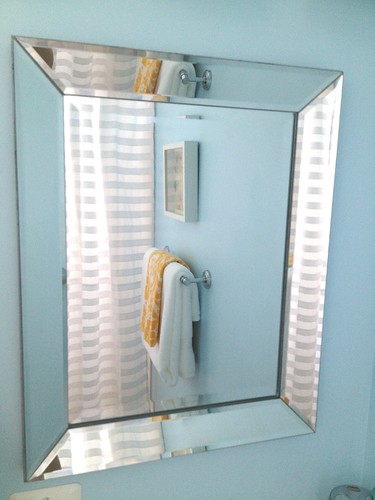
My mirrored-framed mirror from Home Goods. I basically stalked Home Goods for like 3 months to find this thing. Obviously, the style I was looking for was very specific, but I also had some odd size restrictions since the cabinet abuts the wall and there's an awkward outlet just below the mirror. It's a tad small for the space, but everything else I found was too big.

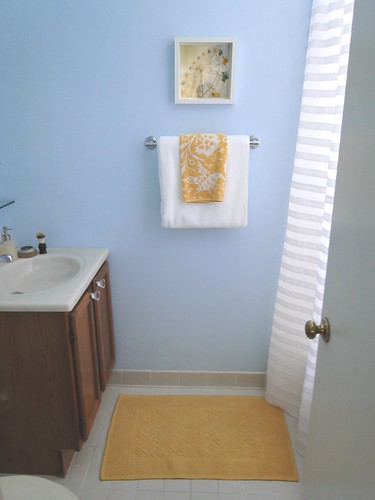
Extra long shower curtain from Amazon. Yellow bath mat from World Market.
A swing-arm mirror from Target allows some mirror access even when both of us are trying to get ready at the same time.
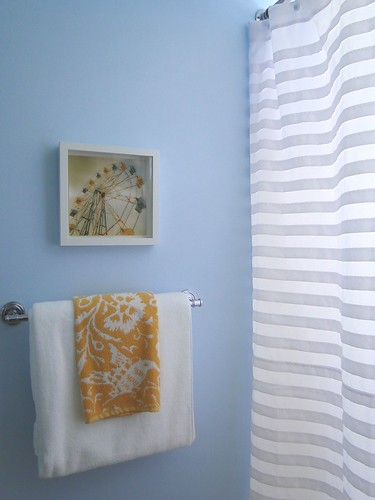
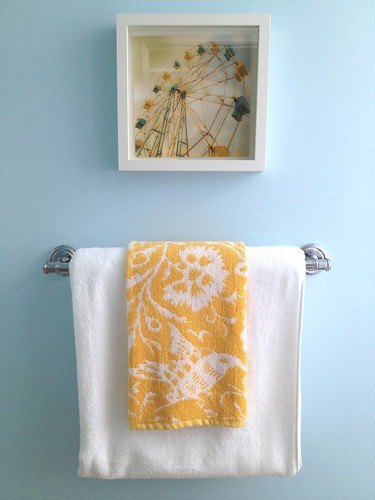
A little whimsical photography from photographer and Etsy seller Carl Christensen. Frame from Ikea. Hand towel from World Market.
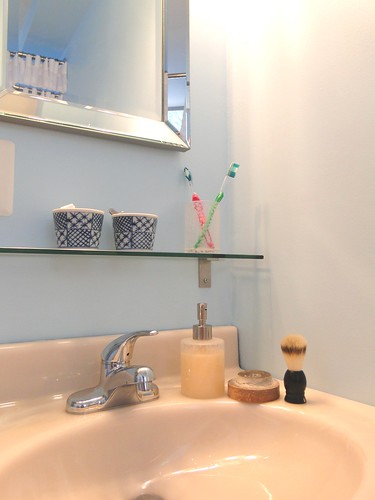
Simple storage jars from Michael's. More hand towels and wash clothes from World Market.

Bath accessories from Target. Hand-painted cups a gift from Michael's aunt and uncle who live in Tokyo.
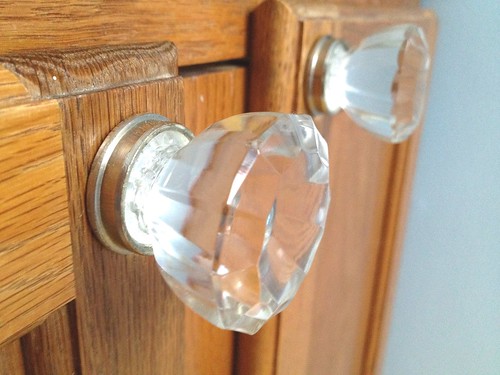
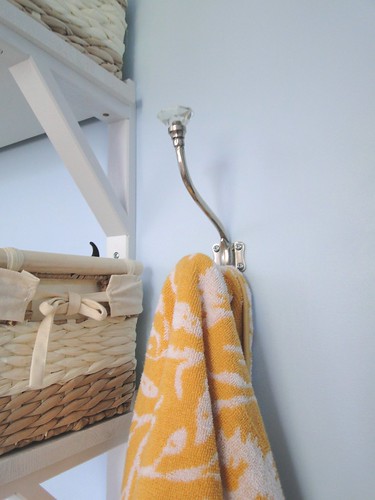
Some new glass hardware and hooks from Anthropologie.
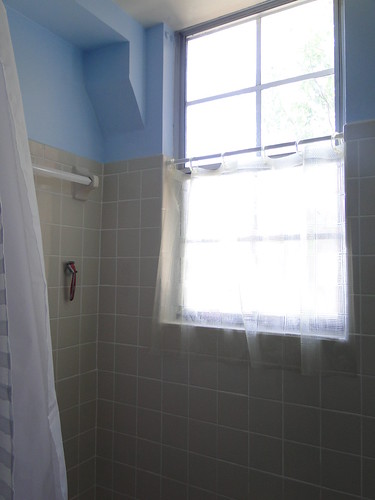
Just for kicks, here's what's going on behind the shower curtain. I re-grouted this bad boy earlier this year. A pain in the butt, but it made an enormous difference.


find me elsewhere


Wow! Looks really great! I wasn't expecting such a dramatic change in such a small space, but I think you did marvelously with what you had.
ReplyDeleteit looks great! i love to see people work with what they have. it's so much harder than starting from scratch.
ReplyDeletei can't believe you re-grouted! i need to re-caulk and i've been putting that off for months.
I think it looks great!
ReplyDeletewow! LOVE the change it looks amazing! great job on the open shelving and the color scheme!
ReplyDeleteIt looks great! Very fresh and clean and crisp.
ReplyDeleteIt looks great!
ReplyDelete