
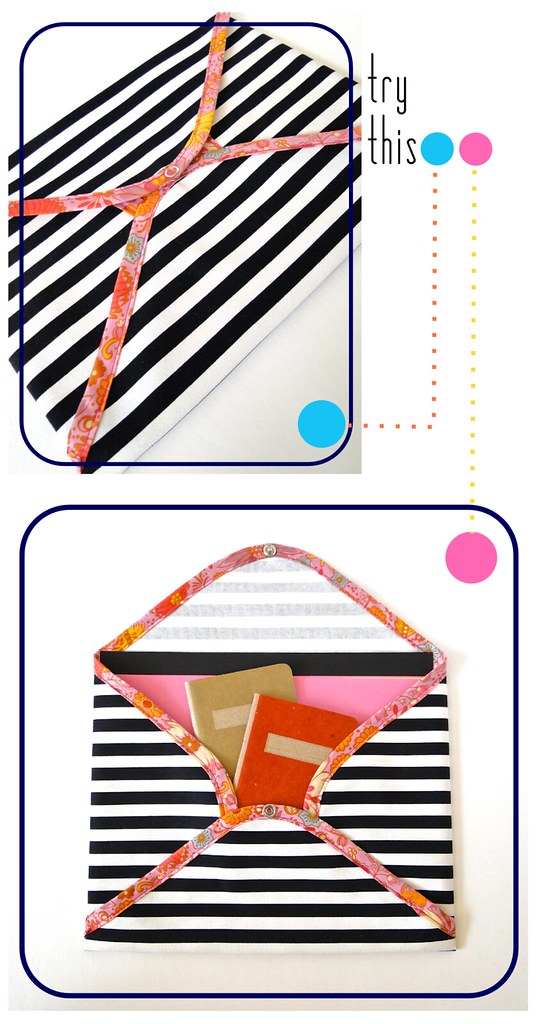
Try This: Fabric Document Envelope
For whatever reason, I find myself needing to carry papers around every now and then. Perhaps it's photographs of some of my work for a meeting or a resume for an interview. Whatever it might be, I like to carry them in style. My fallback has been a cute little folder, but this relatively easy project is the perfect little portfolio for toting around important documents and papers.
Yeah, yeah, I know. What's with all the stripes lately, Mandy? [Sigh.] I love them! And you do too. Now, get off my back.
Read on for the full tutorial.
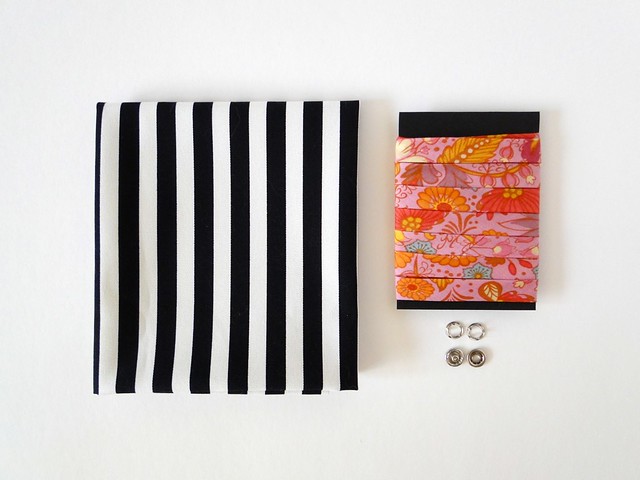
Materials: 22" x 27" rectangle of heavy canvas fabric, approx 2 yards of 1/2" double-fold bias tape*, 1 snap
*A quick note about bias tape :
First up, let it be known that I <3 bias tape. You can easily pick up double-fold bias tape from any sewing store in a whole host of colors. I wanted to switch it up a bit with something creative and custom for this project, so I made my own. Actually, I nearly always make my own.
Making your own bias tape is actually super easy. There are a couple of different ways to approach it. A lot of people approach it as shown in this tutorial from Prudent Baby, but I like to use scraps and smaller fabric pieces to make my bias tape, so I do it the way it's shown in this tutorial from Sew4Home. After you've got your fabric strips all cut and sewn together as shown in the latter tutorial, folding it up is as simple as a $4 bias tape maker (see my essential sewing supplies).
If you're not up for that but still want something a little different, there are tons of Etsy sellers offering unique bias tapes. In fact, a quick search turned up The Biased Shoppe, SaGranny, and Merrigoround & Me -- all shops offering adorable and unique double fold bias tapes.
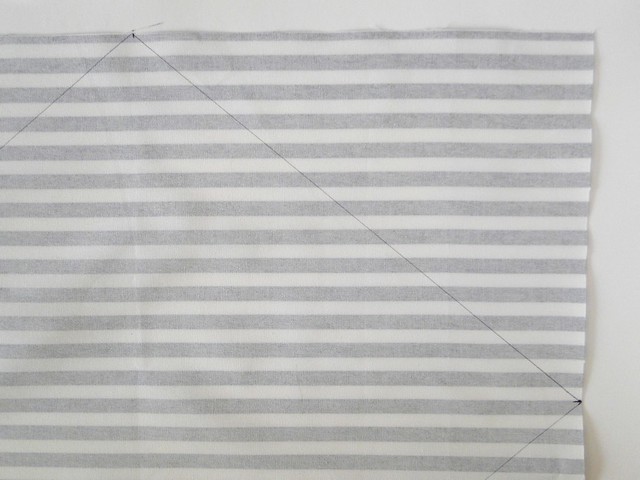
One: With a marking tool or ink pen, mark the center point on each edge of your 22" x 27" canvas rectangle. Draw lines connecting each adjacent center point to create a diamond shape.
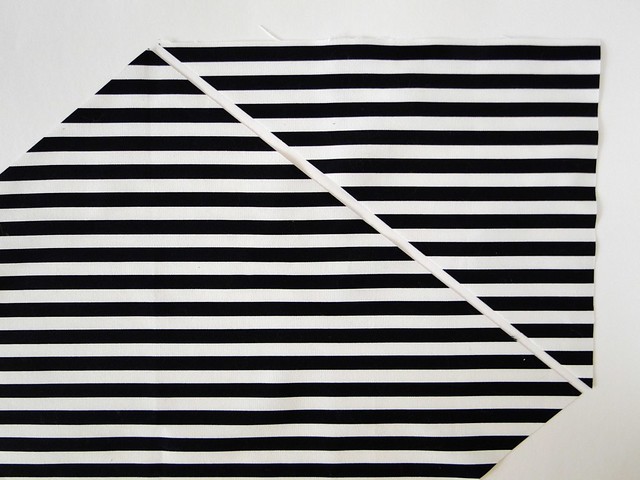
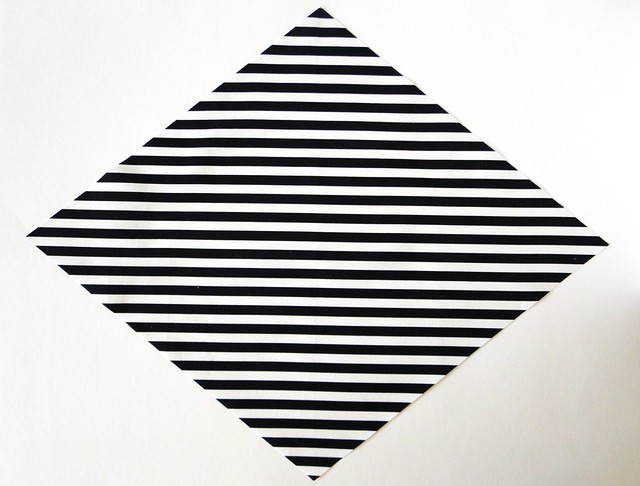
Two: Cut along the lines you just drew so that you have a diamond shaped cut of canvas. Let's call this our canvas diamond, shall we? Sounds so fancy...yet rustic.

Three: Using a small plate or bowl as a guide, round each of the four corners of the canvas diamond.
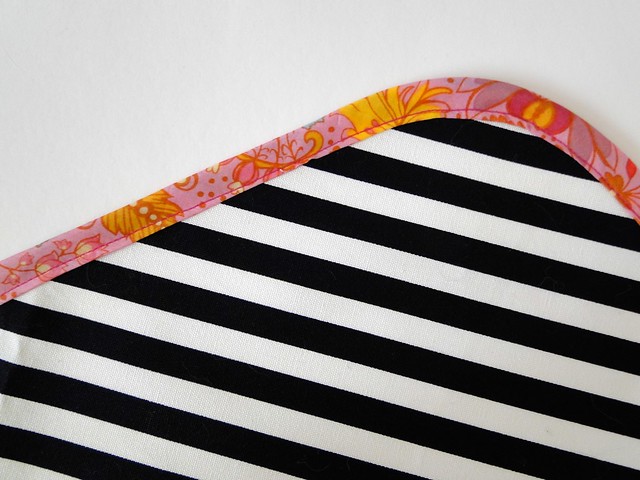
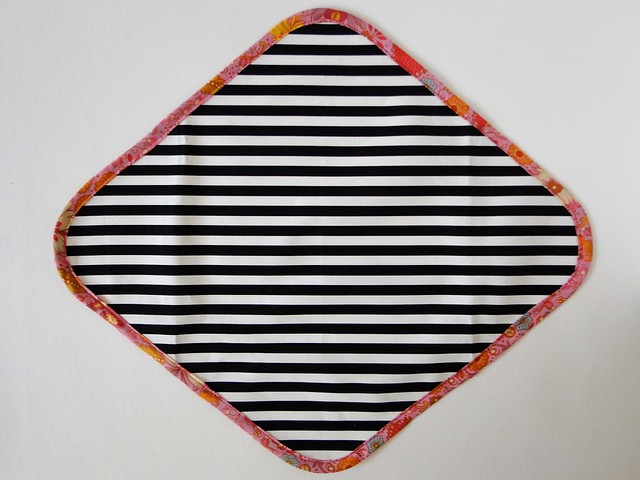
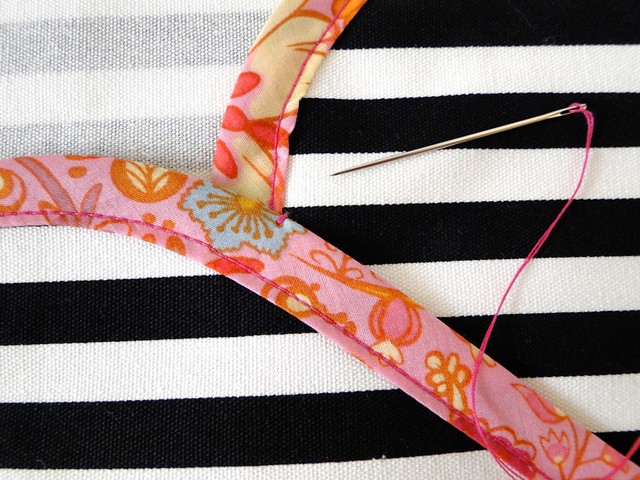
Four: Using a sewing machine, top stitch the bias tape along the entire edge of the canvas diamond. Use a thread that blends in with your bias tape so that people don't see how sloppy you are at top stiching (or is that just me?).
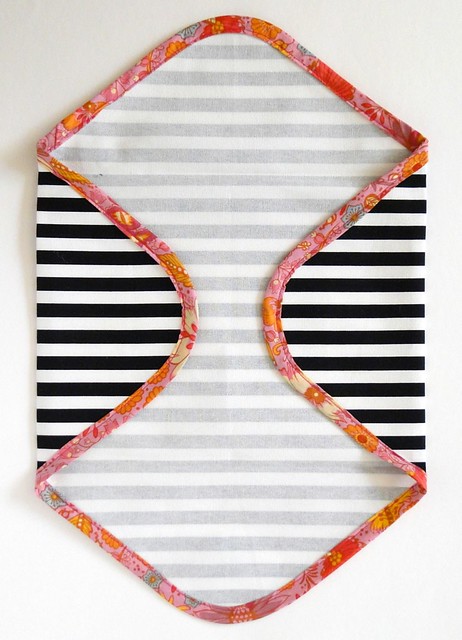
Five: Fold two opposite corners of the canvas diamond in towards the middle so that you leave a space about 12" wide between the folds. Press.

Six: Fold the top two corners in towards the middle so that your envelope is about 10" tall. Press.
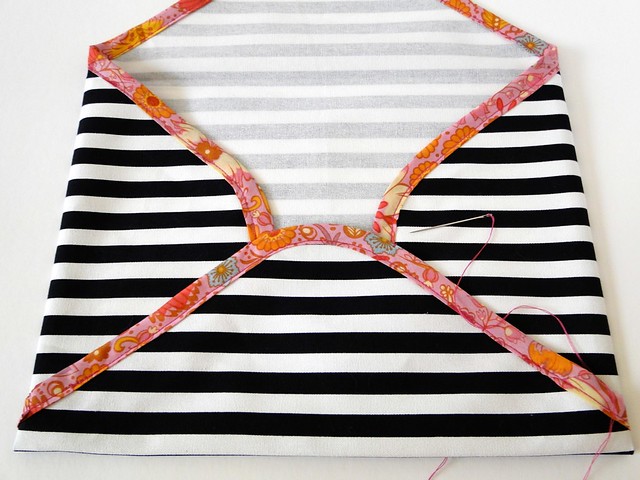
Seven: To hold everything in place, hand stitch the bias tape of the bottom flap to the side flaps in a couple of different spots on each side -- one towards the middle and one down towards the corner.

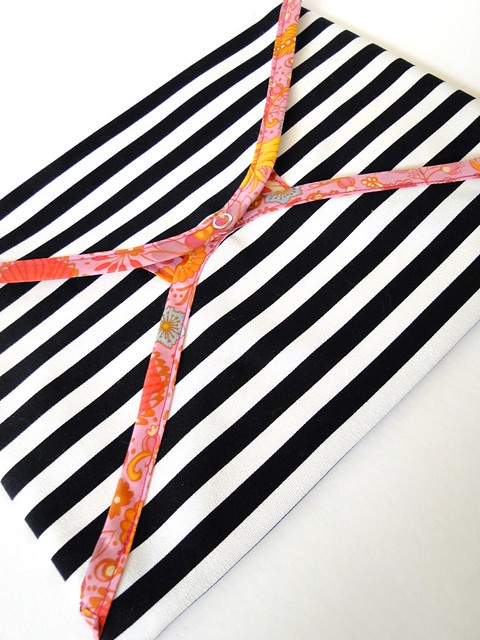
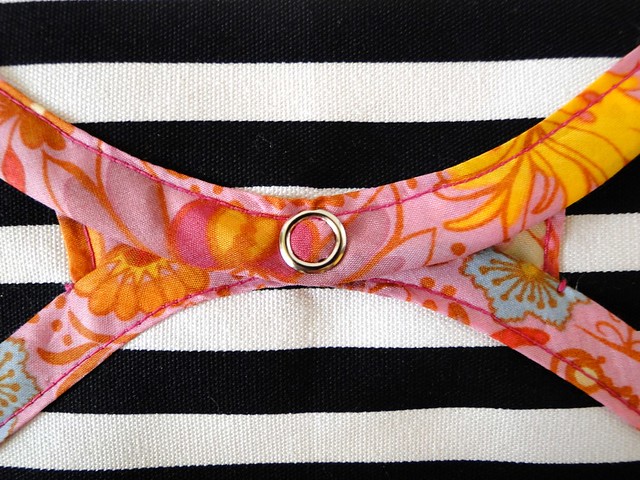
Eight: Install your snap in a place that makes sense. Mine ended up right on the bias tape, and that's just fine. You could use a sew-on snap. If you use the kind you have to pound into submission, just make sure you have all the tools you need (Tip: Many of these snaps call for a specific setting tool, but I've found that for smaller snaps a spool of thread works just fine. Just center the little male end into the center hole on the spool and pound away.).
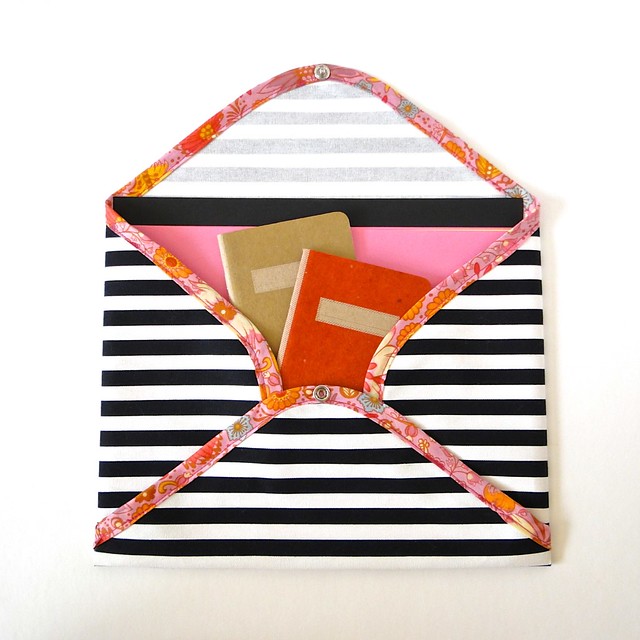
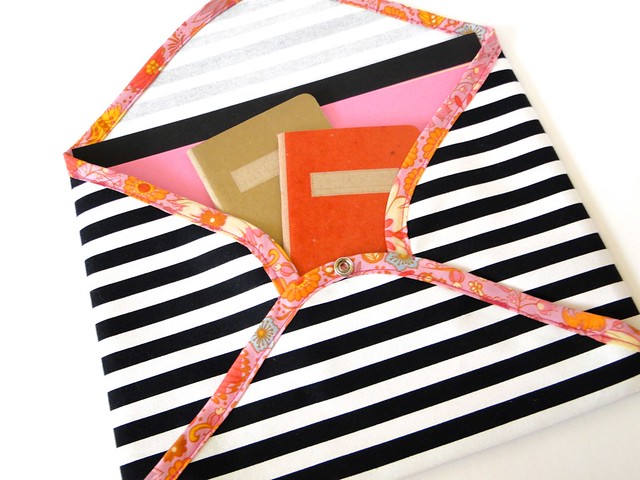
Now stick your documents in there and carry your papers around in the chicest possible way that said papers can be carried. That's right, papers are chic...and sexy. You can even stick some little notebooks in there. I imagine you could even modify this a bit to fit a tablet or even a laptop. The fabric enveloping possibilities are nearly endless!
If you do give this tutorial a try, please be sure and share a picture through the "Share Your Projects" link at the top of the blog page. I'd love to feature some!

find me elsewhere
thanks, great idea.
ReplyDeletewow great photos!! I think this might be something I could manage :)
ReplyDeletecool idea and excellent tutorial! Thanks so much for mentioning my etsy shop, merrigoround & me.
ReplyDeleteI love it! so much cuter than a regular document envelope :)
ReplyDeleteHow did I miss this when it first came out? I love it!! So cute, and it may be just the thing I am looking for! Very cute. Thanks for sharing!
ReplyDelete- Jess
MeSewCrazy.com
SewSet.com
I love this! I have a mild (ok, at least moderate) fear of my sewing machine, but this totally looks doable.
ReplyDeleteOhhh, I am in love!!! Thanks for sharing such a fun tutorial. :)
ReplyDeletelove it! i think I'll make some for my ipad is some lovely gold faux leather i have lying around!!! xx
ReplyDeleteThis comment has been removed by the author.
ReplyDeleteVery cute. Thanks for sharing!
ReplyDeleteWhere did you find that striped canvas?
ReplyDeleteHi, there. I got it from Ikea.
DeleteGood idea! :)
ReplyDeletexoxo
p-and-p-style.blogspot.com - Check this DIY-Fashion blog out!
I am going to make a few to hold my quilters rulers when I go to classes. Thanks for posting the instructions. Wonderful website, by the way.
ReplyDeleteVery cute! I love it!! :D
ReplyDeleteI am confused about "marking the center points." Is the fabric folded?
ReplyDeleteIn step one? No, it's not folded at the point. I just mean mark the halfway point along each edge of the original fabric rectangle. It's 22" tall by 27". wide So along the 27" edges, you'll mark a point 13.5" in along those edges. And for the 22" edges, 11". These marks become the tips of the diamond that you'll cut in the next step.
DeleteThank you for this great tutorial-it inspired me to make a Kindle case along the same lines: https://emergencytea.wordpress.com/2013/08/05/tutorial-make-a-kindle-or-tablet-cover/ (I've linked to your tutorial from there). I'm really happy with my project, so thanks for the inspiration! Mandy x
ReplyDeleteThat's awesome! It turned out really great! Thanks so much for sharing it!
Delete