
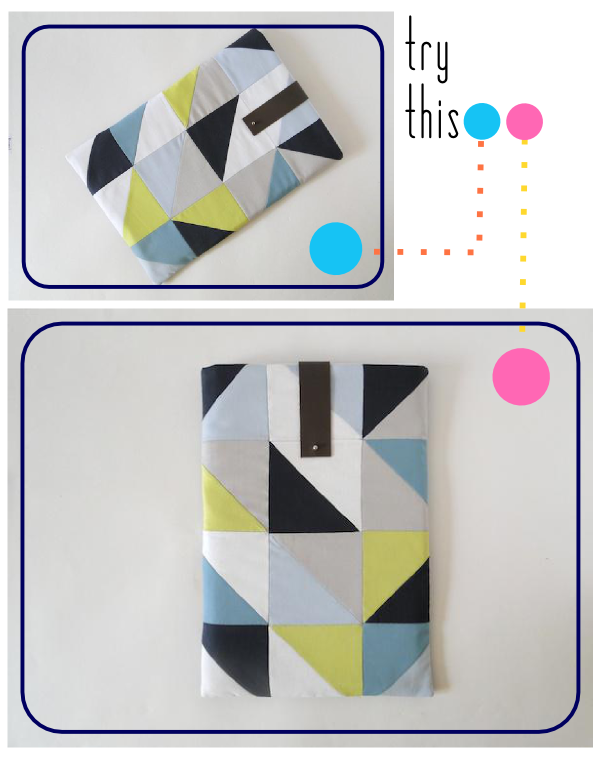
Try This: Geometric Laptop Sleeve
You might recall that I got a MacBook for my birthday. Upon the death of my husband's PC last week, I convinced him to come over to the Apple side. Because he's a lovely man, he thought we should get a bigger one this time around and that said bigger one should become mine. So this put me in the market for another laptop sleeve. I decided to go a different route this time around (see my last creation here), and make a tutorial of it.
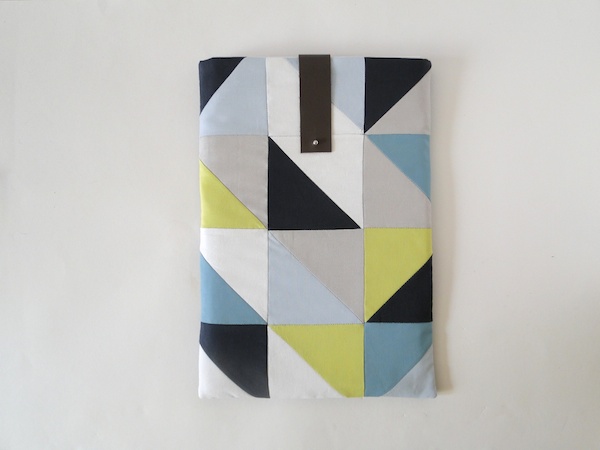
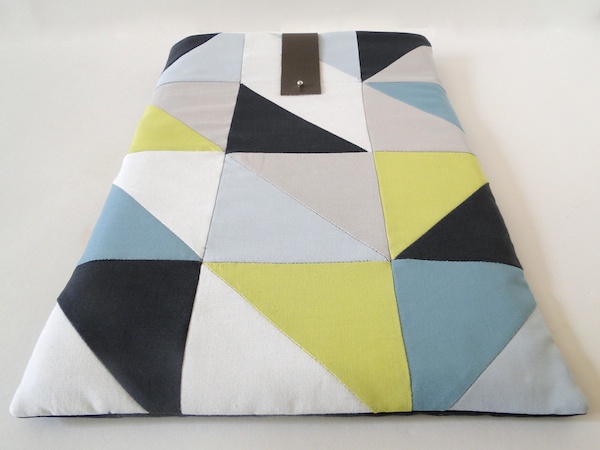
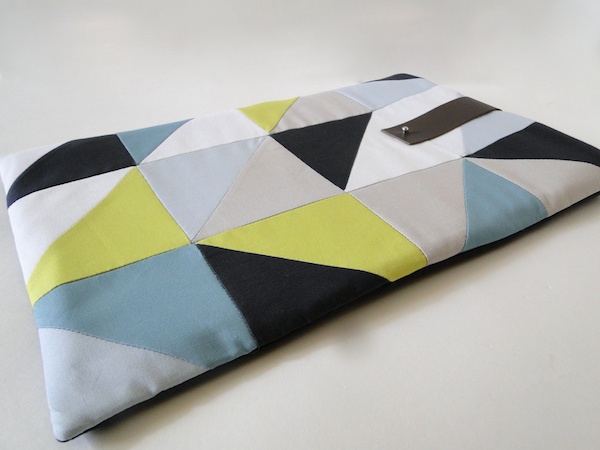
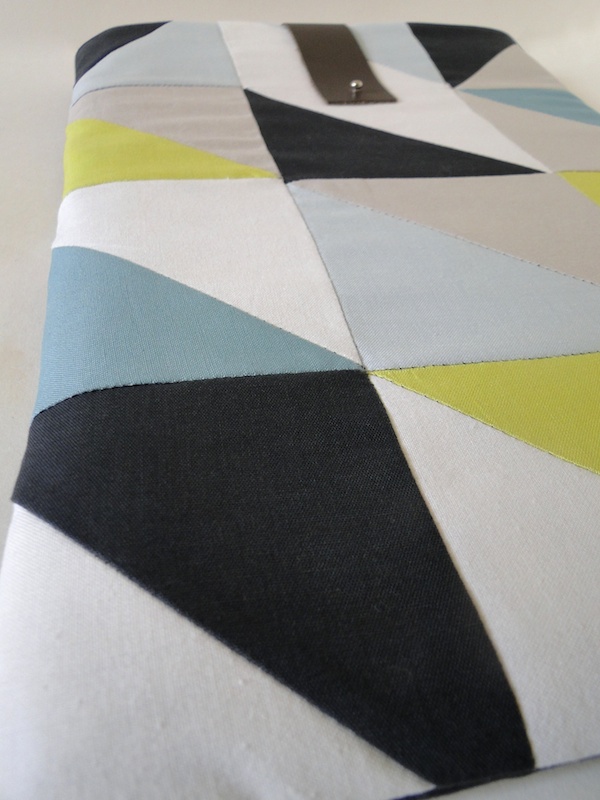
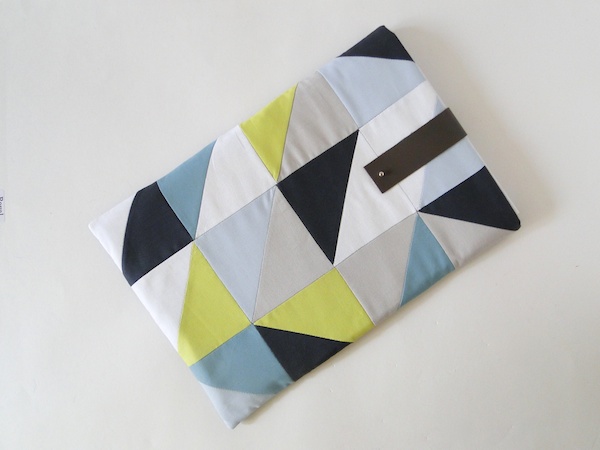
If you've checked out any of my tote tutorials, these steps will seem familiar. This time around, I added in some basic quilt-piecing skills to create a sleek geometric pattern, which was super inspired by some of Ferm Living's latest textiles but particularly this pillow.
Read on for the full tutorial.
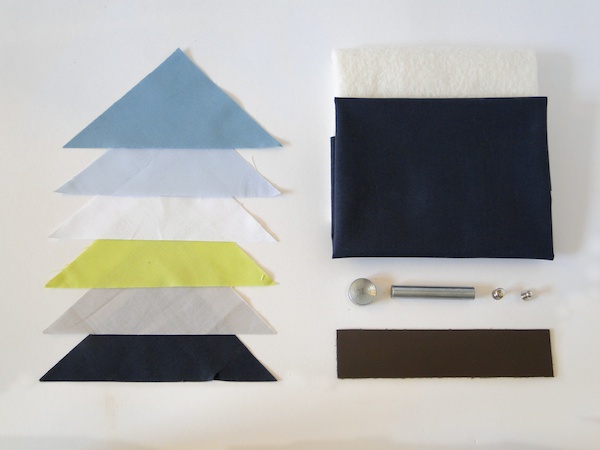
Materials:
In order to collect your materials, you need to begin by calculating how big each of your fabric cuts need to be. Assuming a 0.5" seam allowance, the width of each of your cuts should be your computer's width + your computer's thickness + 1.5". The length should be your computer's length + your computer's thickness + 1.5". Once these have been determined, collect the following supplies:
(3) Cuts of Solid Fabric in the Dimensions Calculated Above
(3) Cuts of Thin Cotton Batting in the Dimensions Calculated Above
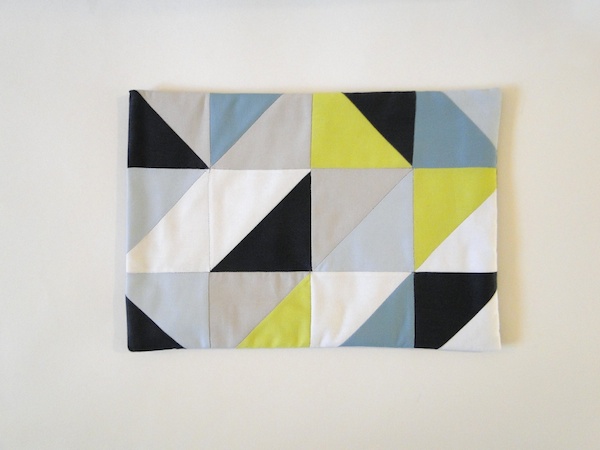
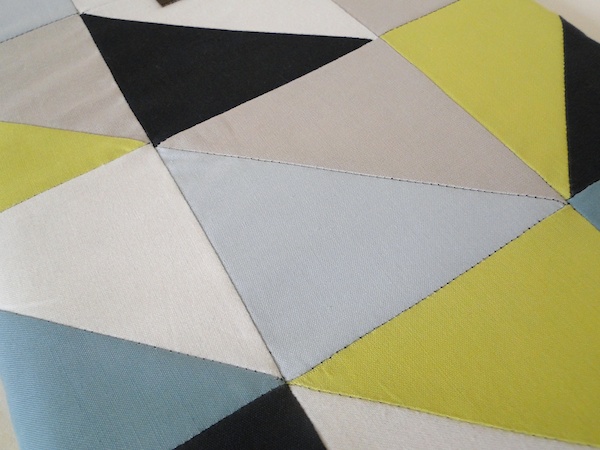
(24) Triangle Cuts of Fabric in Varying Colors (perhaps more, depending on the size of your computer) - Create these by cutting 4.5" squares in half diagonally. For mine, I used (5) White triangles, (5) Charcoal Grey triangles, (4) Light Grey triangles, (4) Light Blue triangles, (3) Light Teal triangles, and (3) Citron triangles
(1) Rivet + Setting Tool
(1) Button Stud
(1) 1.5" x 6" Cut of Craft Leather
Hole Punch (not pictured)
Utility Knife (not pictured)
Hammer (not pictured)

One: To create a geometric top like mine, begin by making 12 squares from pairs of triangles. Press each square. Sew sets of 4 squares end to end to create 3 strips. Press and sew the strips together making sure to line seams up. Press and trim down to the dimensions you calculated above. As for the arrangement, that was just random. Play around with what you like.
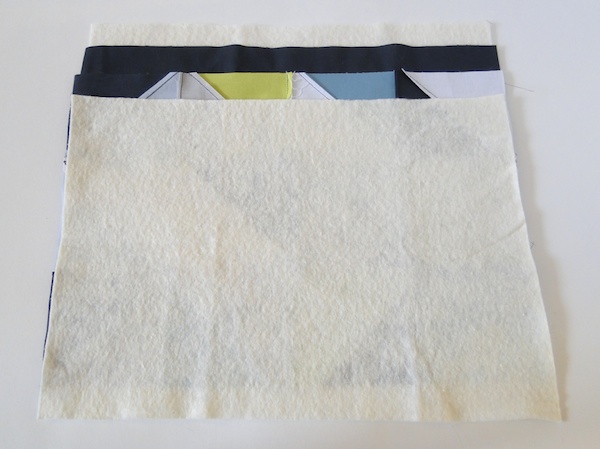

Three: Stack (1) Cut of Batting; (1) Cut of Solid Fabric; the Pieced Top (from previous step) with the right side facing the Solid Fabric; and (1) Cut of Batting. Pin together and sew around three sides, leaving one of the shorter sides open. Turn right-side-out.
Four: Repeat the previous step with the two remaining cuts of Solid Fabric to create the lining, but leave a gap about 4" unsewn.
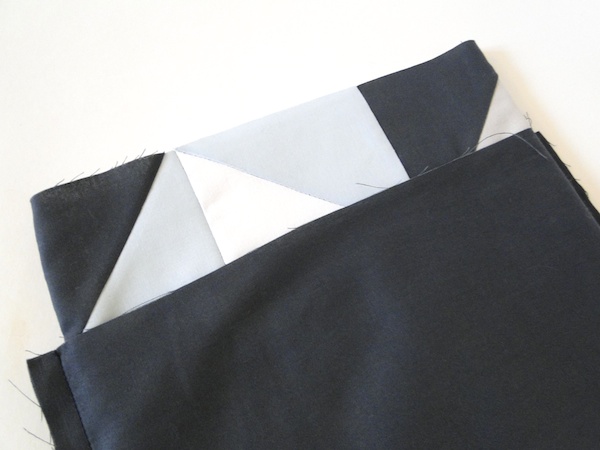
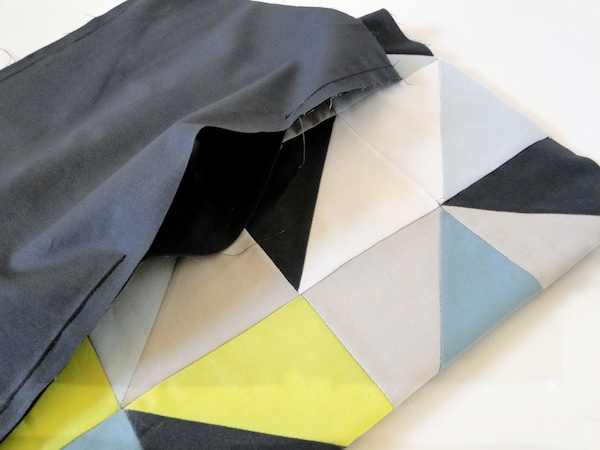
Five: Put the outer sleeve inside of the lining. The right side of the outer sleeve should be facing the right side of the lining with the lining's seams visible to you. Pin around the top opening, and stitch as shown.

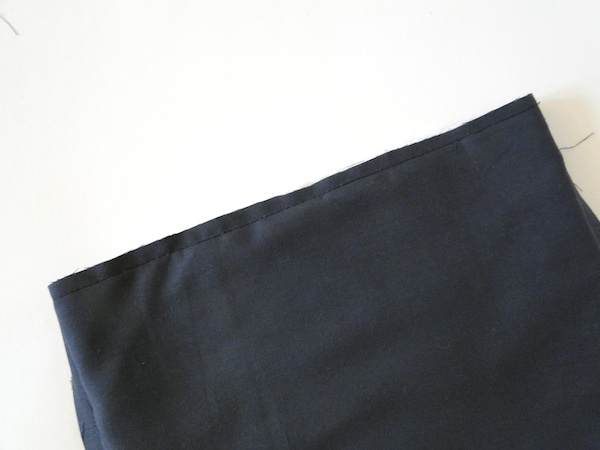
Six: Pull the entire sleeve (lining and all) through the gap you left in the lining. Top stitch the gap closed.
Seven: Tuck the lining inside, and press.
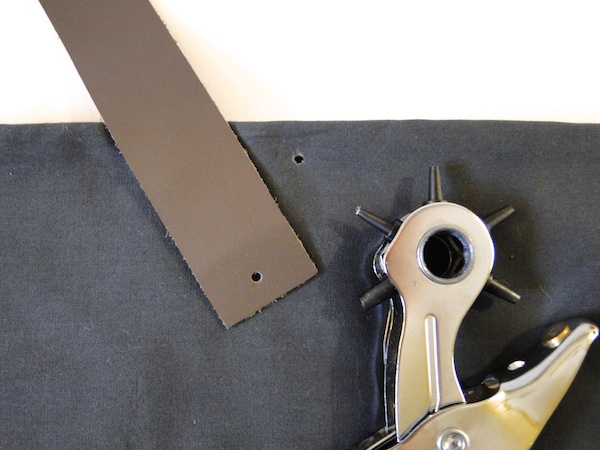
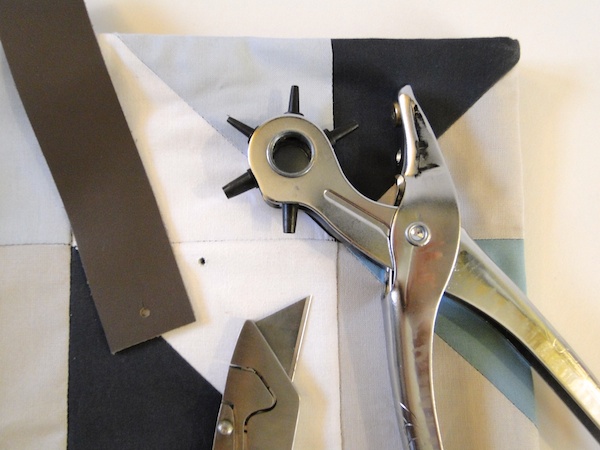
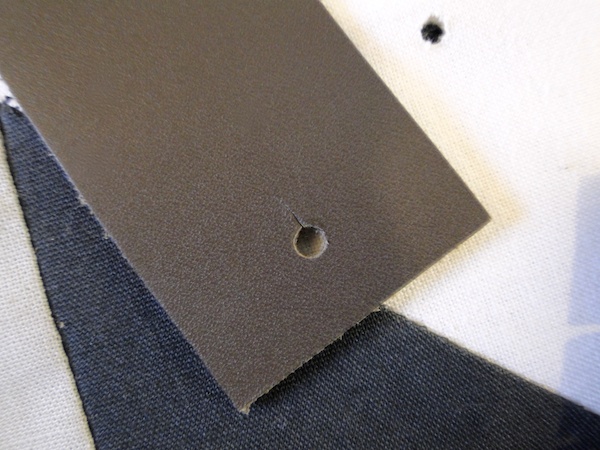
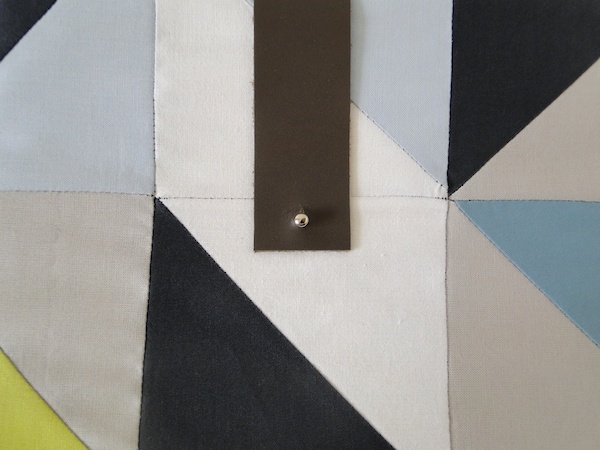
Seven: On the sleeve's back, punch a hold just large enough to fit the rivet in the center .5" from the top. Punch a hole of the same size .25" from the end of the leather strip.
On the sleeve's front, punch a small hole in the center 3.5" from the top. Punch a small hole .5" from the other end of the leather stip. On this end, also use a utility knife to cut a small slit from the hole towards the center of the strip as shown. This hole will be used for clasping the button stud.
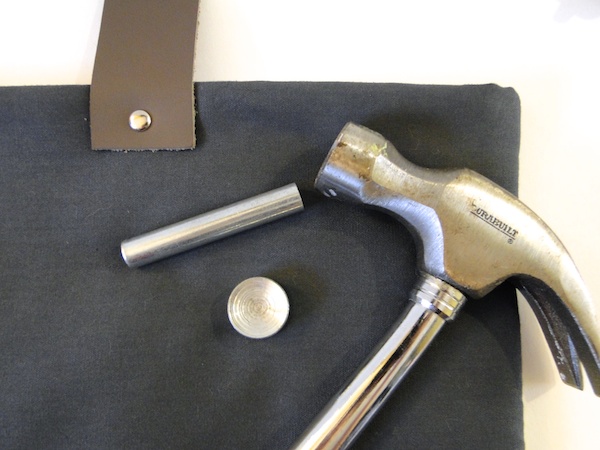
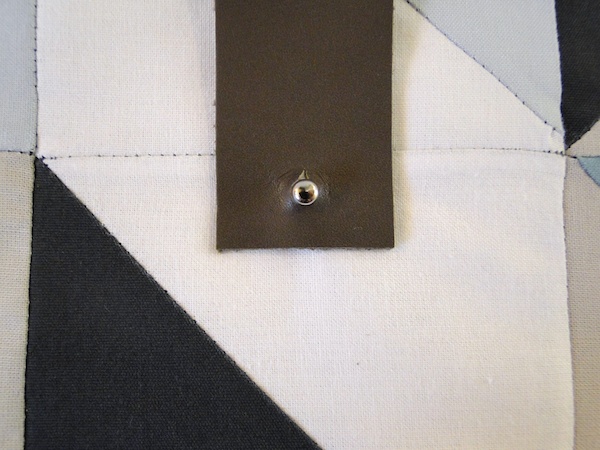
Eight: Install the rivet to attach the leather strip to the back of the of the sleeve (this video is my go-to tutorial for installing a rivet). Install the button stud closure on the front. These are super easy to install. They're two pieces -- including the button stud itself and a back that screws into the stud. You just thread the screw back through the hole from the inside out, and screw the stud right on. Use the slitted hole in the leather strap to open and close the sleeve.
Not too bad, right? What color combos would you use?

find me elsewhere
If you've ever given one of my tutorials or cocktails a try or you've just been inspired by something you've seen here on Fabric Paper Glue, be sure to share a photo. I'd love to feature it!
I adore this Mandy - I just flat out love your style. Well done!
ReplyDeleteI love the patchwork! great color selection! so inspiring!
ReplyDeletewww.annaeversplanb.blogspot.com.es
Bellissimo tutorial !!!! i love your blog...
ReplyDeletefor more inspiration my blog..http://noxcreare.blogspot.it/
and my Facebook:http://www.facebook.com/diynoxcreare
Noemi
Espectacular!!!! Love it
ReplyDeleteHI! Would you happen to sell these? I looked on Easy..... ? Thanks! I am absolutely in love with the black/white and gold one!
ReplyDeleteHi, Desiree. So glad you like it! Unfortunately, I'm not selling this.
DeleteHi Mandy! Thanks so much for the tutorial! I think I'm missing something though--you said to cut 3 pieces of batting, but I only see 2 being used up there. Should I cut an extra piece to line the inside? Thanks!
ReplyDelete