

Try This: Wooden Gems
Today's tutorial will set you back a couple of bucks and ten minutes, and in the end, you'll have a handful of little gemstones ready for whatever projects your imagination can scheme up. Read on for the easy step-by-step and few ideas for how to put these little beauties to use.
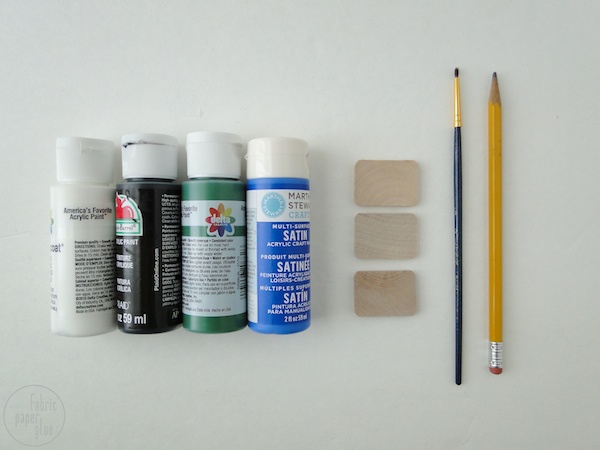
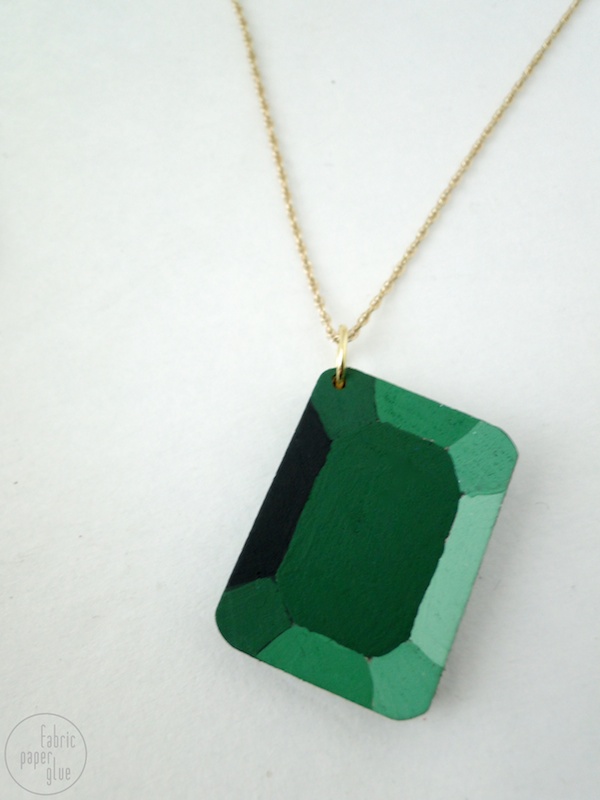
MATERIALS: wooden rectangles, pencil, fine tip paint brush, craft paints in colors of your choosing, black, and white
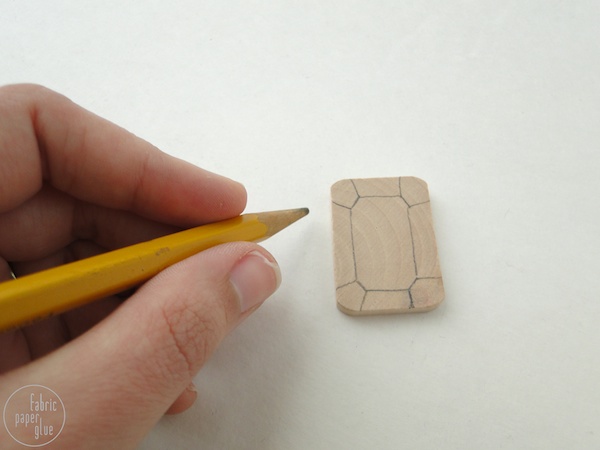
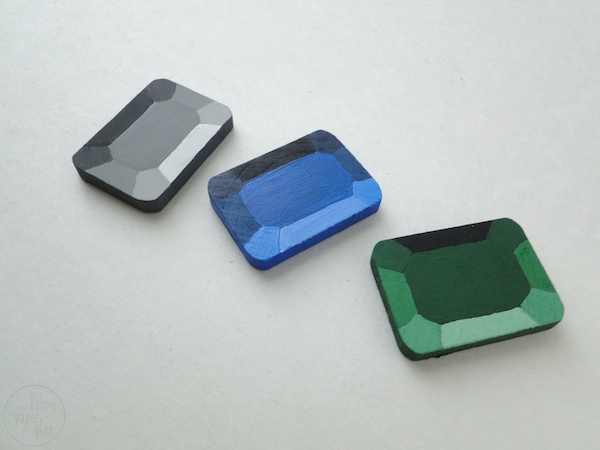
ONE: Begin by sketching the facet lines as shown. They don't have to be perfect.
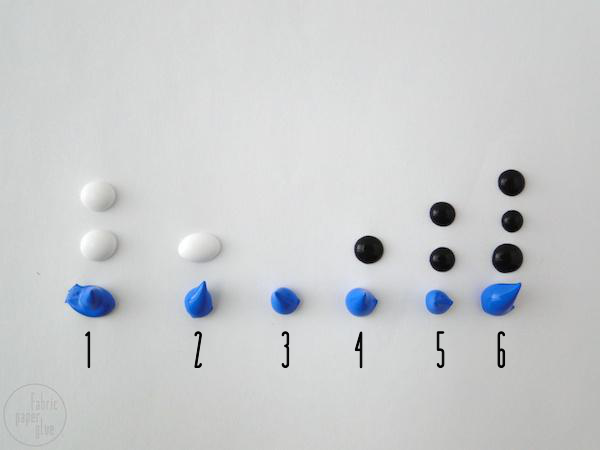
TWO: Mix up six shades of the color of your choosing using black and white paint. Just remember that the black paint goes further when mixed than the white.
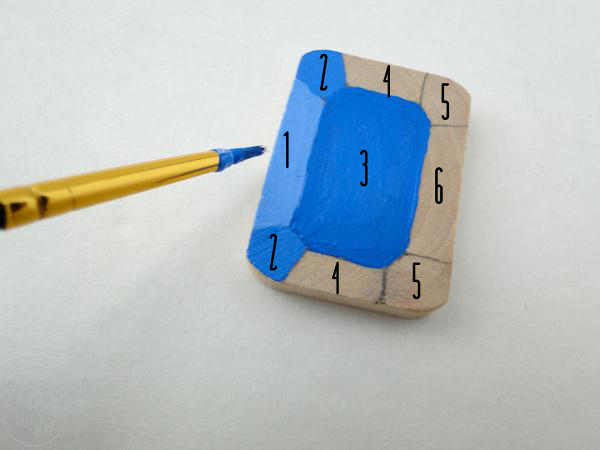
THREE: Use the fine tip brush to carefully paint inside your sketched facet lines. Start with the mid-tone in the middle, and the lightest shade all the way to the left. Work your way around as shown. I painted my edges and the back in the mid-tone as well.

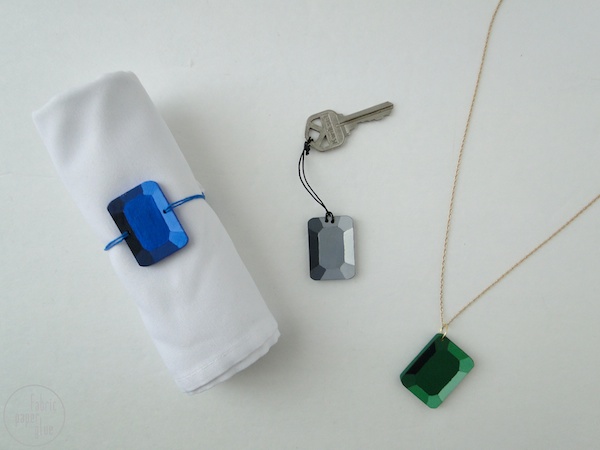
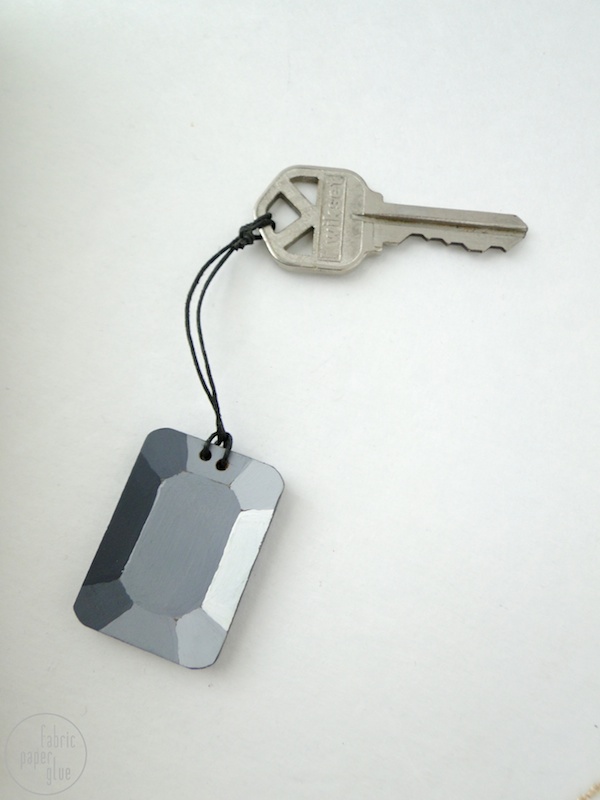
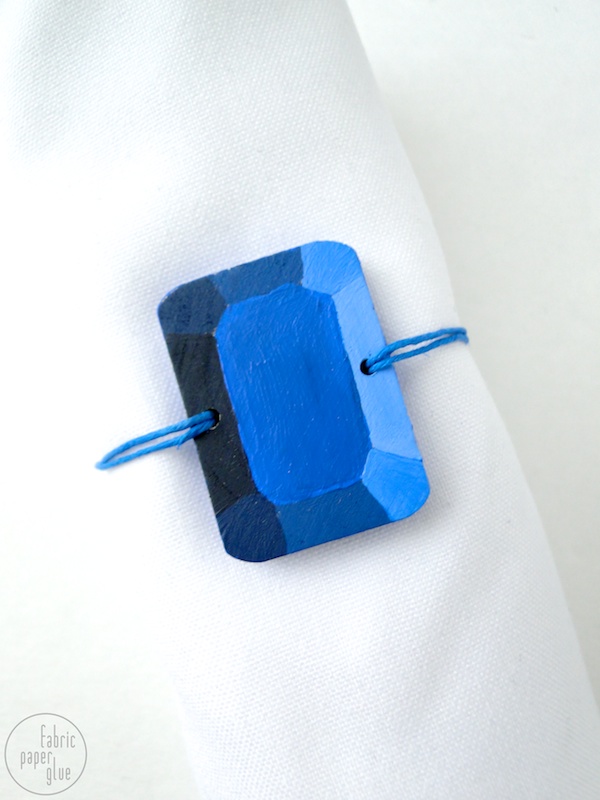
Try out some other colors and use them in all sorts of ways...jewelry, keychains, napkin rings. I could see these making all kinds of great little details for a shower. How would you put them to use?

find me elsewhere
Wooow,looks so real.
ReplyDeleteBest compliment of all on this little project!!
DeleteI agree! These look so real, I thought they were carved when I saw the wooden rectangles but then I didn't see a knife and was really confused! I love the diagram of the paint blotches to show portion control; very clever!
DeleteJust wondering where you got those wooden rectangles from?
Thanks!
super amazing DIY - PINNING THIS! XO,
ReplyDeletewww.preppyandfunny.wordpress.com
Glad you like it! Thanks for Pinning!
DeleteMandy - this is so stinking cool!!!! I LOVE IT
ReplyDeleteThanks, Jess!
DeleteI absolutely love these! I wish I had had a shading tutorial like this when I was a kid! I've posted two photos on my blog truebluemeandyou and reblogged it onto my kids crafts blog on Tumblr. So many possibilities with these like a colorful bracelet etc...
ReplyDeleteHey there. I'm glad you like it, and thank you SO much for sharing with your readers!
DeleteHoly crap. This is amazing. You are brilliant!
ReplyDeleteGreat project! Love it so much, the 3d effect came out perfectly! ;)
ReplyDeleteSeriously...I thought they were real. AND...then when I realized they were wooden, I was for sure that you used metallic paint. Fooled again! Awesome little project! I may make some earrings for myself with this little idea!
ReplyDeleteSo coool! Love this project! I sooo wanna try this, but I probably wont find any wooden rectangles where I live :(
ReplyDeleteCan I try this on something else?
Sure thing. I imagine you could try it on any material you like!
DeleteCan i do it on shrink plastic some way? What kind of other material can I use?
DeleteAwesome!
ReplyDeleteDelfien - Operation DIY
this is so clever! I love it! :D
ReplyDeleteWonderful diy! Hope you'd check out my blog as well
ReplyDeletehttp://nikitabiswal.wix.com/conundrum
I'd love some feedback on the page! Thank you!
This is creativity at its best... Sharing it on my page :)
ReplyDeleteThank you very much!
DeleteThey look so real! And it seems to be fairly easy to do. My only "problem" would be the sketching part. Thanks for sharing!
ReplyDeleteI thought it was a 3D gem. It's pretty. Added to my pinterest board and todo list!
ReplyDeletewhat size wooden rectangles did you use?
ReplyDeleteThey're probably about 1.25" long and 1" wide.
DeleteWoah! I looks like it was curved!
ReplyDeleteAwesome! That looks so real!
ReplyDeleteSuper stellar DIY - thanks for sharing! Definitely pinning for later.
ReplyDeletee m m a ▼ d e e r
You just blew my mind!! My 9 year old and I have been freaking out over here :) So clever!!!
ReplyDeleteSo cute!
ReplyDeletewww.alixhamilton.blogspot.com
Wow really beautiful fabric papers
ReplyDeleteThank u so much
I found your post on stumbleupon.com
Love this! thanks for the toot!
ReplyDeleteI am amazed at these. What a great gifts these would make! Thanks so much for the inspiration! This is a pinner!
ReplyDeleteThose are so neat!
ReplyDeleteWow! These are amazing! I definitely need to try.
ReplyDeleteI'm just wondering, is there a best method for sealing the paint?
Nice! Very creative. I didn't know one can do these with woods. Thanks for posting
ReplyDeleteAwesome .. and good illusion..
ReplyDeleteThis is so completely awesome!
ReplyDeleteThis is amazing!! What an awesome tutorial! Thanks for sharing!!
ReplyDeleteThese remind me of Rupees from Legend of Zelda haha. I'm definitely going to be making myself a few of these.
ReplyDeleteTotally have to try this out - what a great idea! Thanks for sharing!!
ReplyDeletewhere did you get the wooden rectangles?
ReplyDeleteI got them from the craft store -- Hobby Lobby, I think.
DeleteThis text may be value everyone’s attention. How will I learn more? Cartilage Earrings
ReplyDeletehow did you make the holes for the key string?
ReplyDeleteI drilled a hole with a tiny little drill bit and an electric drill. You might be able to accomplish the same thing by hammering a small nail through as well.
DeleteThat’s amazing! I had to double take, I thought it was really carved out like a gem! Very cool :)
ReplyDeleteThis is great. Used 5 shades instead of 6 as I was making a rupee (from the zelda games, it has pointed ends). Just need to experiment with the shading some more, and a smaller brush.
ReplyDeleteThat's cool!!! We'll so have to try this out!
ReplyDeleteHermoso trabajo!!!!Ana
ReplyDeleteI've dreamed of gems in watercolor but these visually strong designs are a winner. Thanks.
ReplyDeleteThe pictures you used are so explanatory; very well done and very clever. The paint is so effective that they look like they have the shape of a gem.
ReplyDelete