

Try This: Pink + Wood Bib Necklace
This is such a fun, easy, and uber cheap necklace.

Materials: 10 - 1" Wooden Craft Disks, Drill, Tiny Drill Bit, Acrylic Paint, Paint Brush, Painter's Tape, 35 Gold Jump Rings, Gold Chain, Gold Clasp
These wooden craft disks come in a pack of about 100 of varying sizes for about $3. You're likely to find this kind of thing close to the popsicle sticks in your local craft store.
The jewelry-making supplies are standard materials that I would recommend having on hand for, you know, all your jewelry-making whims.
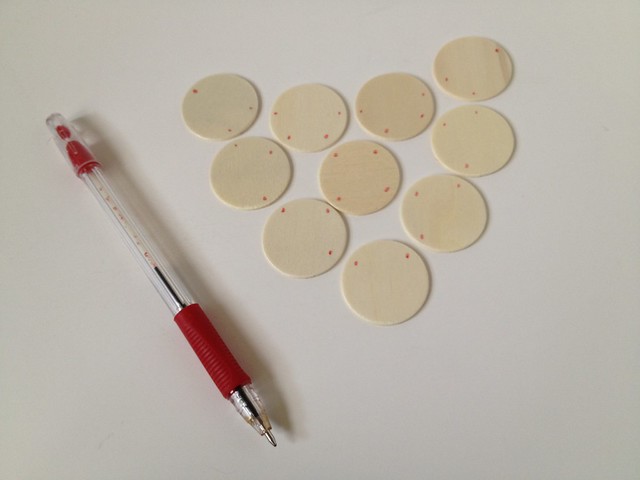
Directions: Place 10 wooden disks in an inverted pyramid shape and lightly mark where each disk would need to be connected to its adjoining disk as shown in the picture.

Using just about the smallest drill bit you can find, gingerly drill a hole where you placed each of your marks. I say gingerly because these craft disks are super thin and may split if you go at it too aggressively. If you want, you can give them a light sand at this point to avoid any little splinters.

For each of the following steps, I recommend keeping each disk in its place as you might easily get confused at the end otherwise. Now, tape off a portion of each disk. I just did it sort of randomly, varying the side that the paint would be on and the portion of the disk that would be painted.

Paint!


After you've removed the tape, put a jump ring through each of your drilled holes. Jump rings are super bendable. Just use a couple of pairs of pliers - one in each hand - to bend them open, and then slip them right into the drilled holes.

Now combine all the disks together by adjoining and closing each jump ring.

Attach the chain to the two end jump rings. Other than to shorten the chain to the desired length, you shouldn't have to open links of the chain, but if you do, you do it the same way as the jump rings--with two sets of pliers. Add the clasp by attaching it to the end of the chain with yet another jump ring. On the other end of the chain, I added two jump rings so that I can wear the necklace at two different lengths if I want. You can more or fewer. And you're done!


I got Michael to take this super awkward picture of me so that you get an idea of scale (and awesomeness). Has anyone noticed a pattern in my vocabulary choice when describing pictures of myself? I'll give you a hint: AWKWARD! Although, sometimes I'll use such qualifiers as 'super' or 'painfully.'


find me elsewhere


I love this!!!! GREAT job. I want (to make?) one.
ReplyDeleteThis looks great! I think your photo is cute!
ReplyDeleteI LOVE this necklace. Just discovered you on craftgawker, and can't wait to keep following :)
ReplyDeletelove this!! i have to make one soon!!
ReplyDeleteOhhh this is just adorable! Love it! :) Thanks bunches for sharing!
ReplyDeletexo Jenny
Created my own version of your adorable necklace. Thanks for the inspiration! Can be found here, http://www.facebook.com/SimplySuz2012
ReplyDeleteTurned out great! Thanks for sharing!
Delete