
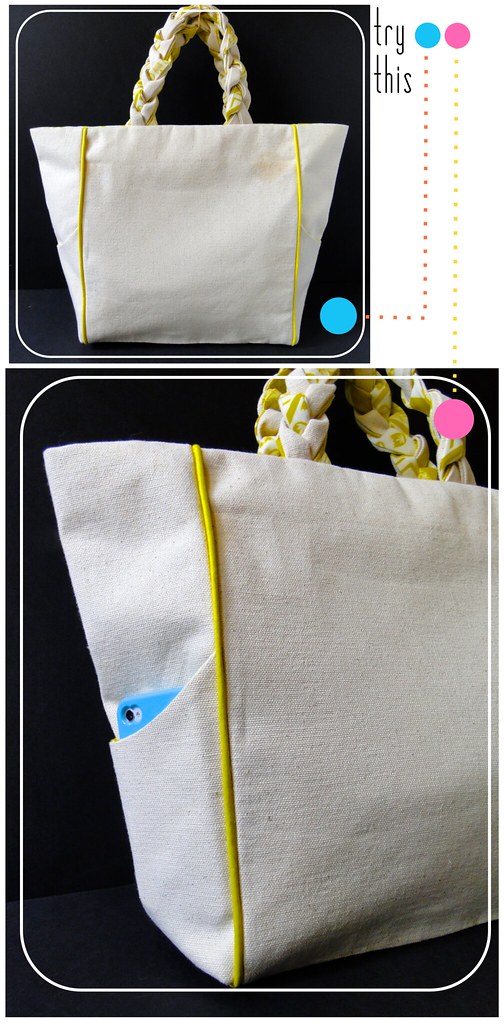
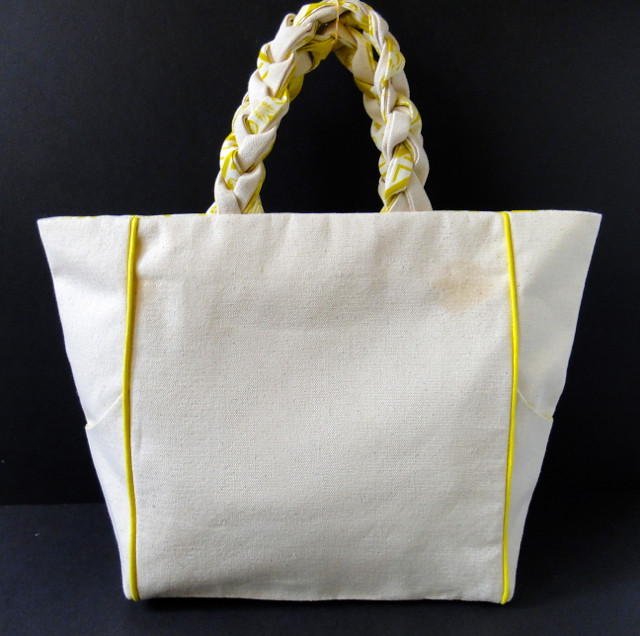
Try This: Piped + Pocketed Canvas Tote Bag
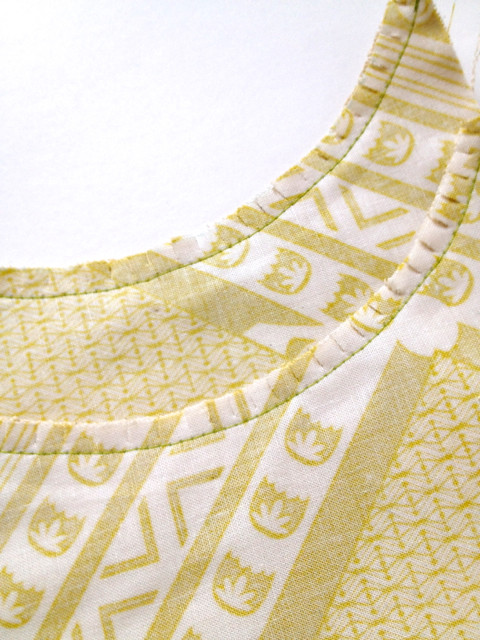
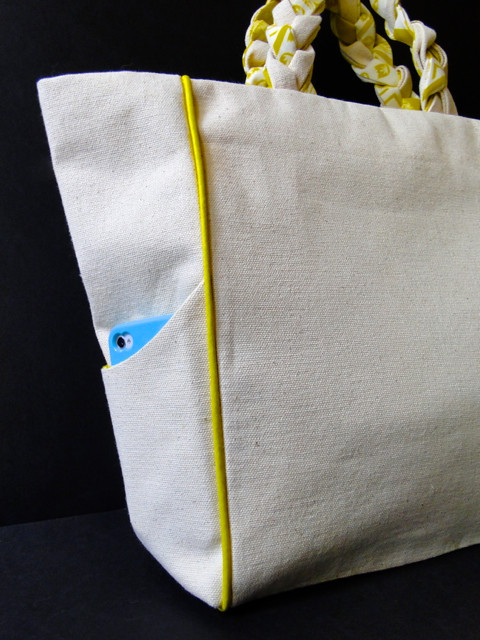
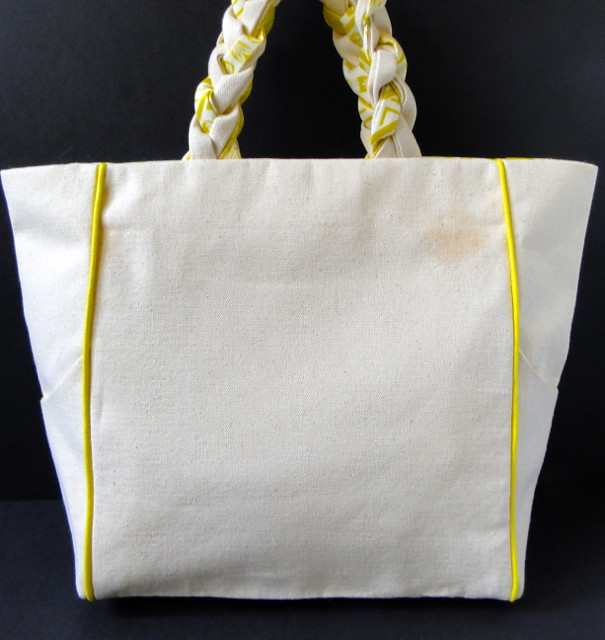
I like tote bags, and I cannot lie. [How I hope that you got the beat on that right.] Seriously, I am loving myself some bag projects lately. This one is a winner for sure. I've been carrying it around for a couple of weeks, and I assure you that it will fit everything you need. And bonus: there's some unexpected details like the uber-convenient side pockets, the bright piping, a bold lining, and some braided handles, just for good measure.
Read on for the full tutorial.
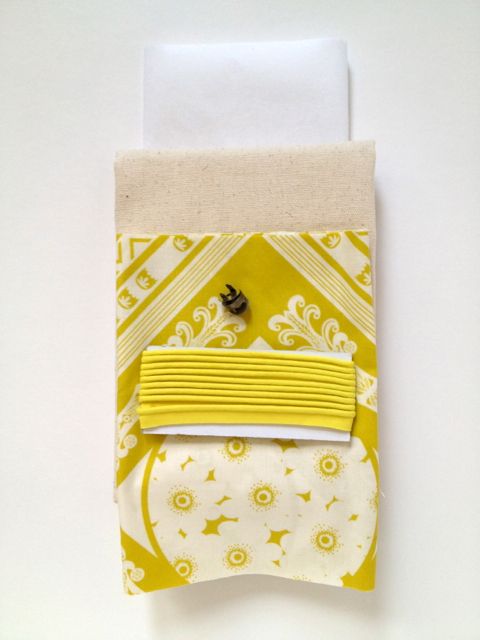
Materials:
(1) Magnetic Snap Closure
Natural Canvas in the following cuts:
(2) 12" x 16" (i.e. canvas front/back panels)
(2) 7" x 16" (i.e. canvas side panels)
(2) 7" x 11" (i.e. canvas pocket panels)
(6) 2" x 22" (i.e. canvas braid strips)
Bold Patterned Cotton in the following cuts:
(2) 12" x 16" (i.e. lining front/back panels)
(2) 7" x 16" (i.e. lining side panels)
(2) 7" x 11" (i.e. lining pocket panels)
(6) 2" x 22" (i.e. lining braid strips)
plus extra for a pocket (optional)
Medium-Weight Sew-In Stabilizer in the following cuts:
(2) 12" x 16" (i.e. front/back panel stabilizers)
(2) 7" x 16" (i.e. side panel stabilizers)
Heavy-Weight Sew-In Stabilizer in the following cuts:
(2) 2.5" x 11"
Piping in the following cuts:
(4) 16"
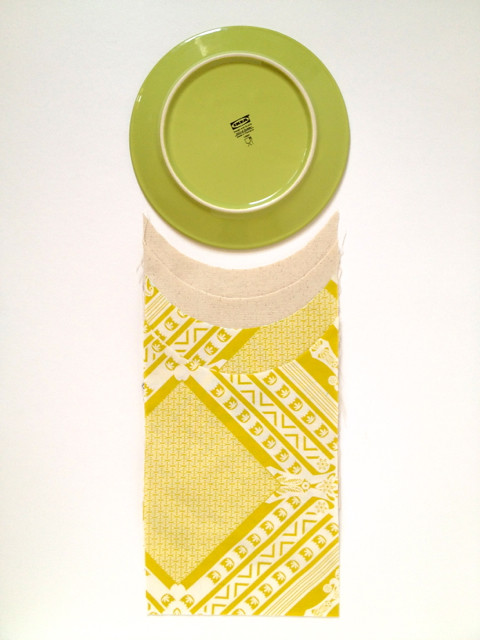
One: Using something round like a salad plate as a template, make a concave cut into the top edge of each of the canvas and lining pocket panels.
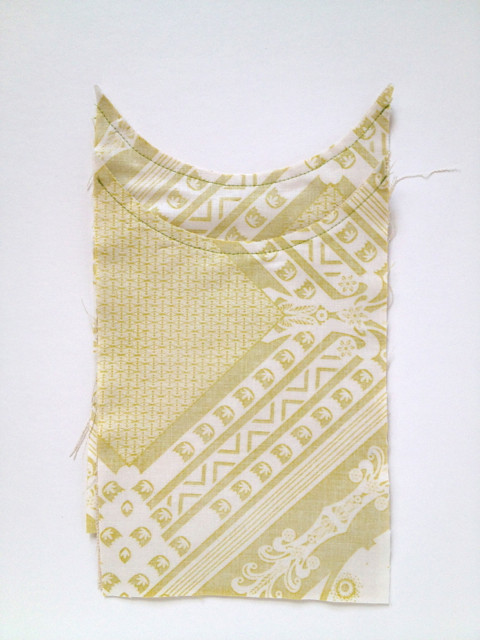
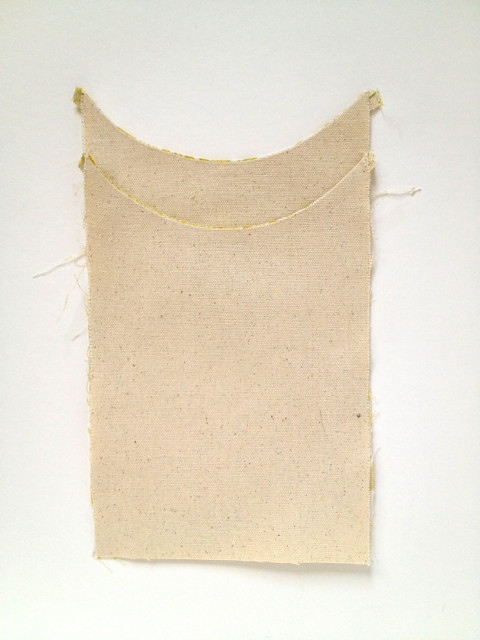
Two: With right sides facing one another, sew together one lining pocket panel and one canvas pocket panel along the concave edge. Clip the seam allowance. Turn right side out and press. Repeat with the other set of pocket panels.
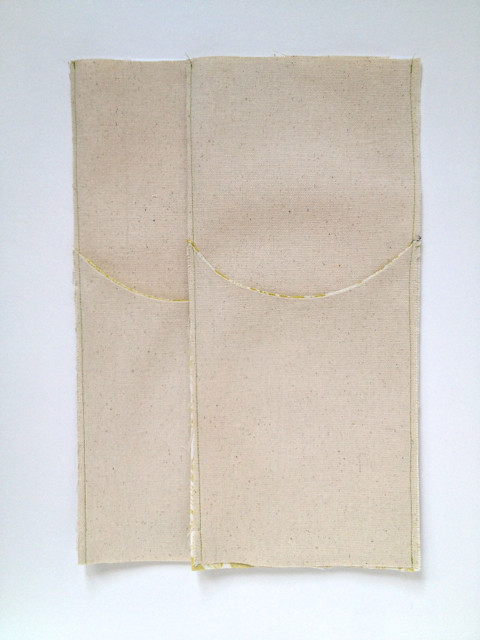
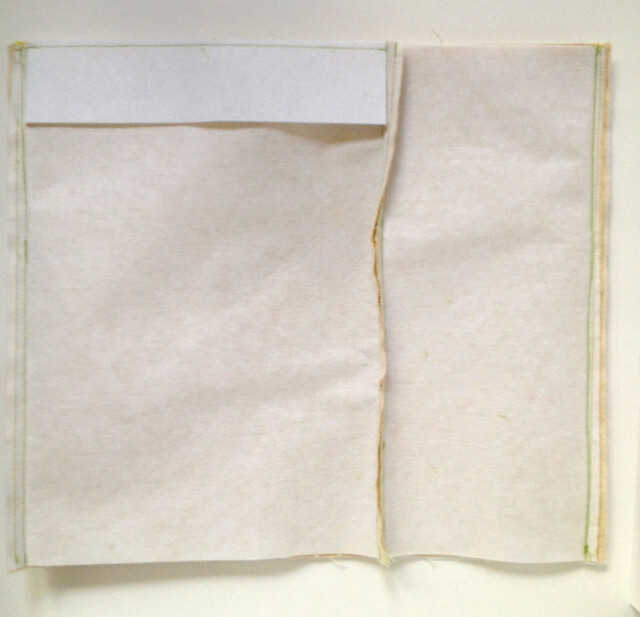
Three: Sew each completed pocket panel to the front of the side panels. Stitch along the edge as closely as you can. You can also use this step to stitch the medium-weight stabilizer into place on the back along the sides of each canvas side panel.
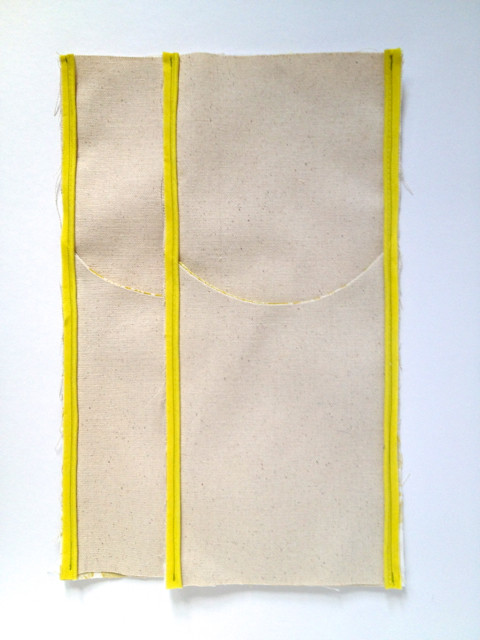
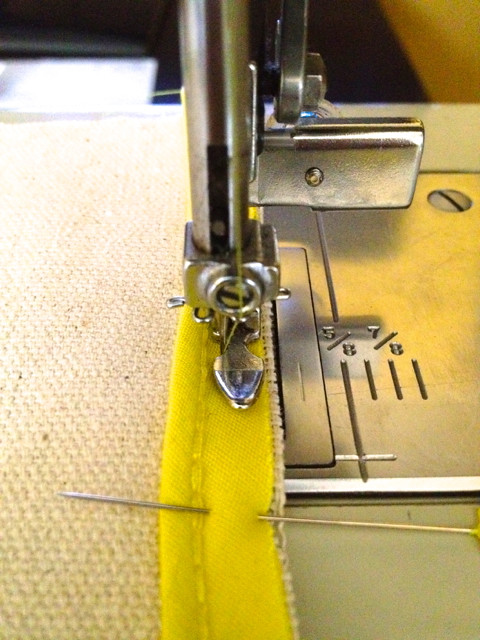
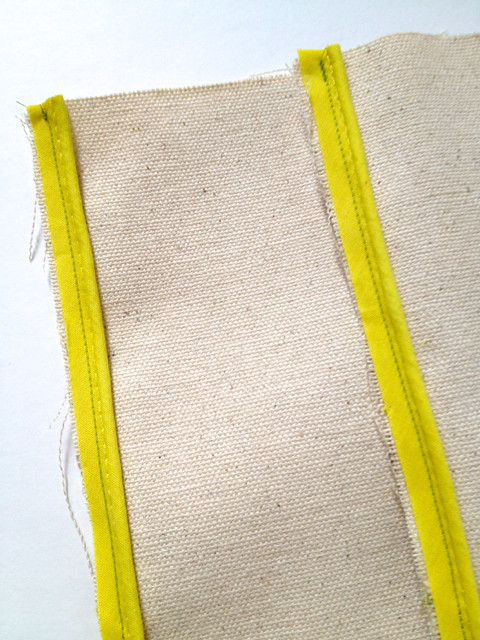
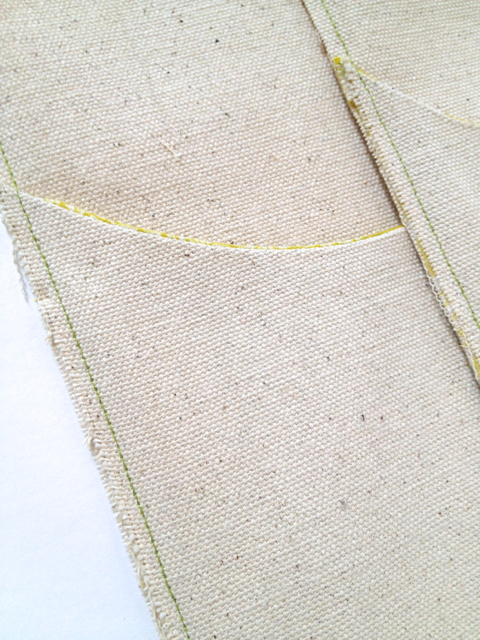
Four: On each edge of each side panel, stitch the piping into place with the piping facing inward toward the pocket. To get the piping stitched nice and close, you might want to try out a zipper foot. They also make piping feet for sewing machines just for this purpose. I don't have one, so I used my zipper foot.
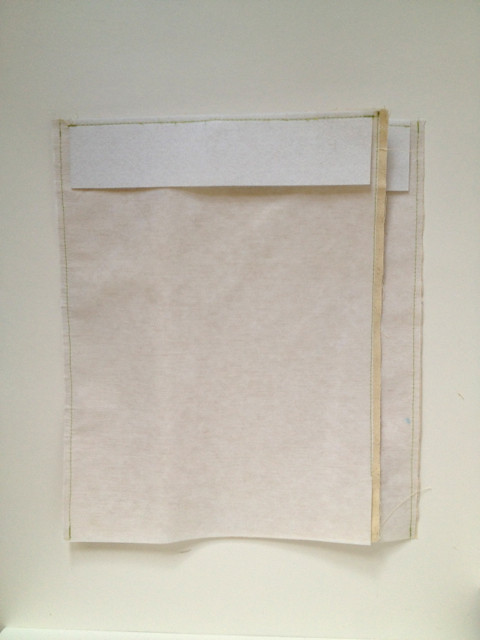
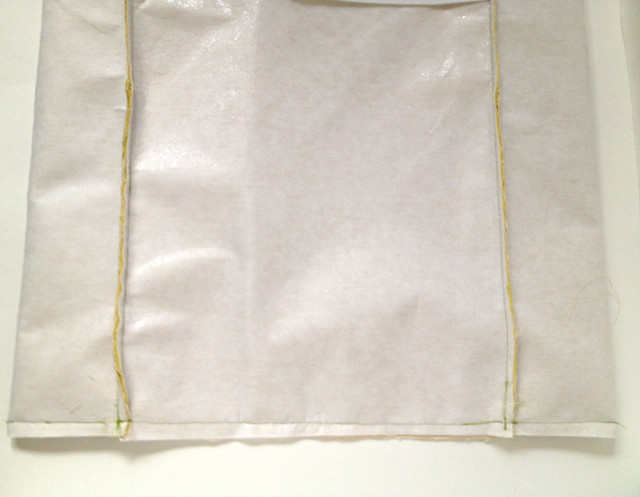
Five: On the back of each of the canvas front/back panels, stitch into place the medium-weight stabilizer along each 16" edge and the strips of heavy-weight stabilizer centered along each top edge.
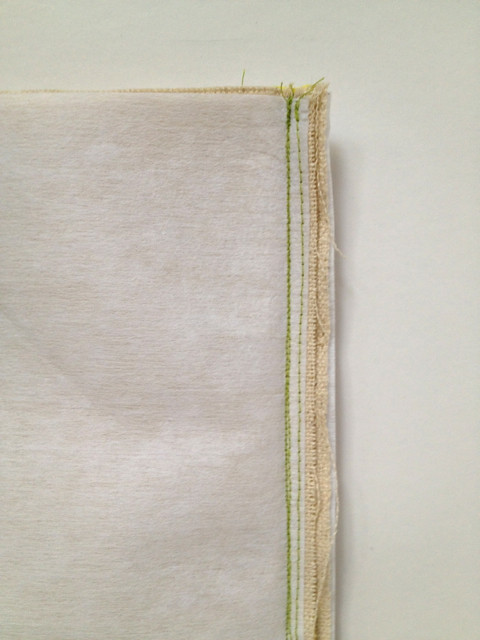
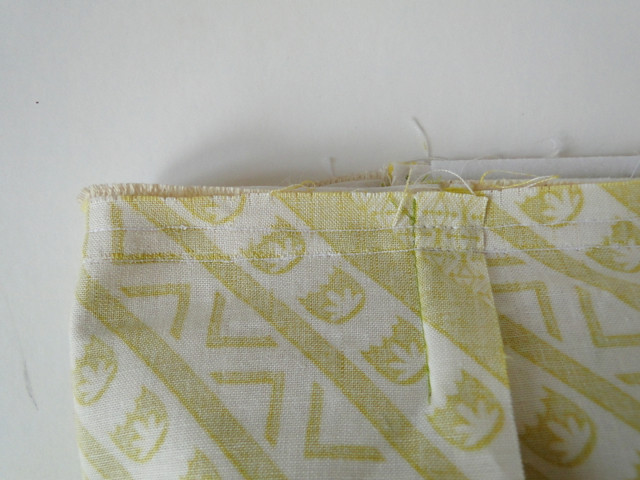
Six: Stitch all the canvas panels together, right sides facing, along the 16" edges. You'll be sewing the canvas front panel to one canvas side panel to the canvas back panel to the other canvas side panel back to the canvas front panel. You'll end up with a tube of sorts. In doing so, make sure that your stitches are to the inside of those you did to stitch everything (stabilizers and piping) into place. Otherwise, you'll end up with errant seams on your finished product. Again, you'll want to use something like a zipper foot for this step so that your stitches are as close to the piping as possible.
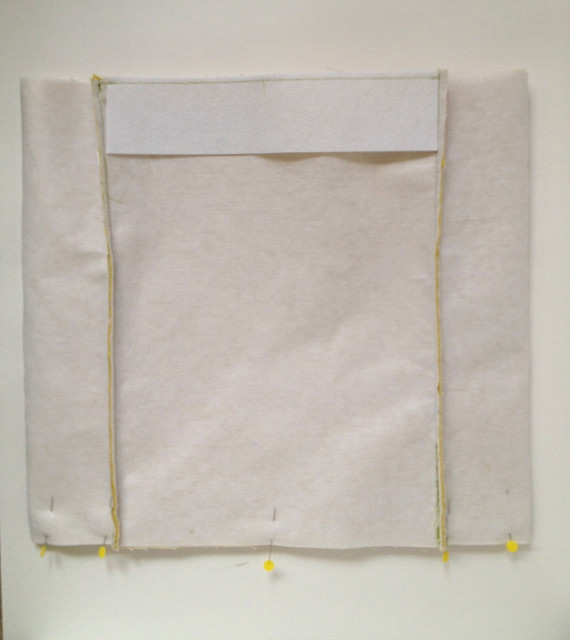
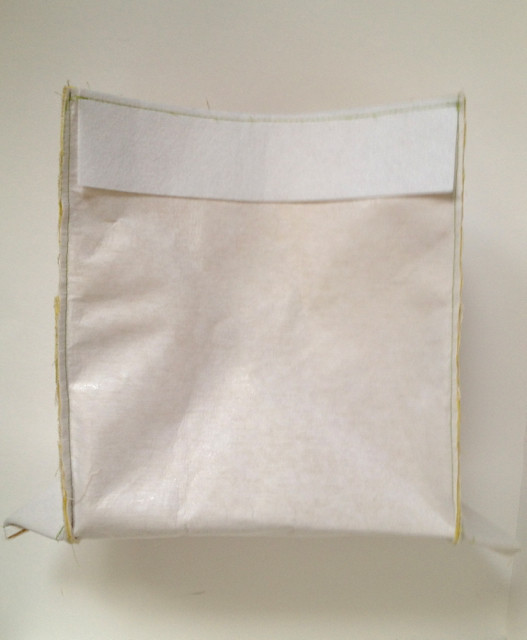
Seven: Flatten your "tube" such that the piping/seaming on one side is lined up perfectly with the piping/seaming on the other side. Pin the bottom of the bag (which is the side without the strips of heavy-weight stabilizer) and sew along the edge.
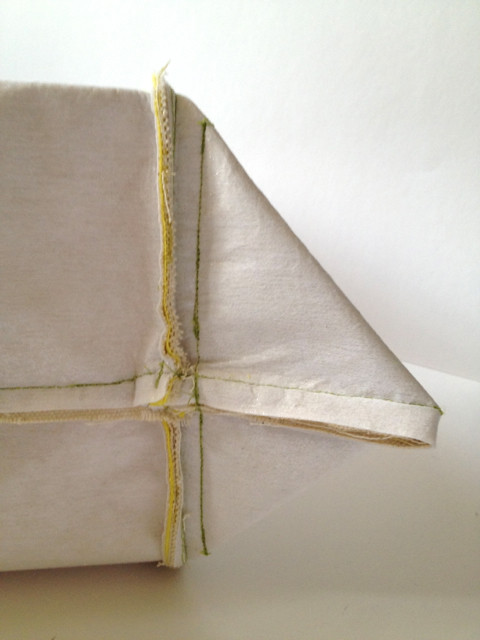
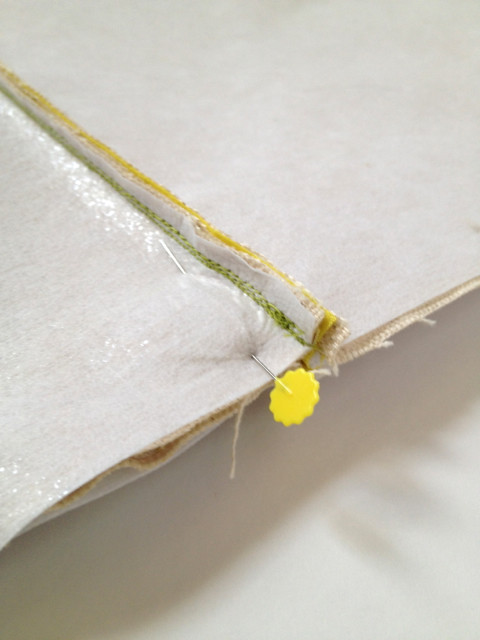
Eight: Box the bottom corners as shown in the picture by creating a flat triangle in each corner such that the bottom seam of the bag forms a straight line from the tip to the very middle base of the triangle. Pin the triangles into place and stitch along the triangle's base just outside of the piped seams (see pictures). Trim the excess fabric. Ugh, was this step confusing?
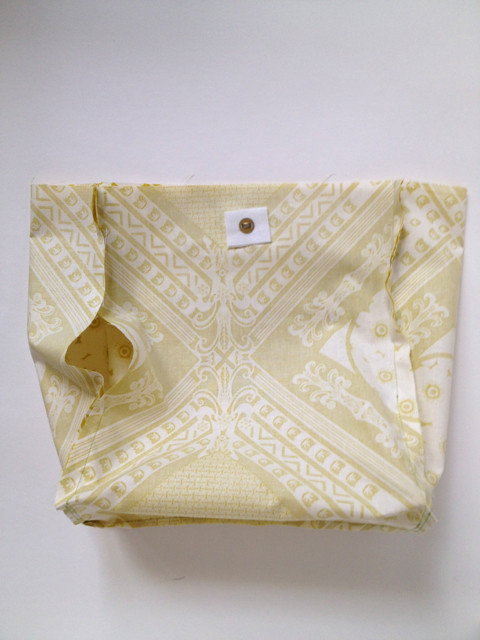
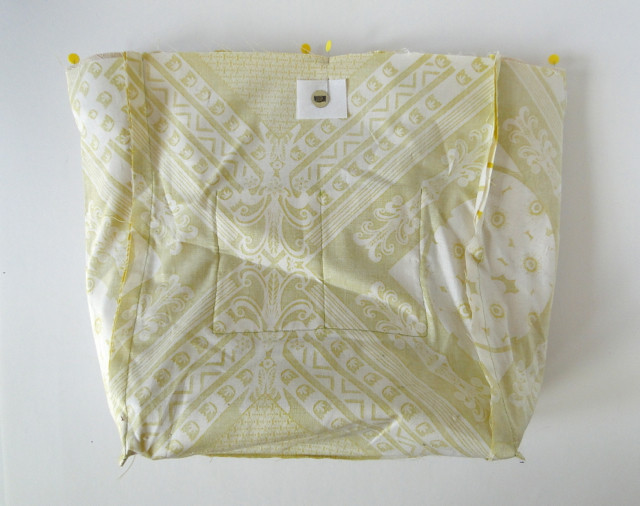
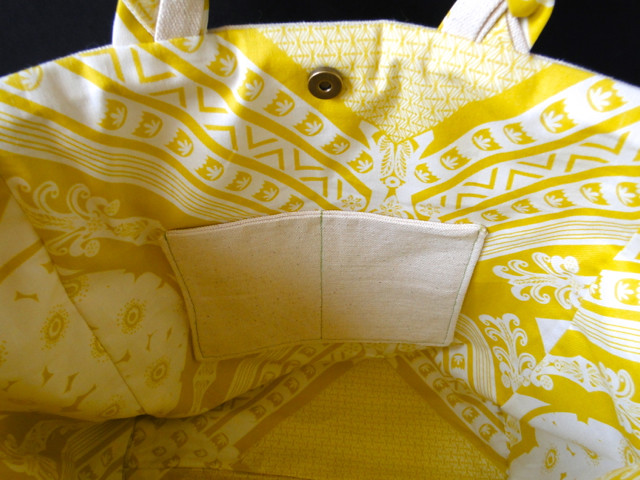
Nine: If you want to sew any pockets into the lining, you'd do it at this point. Now, repeat steps Six through Eight with the lining, but leave an unstitched stretch of fabric about 6" long in one of the sides. This is also the point at which you'd install the magnetic closure in the middle about 2" from the top edges.

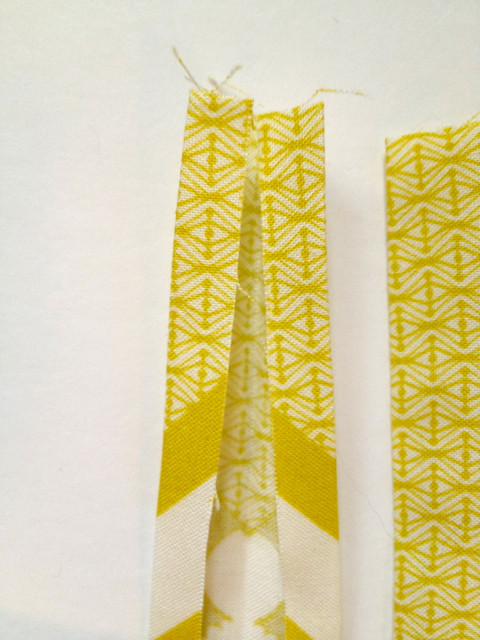
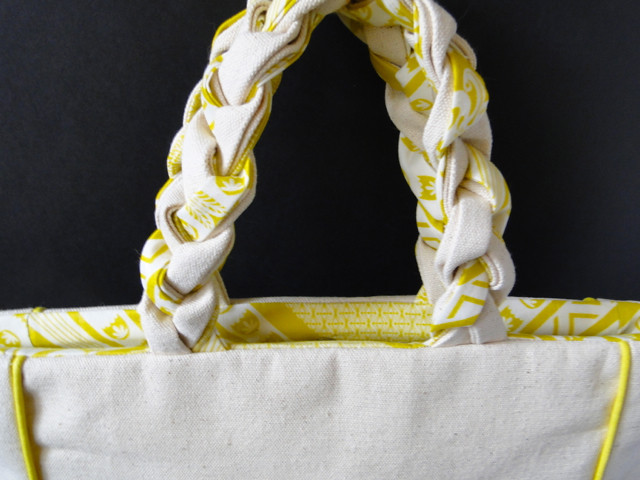
Ten: To begin to make the braided handles, press each of the braid strips by folding the edges of each strip in and then pressing in half -- sort of like a double fold bias tape.
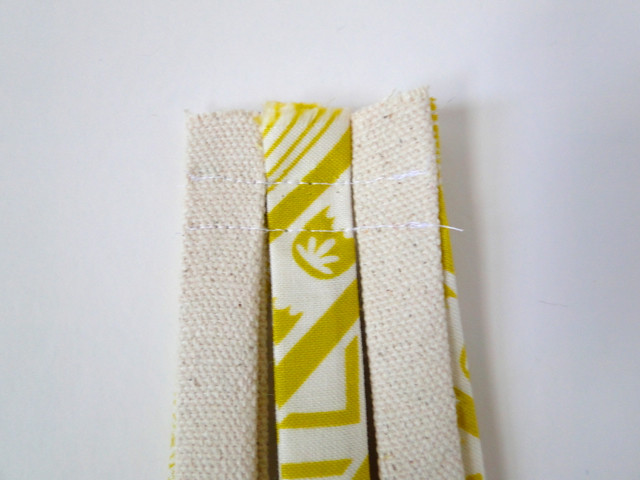
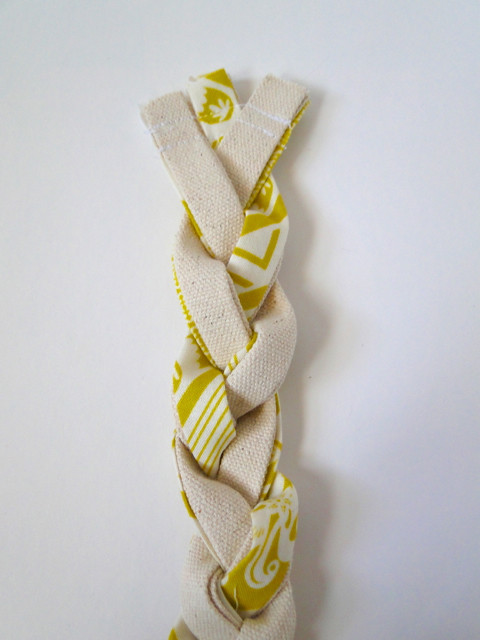
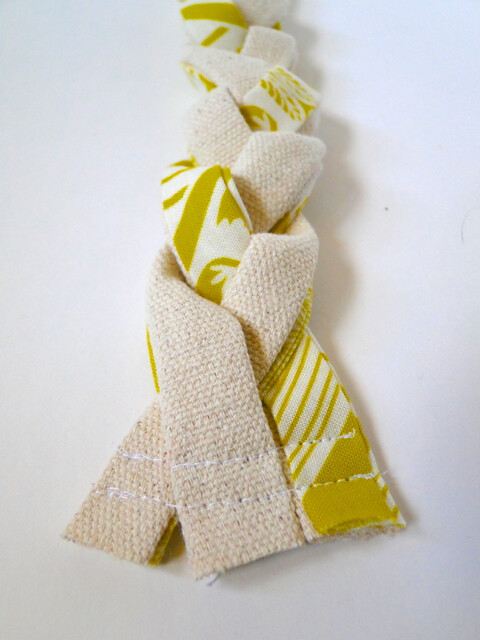
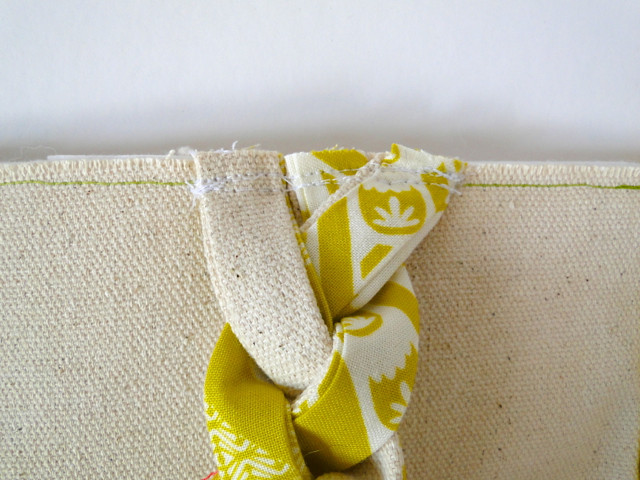
Eleven: For each braided handle, you'll use 3 canvas braid strips and 3 lining braid strips. Create three combo strips by stacking a canvas braid strip directly on top of a lining braid strip. Then stitch together all combo strips side-by-side. Braid them and stitch together at the end similar to the beginning. I stitched them twice on each end for good measure. Repeat with the other set of braid strips.
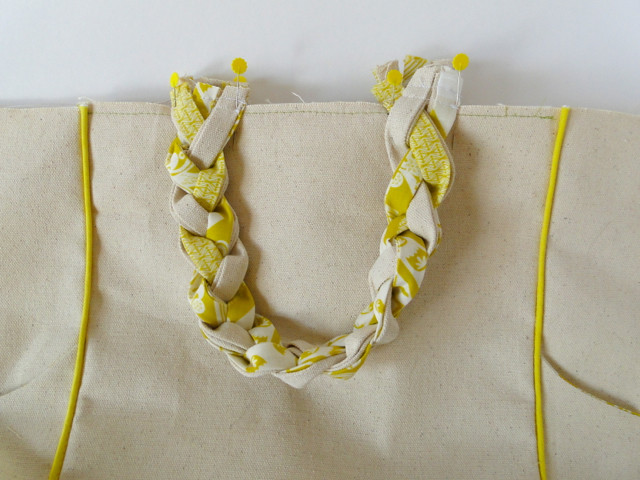
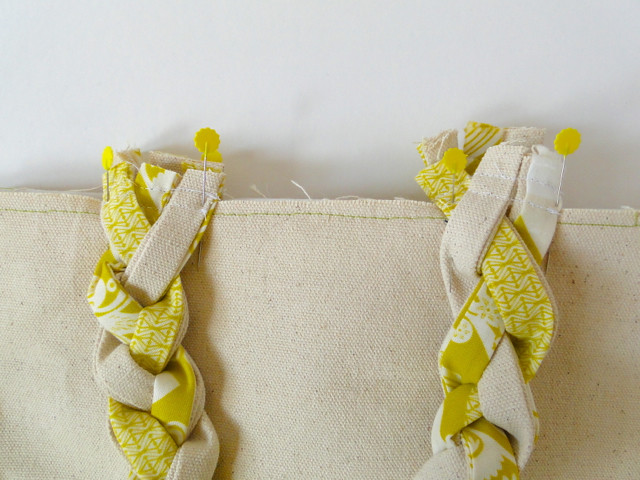
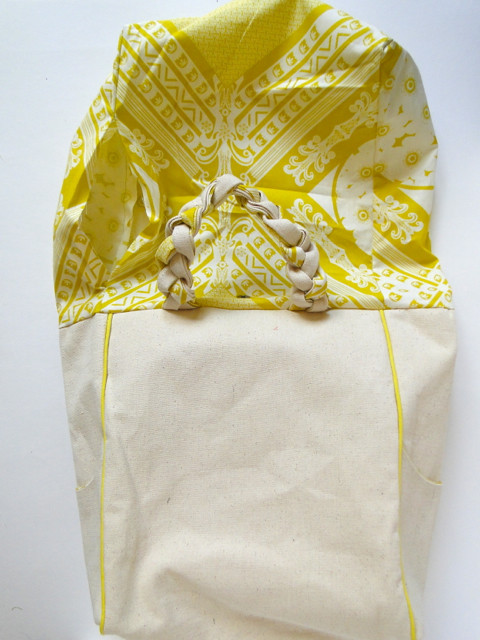
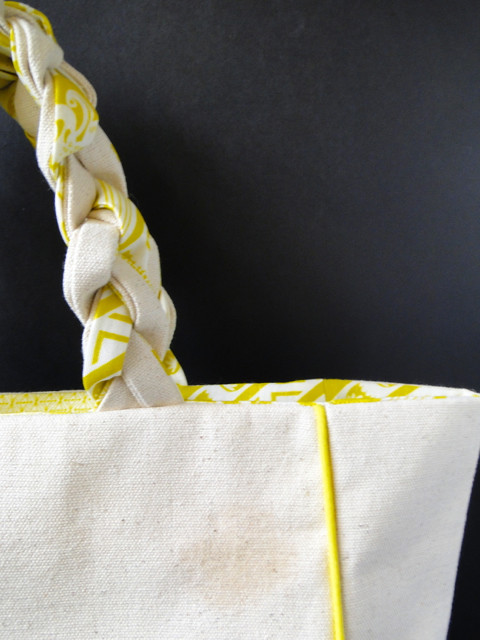
Twelve: After turning the canvas bag right side out, pin the ends of the braided handles into place on the top of each side of the canvas bag with the handles hanging downward as show in the pictures. I placed each end about 2" from the piped seam. Stitch each end into place and trim the excess. I stitched mine twice, again, for good measure.
Thirteen: Place the canvas bag into the lining, which should be wrong side out, with the handles inside between the two bag pieces (vs. sticking out). Line all the seams up, pin, and stitch the two together along the top edge. Do a double seam to give it some extra strength. Make sure your inner most stitch in this step is inside the stitch that you made to hold the handles in place.
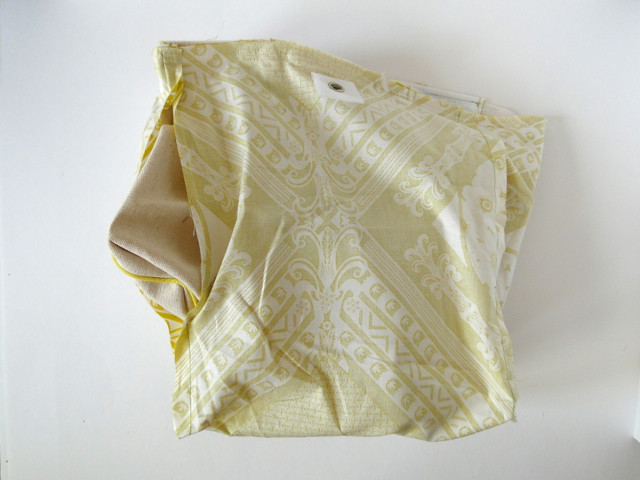
Fourteen: Pull the whole bag -- lining and all -- through the hole you left in the lining. Top stitch the hole shut. Tuck the lining in, and press.
Now, stick everything you own or might ever need into this roomy little guy.
If you do give this tutorial a try, please be sure and share a picture through the "Share Your Projects" link at the top of the blog page. I'd love to feature some!


find me elsewhere
Oh this is way cute! I think I may have to make myself one.
ReplyDeletethis is awesome! I love the side curved pockets and the braided handles - very cute! I hope you will consider putting it in SewSet, love it!!!
ReplyDeleteThanks so much, and have a great holiday weekend!
I absolutely love this, especially the braided handle. I just found your site via craftgawker and have been having fun going through your past projects!
ReplyDeleteI would love to have you add this to a collective link party I co-host, Eat Make Grow: http://www.hideousdreadfulstinky.com/2012/08/eat-make-grow-thursday-5.html
I host along with two other bloggers, so one link shows up on all three blogs, and we feature a couple of bloggers each week. We're always looking for great content like this! Hope to see you over there.
really love the piping detail and side pockets! Nice job!!
ReplyDeleteI love your tote tutorials! Sadly, it is the sewing part that escapes me ... one day! :) I love the yellow & the braided handle!
ReplyDeleteBeautiful! I love the braided straps.
ReplyDeleteLove the bag. I am currently trying to make this. but i am kinda lost at the pocket part. why is the pocket broader (11") than the panel (7")??? your pic looks same...can you clarify the dimlit that i am?? have i missed something??
ReplyDeleteIn your pocket pic - the breadth looks the same for the panel and the pocket. you say the pocket is 11X16 and the panel is 7X16. Or have i tilted the pattern? i am kind of confused here. please reply asap..!! and ya i am Sudha from India :)
DeleteOh, my. Good catch! I just updated it. The side panel should be 7" x 16" and the pockets should be 7" x 11". So sorry about that!
Deletethank God...i was beaking my head from mornin over this...heh heh happens..!!! thanks for the quick reply....shall resume the sewing and post you pics....although i dont find such gud canvas fabric here...sigh..!!! wil post my version soon..!!
DeleteLove the pockets and the shape of the overall tote. You may've just convinced me to try piping for the first time. :)
ReplyDeleteWhat is the finished size of this bag?
ReplyDeleteThis is ULTRA cute!!!
ReplyDeletehi,thanks for sharing this amazing tut..i have made so many bags using this concept n varitions too! and i was really happy with the output.
ReplyDelete