
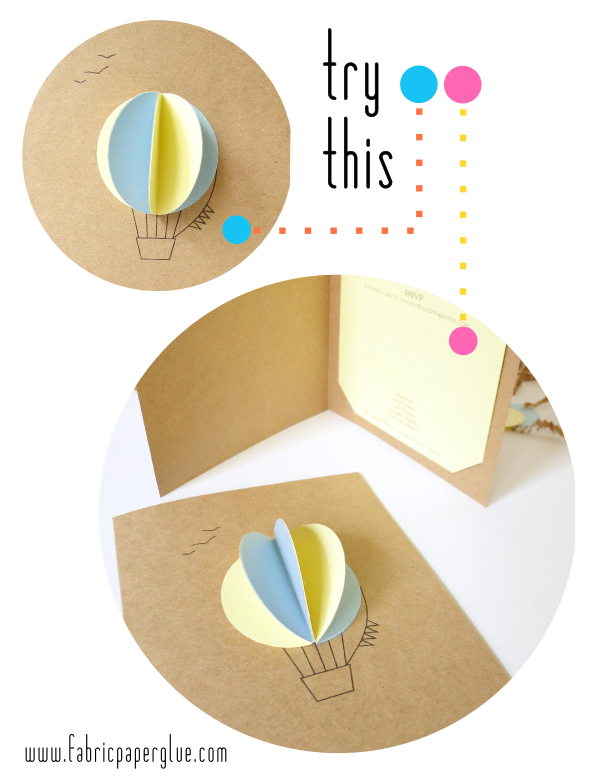
Try This: Hot Air Balloon Baby Shower Invitations
I am in the midst of planning a baby shower for one of my very best childhood friends Alison. Alison's got big plans for a hot air balloon-themed nursery, so I'm hoping some of our shower decor can pull double duty as nursery decor. Keeping with the theme, I DIYed some invitations that are maybe the single cutest thing that I've ever created and set me back a whopping six bucks plus postage. Such success calls for a tutorial, no?
Read on for the full step-by-step and a bonus pic of Alison and me on our first day of high school. Trust me, it's worth it. The awkwardness is priceless.
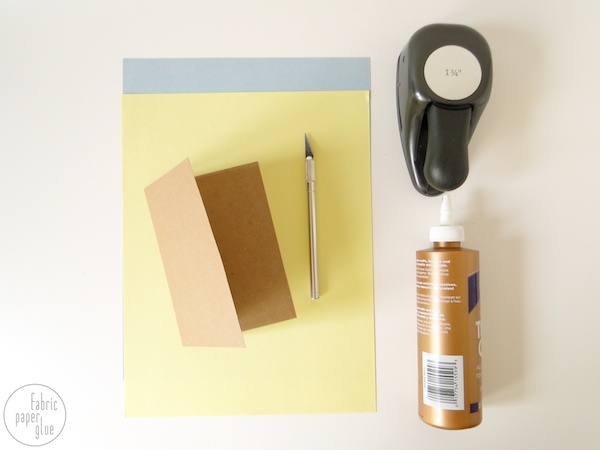
MATERIALS: Card Stock, Blank Cards, Craft Knife, Circle Punch, Craft Glue, Cute Fonts, Home Printer
I mentioned how cheap these were for me. All I had to buy were the cards, which were $6 for two packages of 25 at the craft store. The card stock was free -- a gift from a coworker who had cleaned out his house and uncovered a whole stash of it and thought of me, and I had all the other supplies on hand.
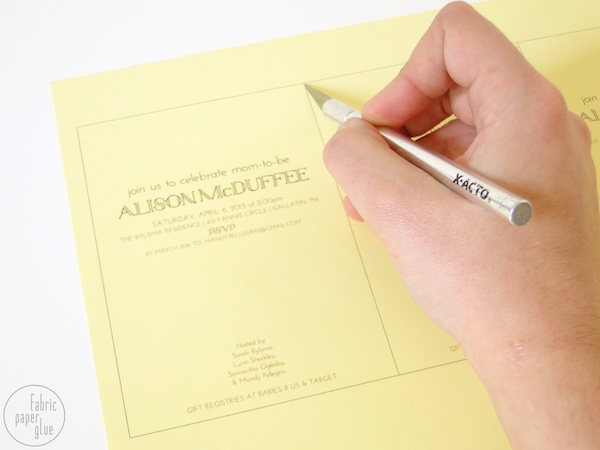
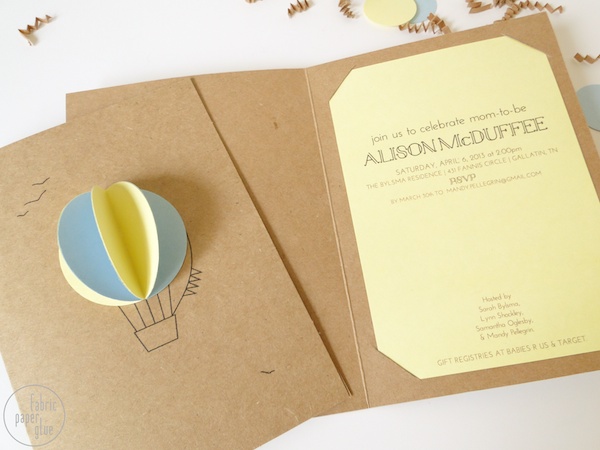
ONE: Begin by designing a simple invitation in your word processing program that measures about 1/4" less all the way around than your blank cards. For example, my blank cards were 4" x 6", so I designed an invitation 3.5" x 5.5". You can accomplish this by manipulating your margins in page set-up. Print them out on card stock, and cut out using scissors or a craft knife.
For my fonts, I used Sail Away and Josefin Sans Std.
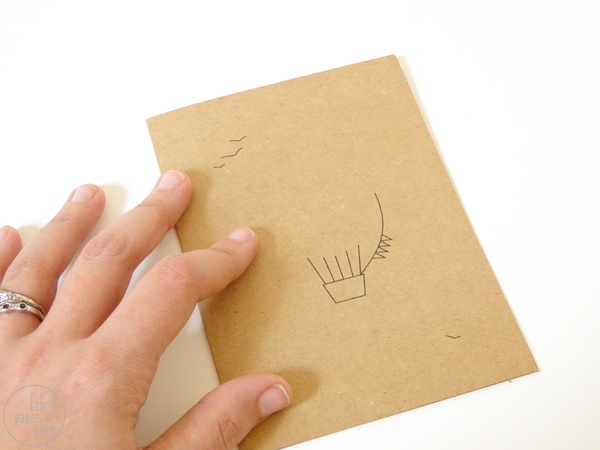
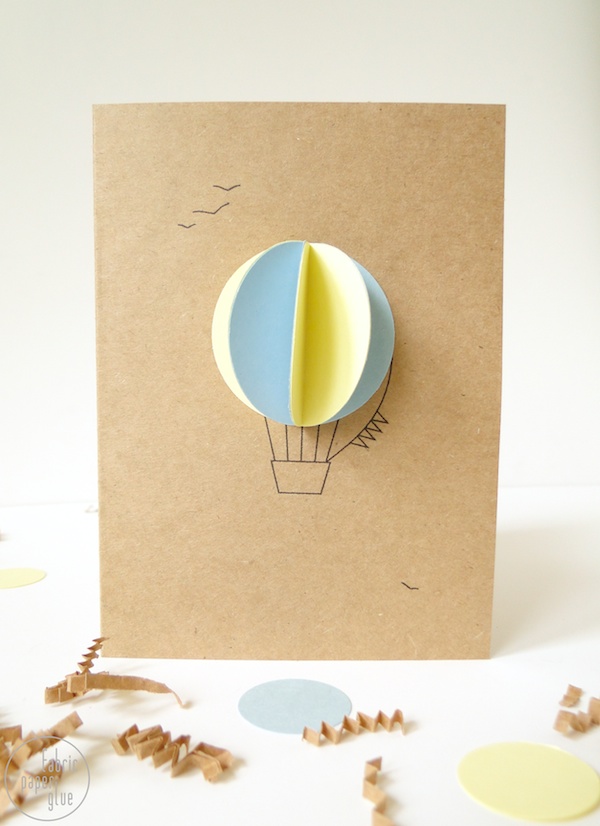
TWO: On the front of each blank card, either hand draw or print the basket for your hot air balloon (maybe some birds, too!). I used this little graphic that I made up (right click on the image to save if you'd like to use it, too) and fed my cards through the printer.
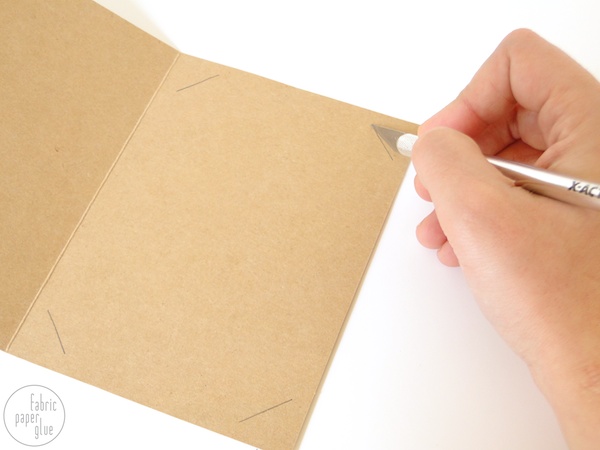
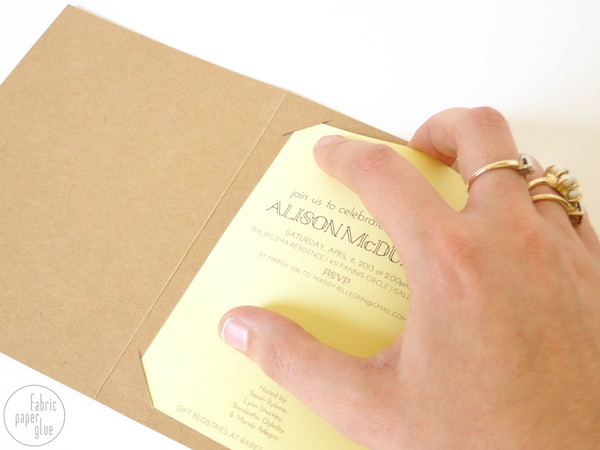
THREE: In the inside of each blank card, mark and cut a diagonal slot about a 1/2" long in each of the four corners, and slip your invitations inside.
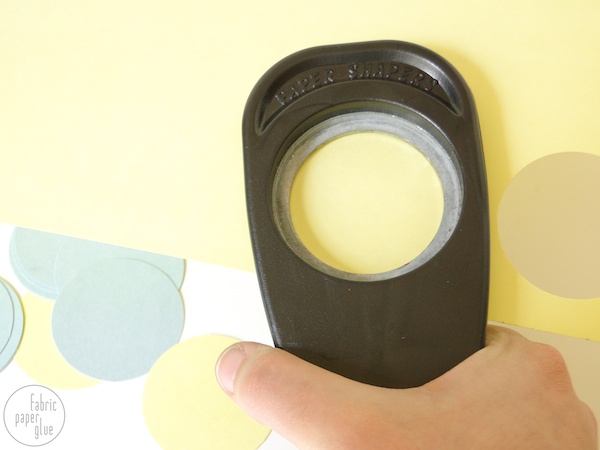
FOUR: Use your circle punch to punch out a whole bunch of circles from your card stock. You'll need four for each card. I did two in each color for each of my cards.
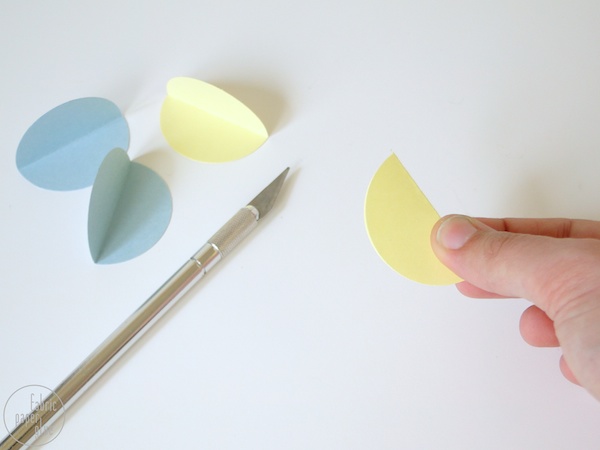
FIVE: Fold each of the circles in half. To get a clean fold, use the back of the craft knife to score a line down the middle.
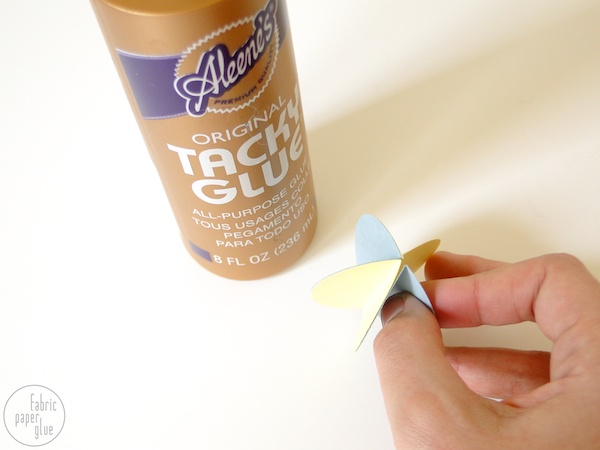
SIX: Glue four of the folded circles together without actually closing the sphere. See that blue one and that yellow one on each side of my big finger? Yeah, those are the ones you don't want to glue together.
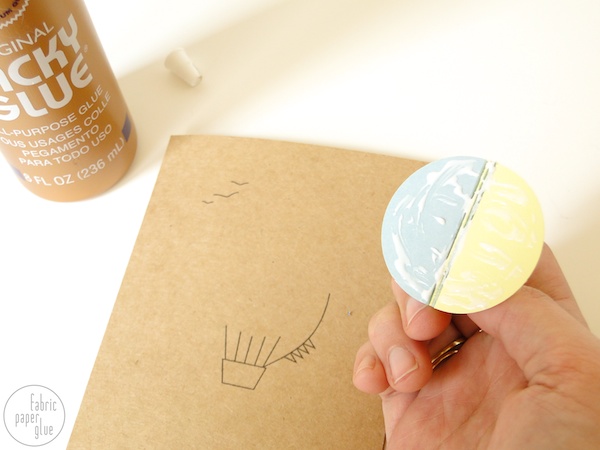
SEVEN: Remember those edges you didn't glue together in the last step? Now put glue all over them, and affix it to the li'l basket on the front of your card. You're done! I also took those cute fonts to the envelope by printing everyone's names and addresses, too.

Alright, I made promises, so here it is...Alison and I on our very first day of high school.
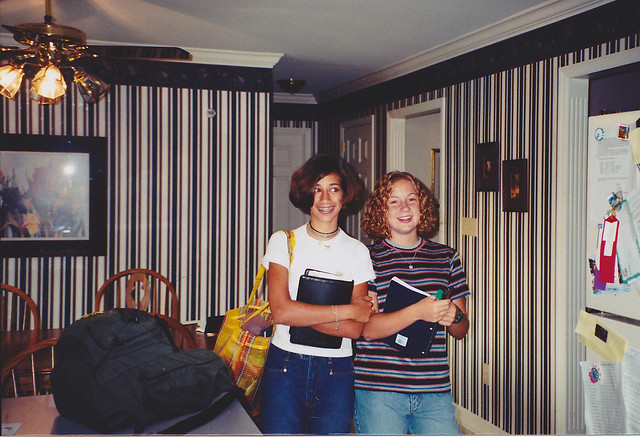
Alison looks adorable. She basically still looks just like this. But me? Oh my god. Have you seen anything more awkward in your whole life? It's just plain painful.

find me elsewhere
These are SO cute! Hot air balloons make a great nursery theme.
ReplyDeleteLovely diy!!!!!!!!!!
ReplyDeletexo
Noemi
http://noxcreare.blogspot.it
Trust me: I was the epitome of awkward in high school. :)
ReplyDeleteThis is such an adorable idea for an invite - love!
ReplyDeleteIt's really nice :-)
ReplyDelete