
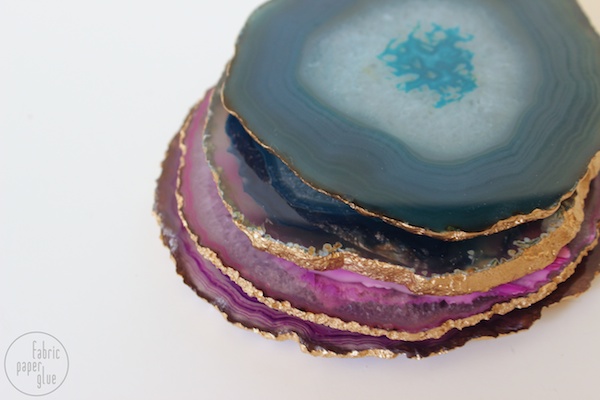
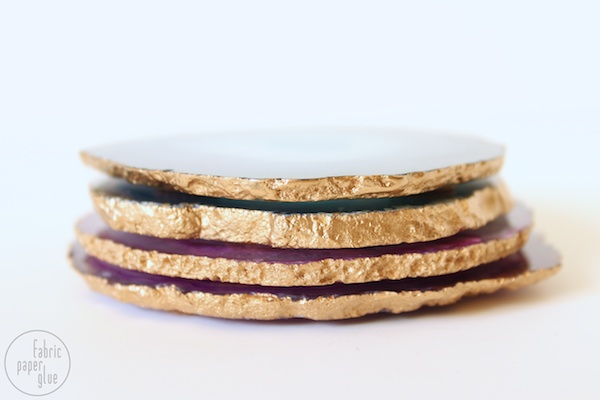
Look at 'em. Aren't they gorgeous? I first discovered gilded-edged agate coasters when I rounded up my favorite gold barware. But, um, $140 for a set of coasters is a bit steep, no? Read on to learn how I got the same look for less than twenty bucks and only a teeny tiny bit of DIY.
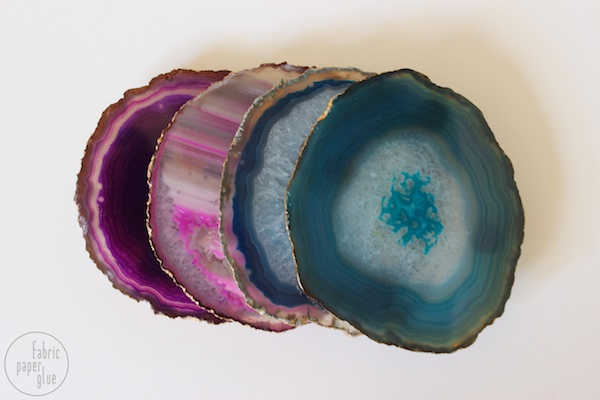
While looking for supplies for a whole other project, I stumbled upon this set of coasters for $17 from an online mineral store. Woot woot, if I do say so.
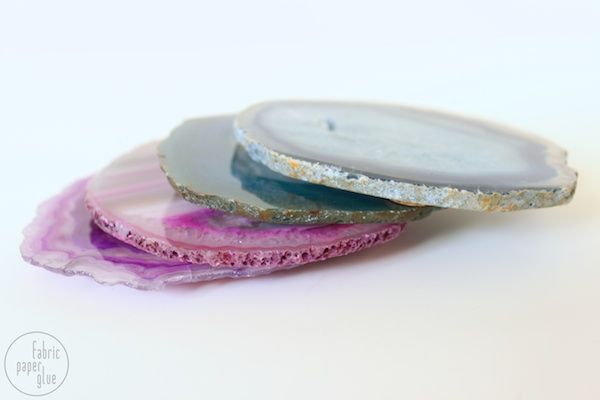
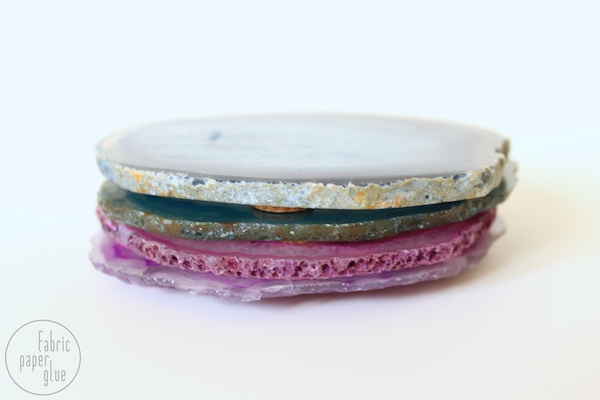
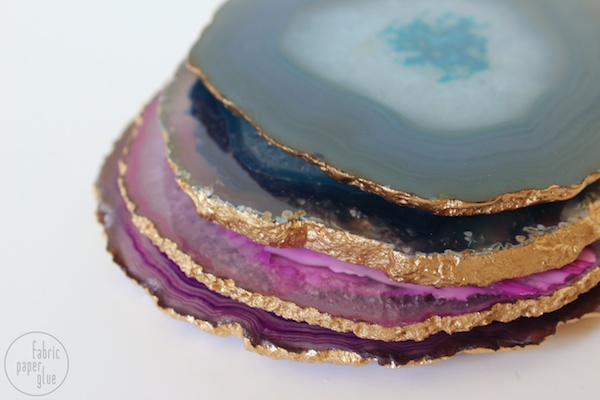
They're pretty easy on the eyes as is.
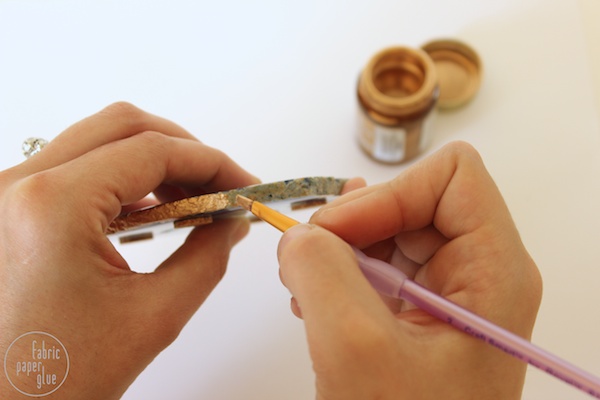
But I couldn't resist adding a touch of gold by carefully painting the raw edges with liquid gilding. A single coat was all it took.
Pretty as can be!
If you're up for a slightly more serious DIY, you should check out this tutorial by Desert Domicile. She uses actual gilding sheets, and starts with plain 4" agate slices and adds little bumpers to make them into coasters (mine came with little cork feet already stuck on).

find me elsewhere
Your coasters turned out great! Thanks for linking back to my tutorial :)
ReplyDeleteNo problem! Your coasters turned out beautifully!
DeleteI was just in the gift shop at natural history (disclosure, I work there) and eying all those gems and minerals and thinking about all the diy possibility! I think your project adds such elegant touch with the gold.
ReplyDeleteOh, I didn't even realize they sold these things at Natural History (although that makes perfect sense). Perhaps I should make a stop there sometime and check out the selection!
DeleteThese are so beautiful! And what an easy project to add some glam to your coffee table. ;)
ReplyDeletexxMonica
mon makes things
I WANT THESE!!
ReplyDeleteWow these look beautiful! What an awesome DIY.
ReplyDeleteThese are so pretty! The gilded edges are the perfect way to finish them off
ReplyDeleteThose are awesome!! I love the mineral stone being used because it's also very colorful. I like the idea of putting gold paint on its side. Just making it look more pretty and beautiful! Thanks for shairng this idea.- www.jrsalescorp.com
ReplyDeleteHi~ I absolutely love these and am going to purchase some agate and semi-dyi also. I was wondering though.. I'm guessing because you didn't mention it here that you did not seal the liquid gilding after. I have no knowledge of liquid gilding and was wondering if you thought that a sealer was necessary? Have you noticed any fading or what not?
ReplyDeleteLooks like your comment went to spam, so apologies for not replying sooner. The liquid gilding is oil-based so it's super strong as is. I have not seen any fading, chipping, or the like, so I think you're good to go without a sealer.
DeleteTHANK YOU! I saw some very similar to this on a "discount" -_- home furnishings site. I didnt want to shell out almost 60 dollars for something I figured that I could make myself. To find out that they are going to cost less than 30 dollars to make give me such a feeling of excitement! Super adorable easy to do project WIN!
ReplyDeleteWow, thank you! I hope yours turn out great!!
Deletei was inspired by your pretty picture and easy tutorial thank you! where would i find the liquid gold that you used? thanks xx
ReplyDeleteThanks! It's just from Michael's. It's Martha Stewart brand, and you can find it along side the other craft paints.
DeleteSo pretty! The gold is just perfect! :)
ReplyDeletehttp://cafecraftea.blogspot.com
These are sooo great!
ReplyDelete