
If you've been around here long, you know that my tote bag handle of choice is a pair of leather straps affixed with a sleek little set of rivets. Why? Well, I love rivets. Not only do they look legit, they're actually incredibly easy. The funny thing is that I was intimidated by them for a long time. I figured if I was that it's possible others are too, so it might be worth it to spend a little time talking about them for a minute.
Read on for the full 101.
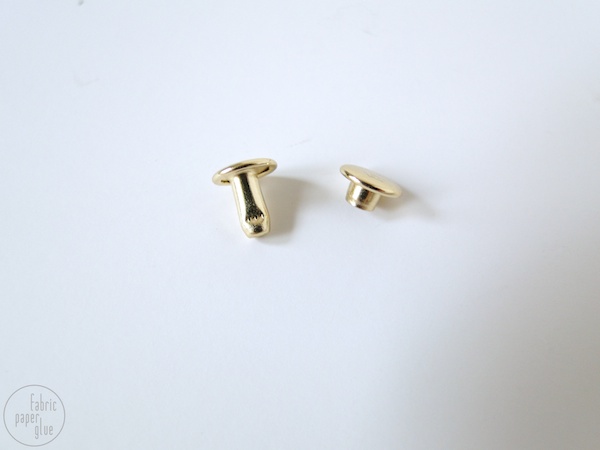
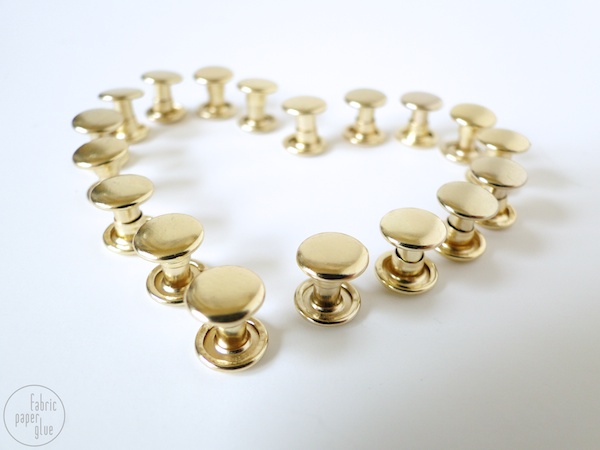
If you go looking for rivets online, you may find a few different types. The kind that I work with are called rapid or jiffy rivets. They're made up of a post and a cap. Double cap rivets will have a finished end on both the post and cap (as shown). Otherwise, the end on the post will have an open hole. Either works for most of my projects where the post end is only seen inside the tote bag.
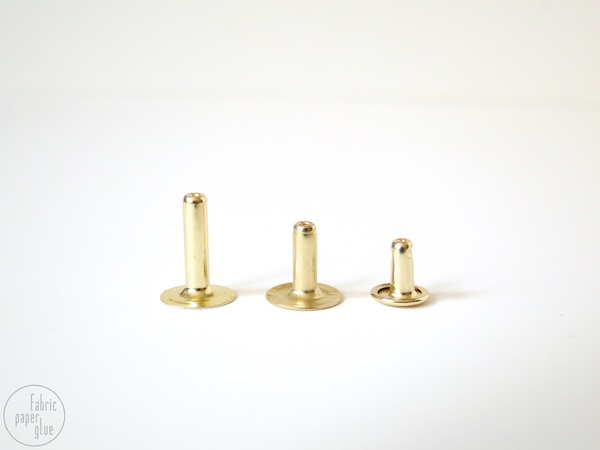
Rivets come in several lengths. X-small rivets have posts approximately 3/16" long (not shown). Small ones have 1/4", medium 3/8", and large 1/2".
The length of the post should equal the thickness of the material(s) through which you're actually putting the rivet. For nearly every project I use rivets on, I'm only working with a single thickness of leather, a couple of layers of fabric, and maybe some interfacing. For this purpose, the small 1/4" rivets do the trick every time.
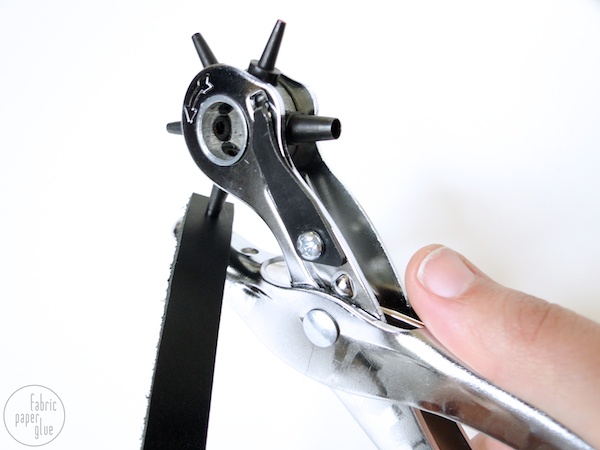
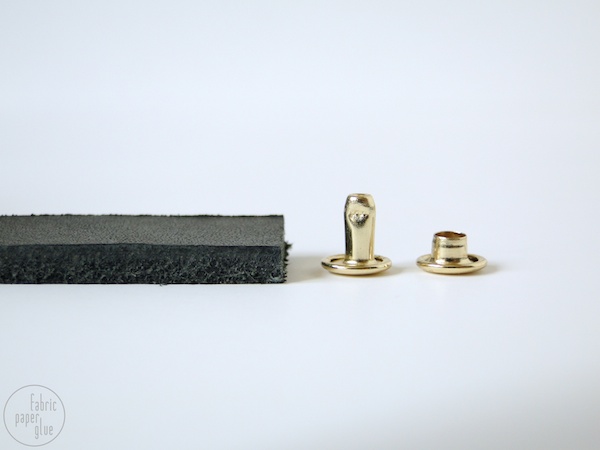
To put it all together, punch a hole through your materials -- in this case, a leather strap -- just large enough to slip through the post. You can use a rotary punch like I'm using or a hole punch set. With the latter, you punch holes by tapping a tube through your material with a rubber mallet on a protective mat. These are particularly useful if you're trying to punch a hole in the middle of a cut of leather or other material (vs. on the edge). The rotary punches can also put some serious stress on your grippy muscles (scientific term) if you're punching too many holes or a particularly thick material.
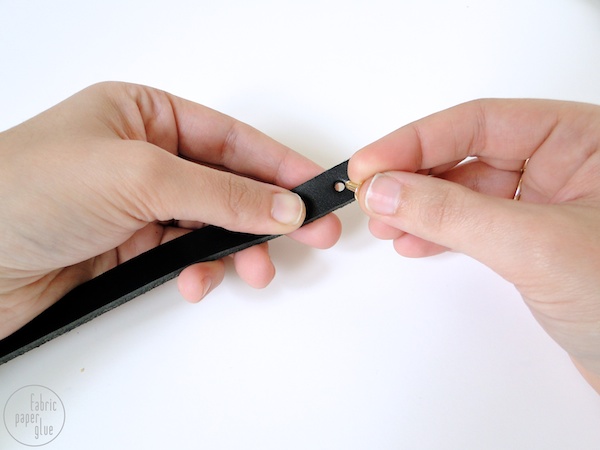
Insert the post through the hole. If you're using a regular rivet that's not double-capped, remember to use your finished cap end on the side that will be shown.
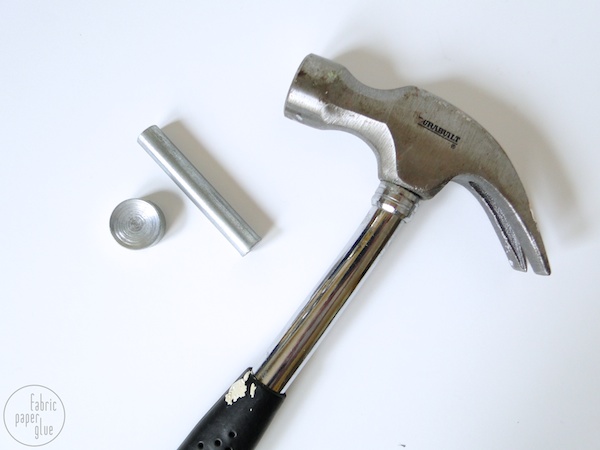
The tools for setting a rivet are shockingly rudimentary. All you need is a setter (on the right), an anvil (on the left), and regular old hammer. Both the setter and the anvil have one flat side and one concave side. Always whack the hammer on the flat side of the setter with the concave side on the cap. As for the anvil, you'll use the concave side when using a double cap rivet. Use the flat side when using a regular rivet.
To actually set it, the order will be floor/sturdy surface, anvil, rivet post, leather strap (and/or other materials), rivet end cap, and setter. Hold the setter in place on a sturdy surface (I use my kitchen floor), and give it 2-3 whacks of the hammer.
MATERIALS: Now, where do you get all these materials? Well, I've got some suggestions!
I highly recommend a starter kit that comes with a setter, an anvil, and several rivet lengths to play around with. In fact, this is where I started, and it's still the setter and anvil that I use. A great source of all things leather is Tandy Leather Factory, offering up starter kits, rivets, rotary hole punches, hole punch sets, anvils, and setters.
Also, people often ask me where I get my leather straps. I use 1" leather straps for all of my projects. Sometimes I cut them down to 1/2", which is admittedly tedious and imperfect. Tandy offers straps in natural and darker brown. About a year ago, I dropped about $60 on 10 straps in brown and black from Zack White Leather. I've done bunches of projects and haven't had to restock. Colored leather straps are decidedly harder to find. In fact, I've only found them from Etsy seller All4Handmade. The seller is based in South Korea, so shipping takes a while, and the leather is a bit thin for a serious tote bag. Having said that, the choice of colors is unbeatable.
PROJECTS: Finally, I'd be remiss if I didn't link you back to all my projects that use rivets...since you're an expert now and all.
Leather-Handled Storage Baskets
Striped Tote Bag
Striped Tote Bag Redux
Plastidipped Tote Bag
Geometric Laptop Sleeve
Geometric Laptop Sleeve Redux
Art-Inspired Chevron Tote Bag
What do you think? Ready to use some rivets?

find me elsewhere
I have never used rivets before because I was oddly overwhelmed by the idea! Now I feel like I need to run out and rivet something!
ReplyDeleteHi! I have found that the Tandy Leather Factory in Elgin, IL [(847) 289-5227] is the BEST and most helpful when you're new at doing anything with leather. Ask for Steve - he's helped me with a million projects and knows everything about leather/rivets/supplies.
ReplyDeleteThanks for the how-to, I'd always wondered! What do you think about these?
ReplyDeleteFor grommets: http://www.amazon.com/gp/product/B000BPNOMU/ref=ox_sc_act_title_1?ie=UTF8&psc=1&smid=A1SV1BYDTUK2Z5
For rivets: http://www.amazon.com/gp/product/B000XAQT3O/ref=ox_sc_act_title_2?ie=UTF8&psc=1&smid=A2FQ5GG01HBOZ1
They both look like good kits to me. You can also buy grommet kits at most fabric stores. I've even seen some rivet supplies at the craft store in the leather section.
DeleteThis is a great post because 1) I love posts about craft supplies and 2) I've been meaning to hunt down and use rivets! Thanks for sharing, Mandy! xo
ReplyDeleteThanks so much for the post! I've been wondering how to use rivets. I was reading the comments when I saw that Tandy Leather Factory is in Elgin, IL - 5 minutes from me!! They're open till 5 tomorrow - I'm so going. I always read about great fabric stores or crafty places and they're always NOT nearby. Can't believe this one is in my backyard. I rally appreciate the demo, the pics and the info. Thanks!!!!!!!!
ReplyDeleteThanks. I just got a leather craft kit and did not know what to do. This helped a lot!
ReplyDelete