
Last week, I shared with you my friend Rebecca's wedding and mentioned that I helped her with several of the decorative details. Because I did a pretty decent job of taking pics of the process for a couple of these, I thought I'd share them.
These two projects together do a good job of embodying my approach to party decor, which is that it all starts with a fabric + a font. Once you have those, you can create all sorts of little details that hang together. On this one, we started with this birch tree fabric and the font from her invitations, which - believe it or not - we were able to track down for free online (available here).
Both of these projects are pretty simple and lend themselves to bulk creation. First up are super simple accent flags featuring the couple's initals. I mean, seriously, these are embarrasingly simple but I think add a little touch of customization. You can stick these bad boys in all sorts of places, but we just put them in a jar here and there with the flowers.


Now to the process...
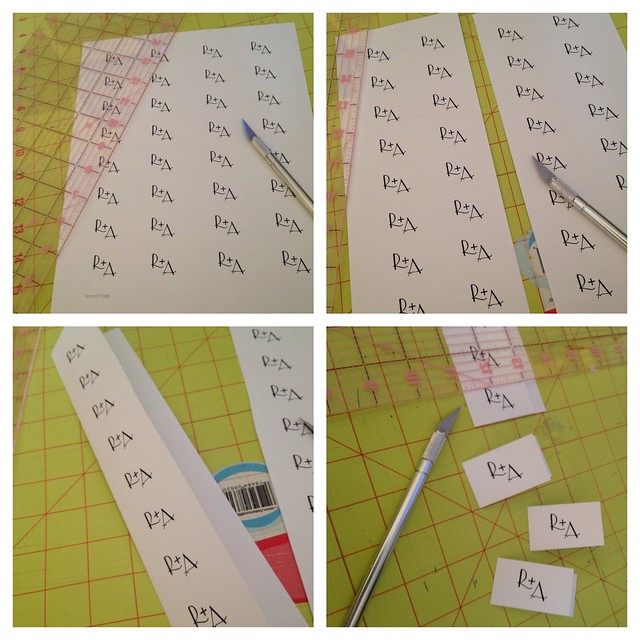
I created a sheet of initials using the free font and the drawing feature in a word processing program. Print off a few sheets on heavy carstock. Cut them out. Fold them down the middle. Cut some more.
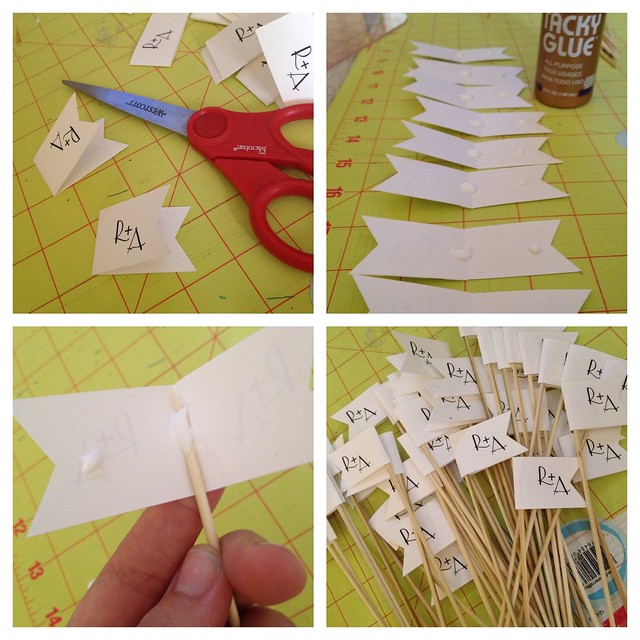
I added a little detail to the edge. Line 'em up, add glue, and wrap them around a skewer. Done and done! I churned about 50 of these out in less than an hour.
Next up are the fabric program pockets. These area bit more involved, but with a little wrist grease (seriously, the cutting on this one will wear out your wrist), it's not that big of a deal. 150 pockets took around 7 yards of fabric and a few couple hour sessions. Totally worth it because they made the programs feel so warm (can programs feel warm?) and personal...especially with the customized flags. The programs themselves were also a DIY.

Photos by Justin Wright Photography
More process...
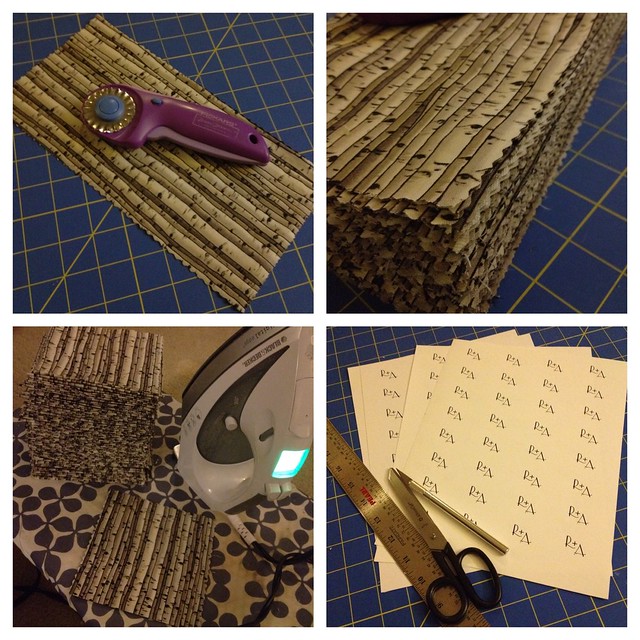
For each pocket, I used a rotary cutter with a pinking blade (this is key because it prevents you from having to finish the edges) to cut out a piece of fabric about the same height and about 3/4" wider than the finished program. I did this about 150 times. Then ironed them in half lengthwise. Next up were the personalized flags, which I created in much the same way as those up above.
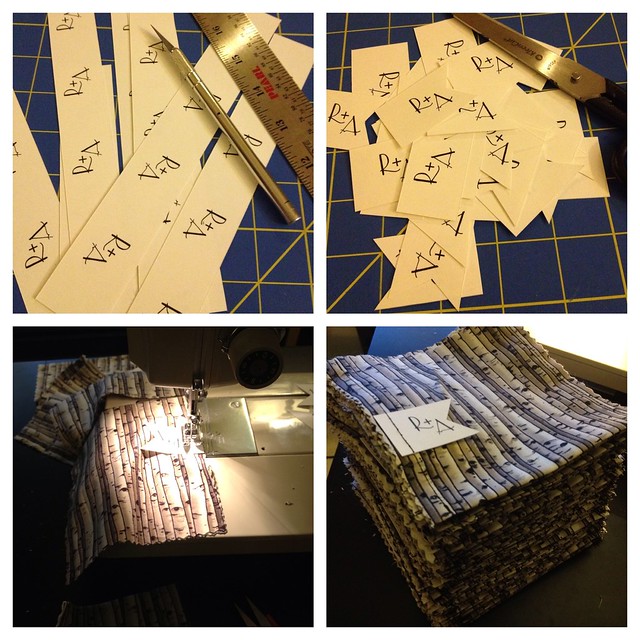
I cut each of the flags out (no need for a folded flag this time) and added the edge detail. Then I sewed along each side of the folded fabric pieces -- sewing the flag right onto each one. You can just feed the pockets in one right after the other and clip them apart later. Repetitive, but relatively easy!

find me elsewhere


Where is my picture of Mandy in the forest with an axe cutting those wood discs in the first picture?? :)
ReplyDeleteThat would be awesome, but I played no role in those wood discs. That was all Andrew. Beside, Michael tries to keep my interaction with power tools to a minimum for fear of his own well-being.
Delete